Met profielen in Order Anywhere beheert u tot welke Lightspeed Restaurant-menu's klanten toegang hebben en wat ze ermee kunnen doen. Maak aparte profielen aan om klanten de mogelijkheid te geven van buiten uw restaurant contactloos afhaalbestellingen te plaatsen, hier opeten-tafelbestellingen in het restaurant te plaatsen en het menu te bekijken zonder iets te bestellen. Produceer QR-codes of deel de URL van een profiel zodat klanten de Order Anywhere-pagina van een specifiek profiel kunnen bezoeken.
Een nieuw profiel aanmaken
Maak een nieuw Order Anywhere-profiel aan om klanten de mogelijkheid te geven van buiten uw restaurant afhaalbestellingen te plaatsen, hier opeten-tafelbestellingen in het restaurant te plaatsen en menu's te bekijken zonder iets te bestellen.
- Log in bij de Order Anywhere-backoffice. Zie Inloggen bij Order Anywhere voor hulp.
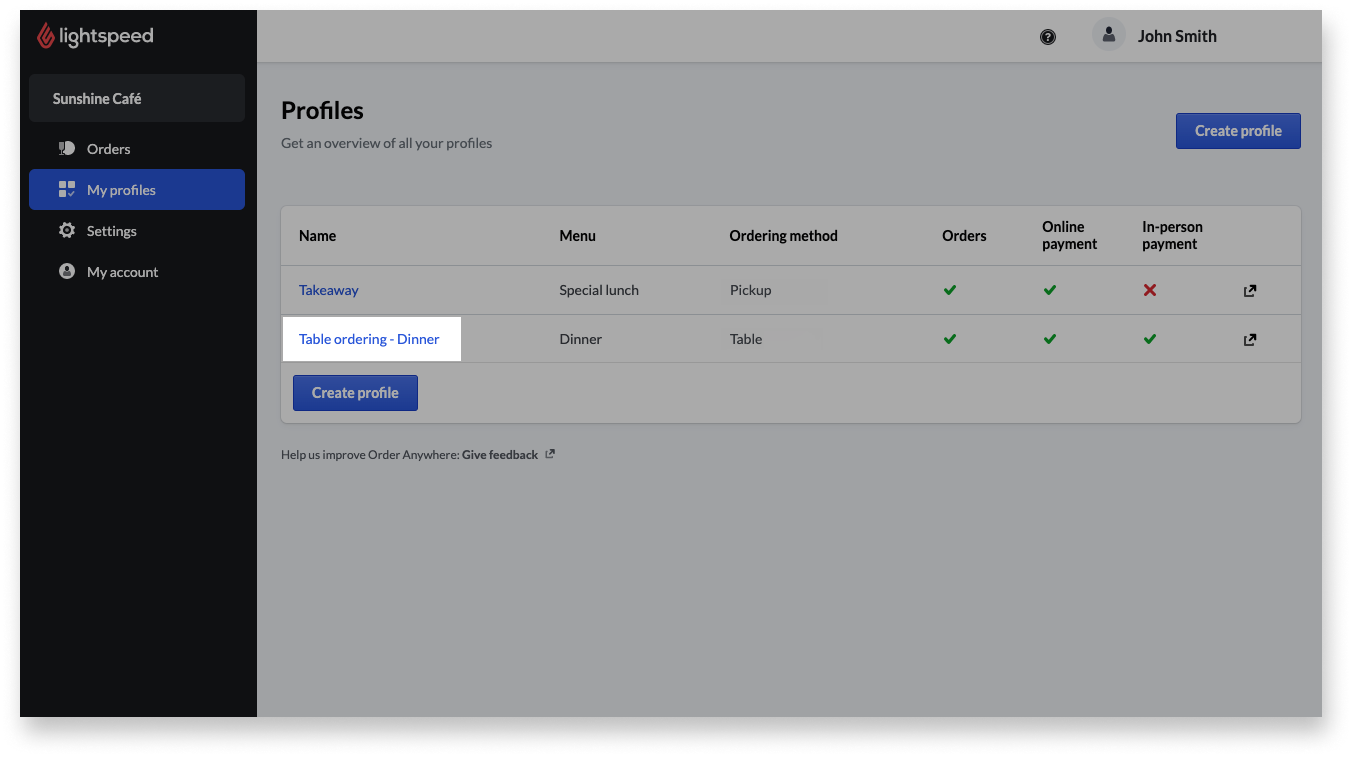
- Selecteer Mijn profielen in de navigatiebalk.
- Klik op Profiel aanmaken.
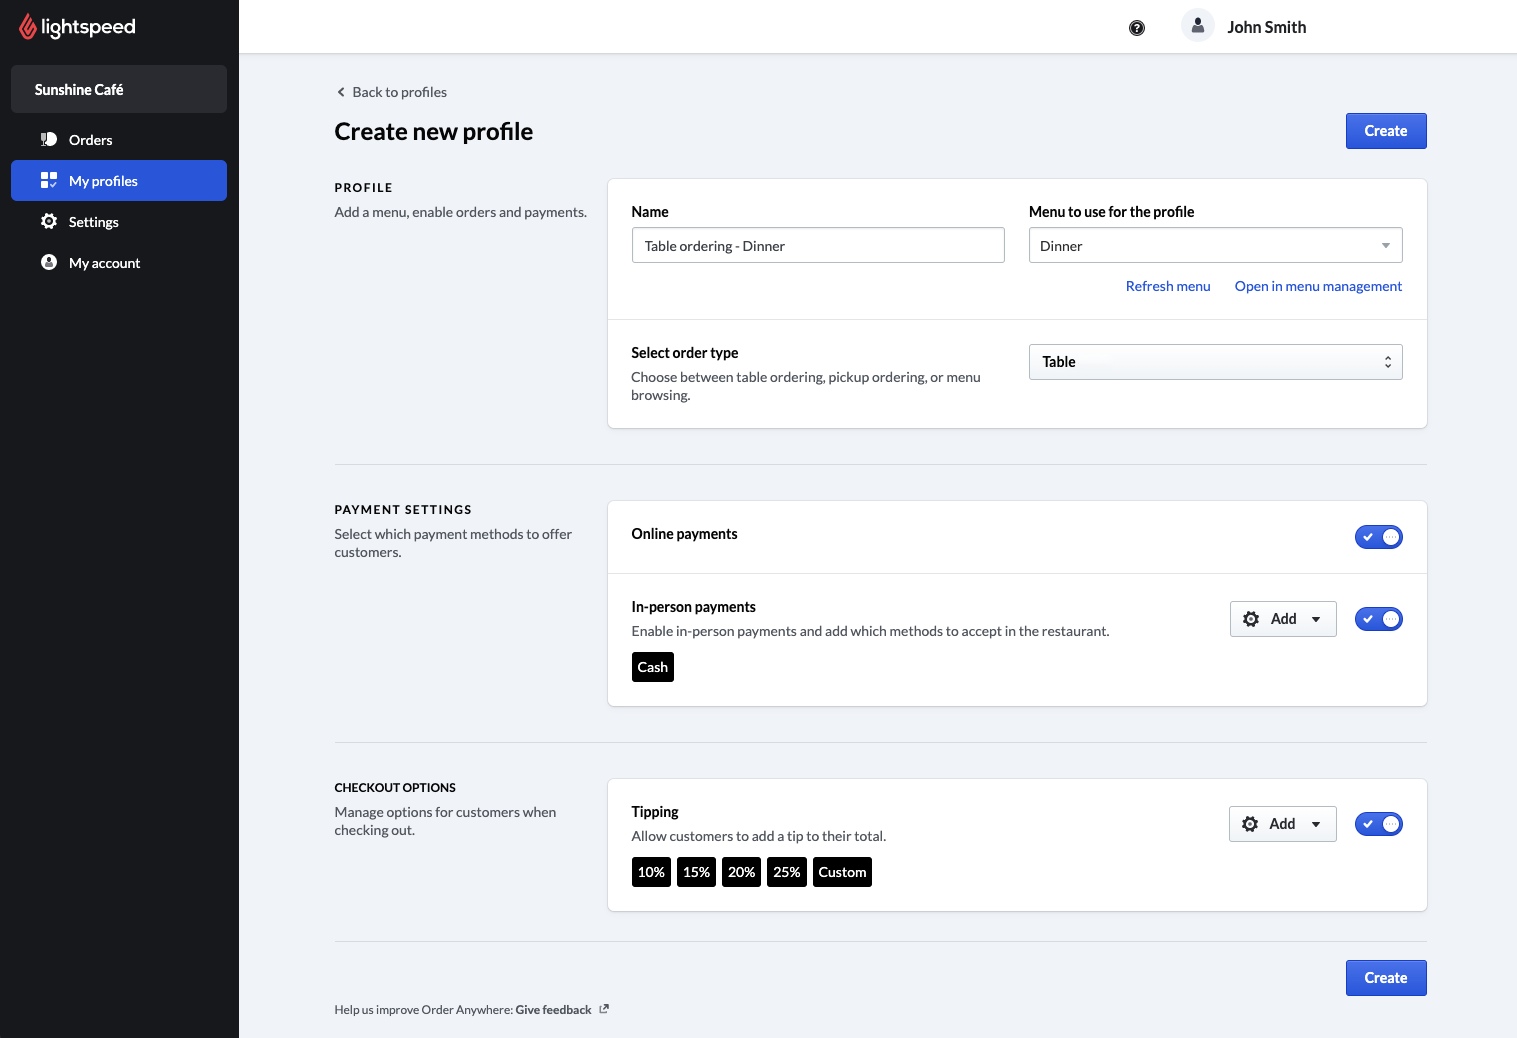
- Voer een naam voor het profiel in.
- Kies een bestaand Lightspeed Restaurant-menu uit het Menu om te gebruiken voor het profiel-vervolgkeuzemenu om te bepalen welke producten de klanten kunnen bestellen.
- Selecteer een bestellingstype uit het vervolgkeuzemenu Bestellingstype selecteren:
- Afhaling: Klanten kunnen vanaf elke plek buiten uw restaurant afhaalbestellingen plaatsen om zo snel mogelijk of op een later gekozen datum en tijdstip af te halen.
- Tafel: klanten kunnen in het restaurant hier opeten-tafelbestellingen plaatsen.
- Door het menu bladeren: klanten kunnen het menu bekijken maar kunnen geen bestellingen plaatsen.
- (Optioneel - alleen voor Afhaling-profielen) Selecteer een optie uit hetLimiet voor vooruitbestellen-vervolgkeuzemenu om in te stellen hoe ver van tevoren klanten afhaalbestellingen kunnen plaatsen.
Belangrijk: Toekomstige bestellingen worden onmiddellijk nadat de klant deze geplaatst heeft naar de Restaurant POS-app gestuurd. Zie voor meer informatie over hoe u kunt zien welke bestellingen er voor welke dagen gepland staan Bestellingsrapporten voor Order Anywhere. - (Optioneel - alleen voor Afhaling en Tafel-profielen) Configureer betaalinstellingen:
Betaalinstellingen worden alleen weergegeven voor een profiel nadat u online en betalingen in het restaurant heeft ingeschakeld.- Om toe te staan dat klanten vanaf hun eigen apparaat met een krediet- of betaalkaart voor online bestellingen betalen, schakelt u Online betalingen in.
- Om toe te staan dat klanten bij het verkooppunt betalen, schakelt u betalingen in het restaurant in. Selecteer betaalmethoden om te accepteren, sleep ze in de volgorde van weergave op de bestelpagina en klik op Opslaan.
- (Optioneel - alleen voor Afhaling-profielen) Schakel Opmerking van de klant in om toe te staan dat klanten bij de kassa opmerkingen over hun bestelling invoeren.
- (Optioneel - alleen voor Afhaling- en Tafel-profielen) Schakel fooien in:
- Schakel Fooien in om toe te staan dat klanten een fooi aan hun bestellingstotaal toevoegen.
- Klik op Toevoegen om de fooiopties die klanten bij de kassa zien te configureren.
- Vink de selectievakjes naast elke fooioptie aan om deze aan klanten weer te geven.
- Klik op het ster-icoon om standaard een specifieke optie voor te selecteren.
- Klik op Opslaan om de wijzigingen op te slaan.
- (Optioneel - Alleen voor tafelaccounts) Pas aan welke contactgegevens de klant wordt gevraagd te verstrekken bij de checkout:
- Klik op de schakelaar voor een contactveld om deze in- of uit te schakelen op de Order Anywhere-checkoutpagina.
- Beschikbare contactvelden zijn E-mailadres, Voornaam, Achternaam en Telefoonnummer.
- Klanten hoeven de informatie niet in te voeren tenzij u het veld als verplicht markeert (zie stap 11b).
- (Optioneel) Vink het Als verplicht instellen-vakje aan naast een ingeschakeld contactveld om klanten te verplichten dat veld in te vullen voordat zij hun bestelling indienen.
QR-codes voor een profiel produceren
Klanten kunnen QR-codes scannen om toegang tot de klantgerichte Order Anywhere-pagina te krijgen, waar ze een bestelling kunnen plaatsen of het menu kunnen bekijken. Produceer unieke QR-codes voor elk profiel, print deze en plaats deze op uw fysieke tafels om klanten de mogelijkheid te bieden Order Anywhere te gebruiken. Bij Tafel-profielen zal de door de klanten geplaatste bestelling bij het scannen van een QR-code automatisch aan de specifieke tafel waar zij zitten verbonden worden.
Opmerking: Om QR-codes te produceren, moet er in Restaurant Manager ten minste één vloerplan geconfigureerd zijn. Zie Een vloerplan aanmaken voor meer informatie over vloerplannen.
- Log in bij de Order Anywhere-backoffice. Zie Inloggen bij Order Anywhere voor hulp.
- Selecteer Mijn profielen in de navigatiebalk.
- Klik op de naam van een bestaand profiel.
- Klik op QR-codes produceren.

- Selecteer een bestaand vloerplan uit het Vloerplan-vervolgkeuzemenu.
- Klik op PDF downloaden om een PDF-bestand met alle QR-codes voor elke tafel in het vloerplan te downloaden.

- Print de QR-codes en plaats ze op fysieke tafels in het restaurant.
De URL van een profiel vinden
Naast QR-codes scannen, kunnen klanten ook een URL bezoeken om toegang tot de Order Anywhere-pagina voor een specifiek profiel te krijgen. Vind de URL voor een profiel en deel deze met klanten door hem aan fysieke menu's, uw website of op enige andere plek waar ze hem kunnen zien toe te voegen.
Belangrijk: Wanneer klanten de URL van een Tafel-profiel bezoeken, kunnen ze alleen het menu bekijken en geen bestellingen plaatsen. Om met een Tafel-profiel een bestelling te kunnen plaatsen, moeten klanten een geproduceerde QR-code scannen.
- Log in bij de Order Anywhere-backoffice. Zie Inloggen bij Order Anywhere voor hulp.
- Selecteer Mijn profielen in de navigatiebalk.
- Klik op de naam van een bestaand profiel.
- Klik op de knop Kopiëren naar klembord naast de URL van het profiel om deze naar het klembord te kopiëren.
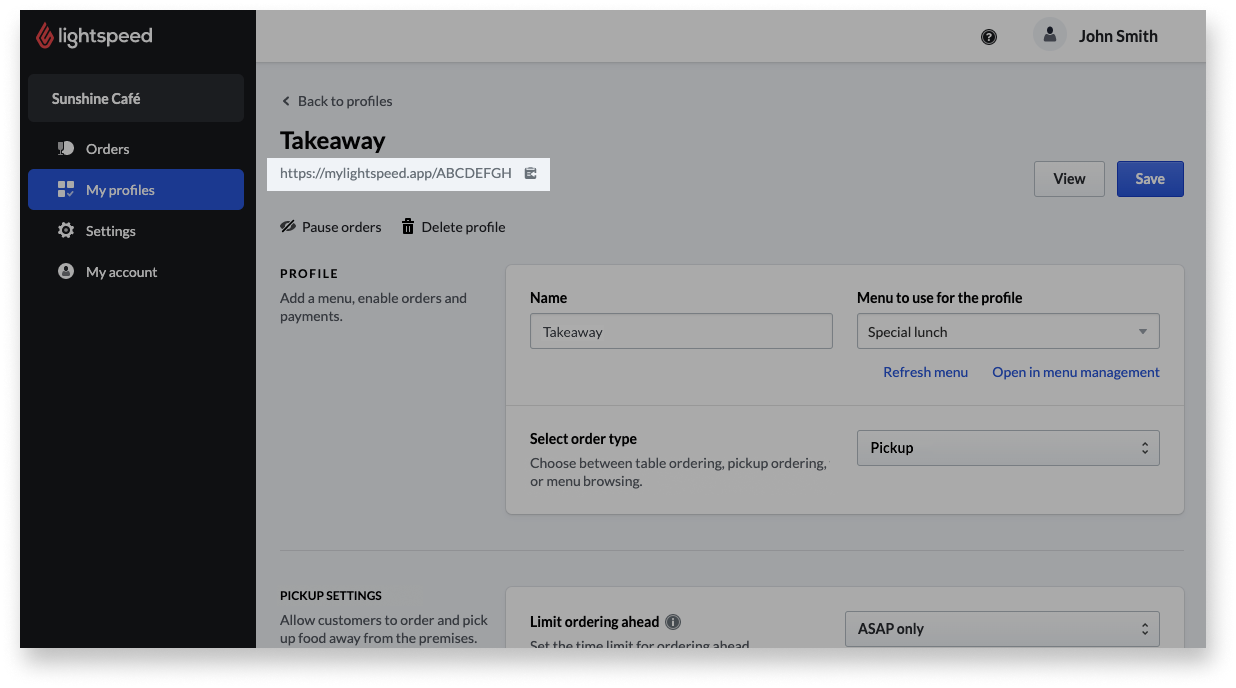
- Voeg de URL aan klantgerichte pagina's toe, zoals fysieke menu's of uw website.
Wat nu?
- Personaliseer optionele bestel- en weergave-instellingen om een gemiddelde bereidingstijd en bannerafbeelding aan bestelpagina's toe te voegen.
- Leer na de configuratie hoe u Order Anywhere kunt gebruiken en beheren.