Customize settings in Restaurant Manager that will control how Order Anywhere works with your Lightspeed Restaurant account. These settings include whether orders will be automatically or manually accepted at the POS, user permissions, printing customer information on order tickets, and other settings that affect online ordering.
Table of contents:
- Configuring online ordering settings
- Setting user permissions for online ordering
- Printing customer information on order tickets
Configuring online ordering settings
Online ordering settings control how Order Anywhere functions for both employees and customers. Keep the POS device awake to ensure all incoming online orders are sent to the POS, set whether online orders are manually or automatically received and finalized, and play a sound from the POS device to notify employees of new incoming online orders.
- Log in to Restaurant Manager with your admin credentials.
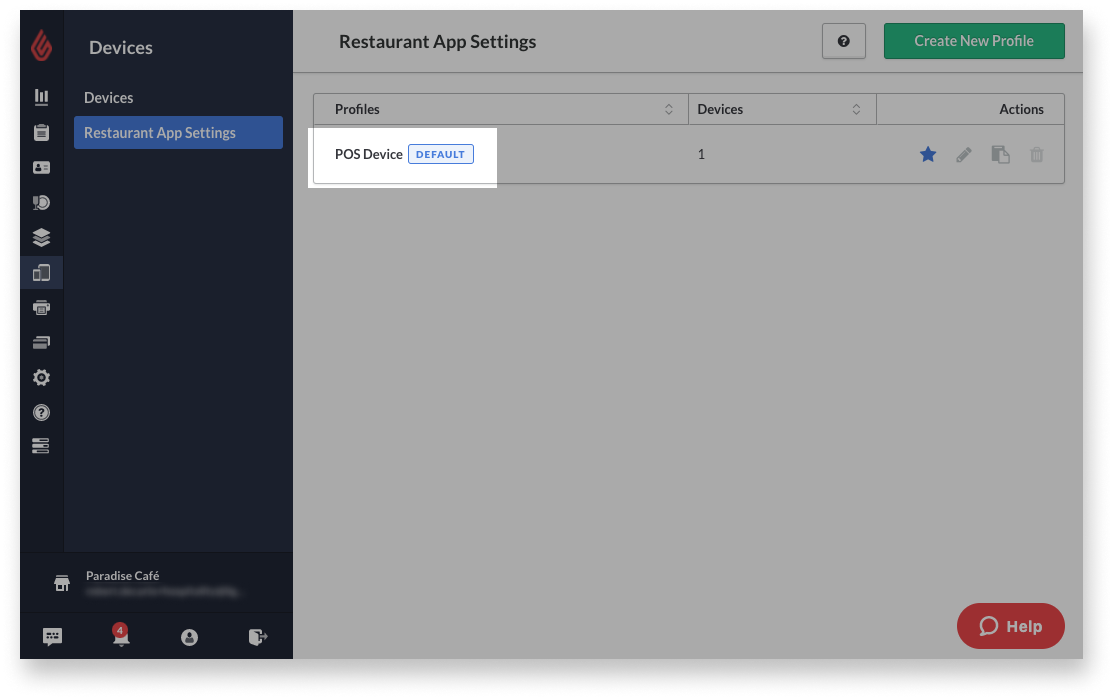
- From the navigation menu, go to Devices > Restaurant App Settings.
- Click the device profile for which to apply the online ordering settings.
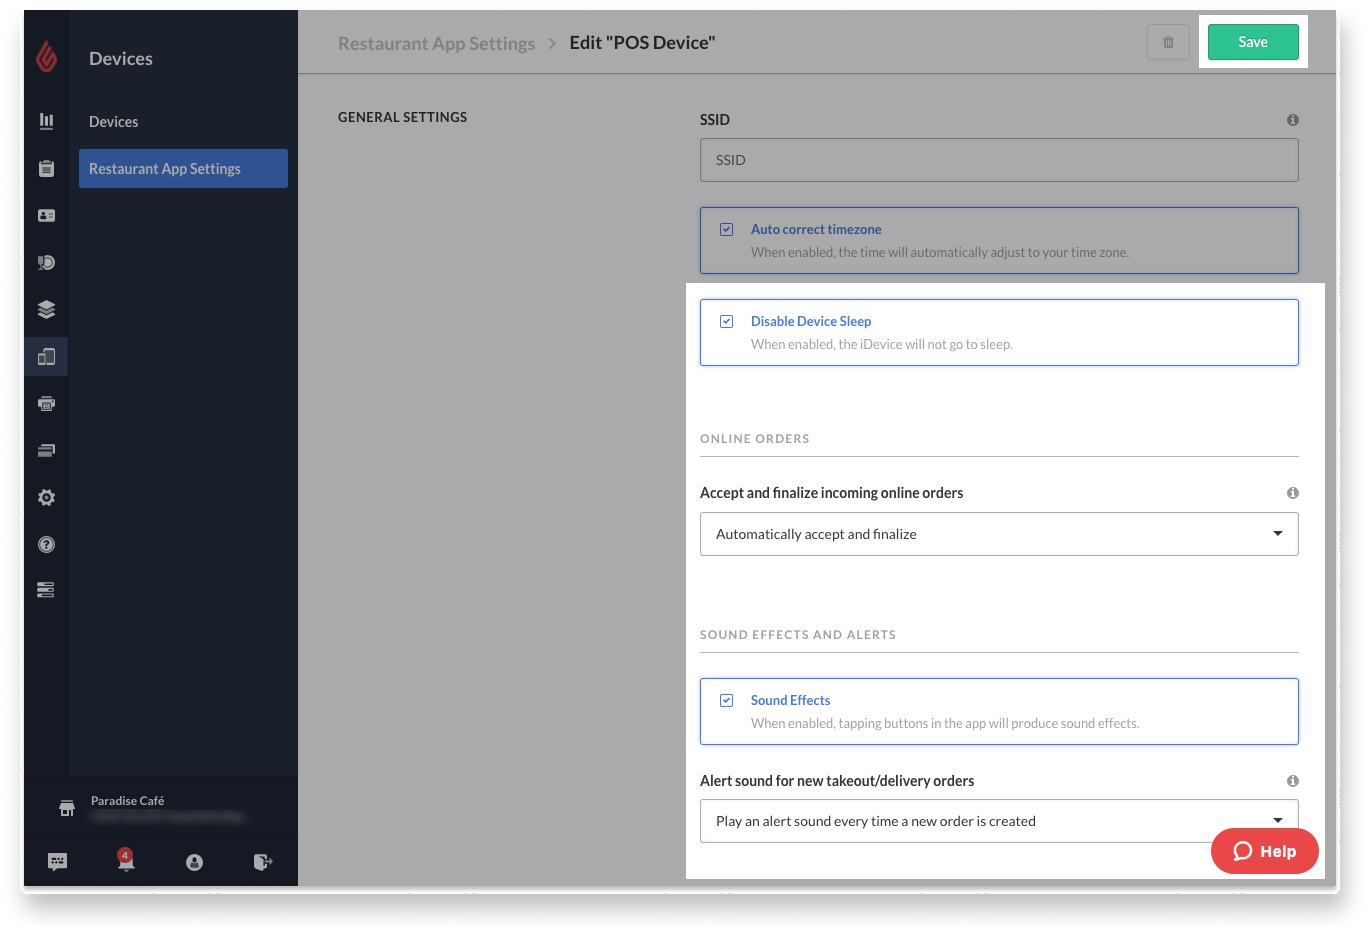
- Scroll down to the General Settings section.
- Enable Disable Device Sleep to keep the POS device awake while running the Restaurant POS app.
This will ensure incoming online orders are received by the app. If the POS device is asleep, online orders will not be received. - Select an option for the Accept and finalize incoming online orders setting to determine how incoming online orders will be processed.
Important: The Automatically accept and finalize option is not supported for use with Order Anywhere. Instead, use Automatically accept.
To learn about each option, see the Accept and finalize incoming online orders options table.
- (Optional) Enable the Sound Effects setting to play a notification sound for each incoming pickup order, then select an option from the Alert sound for new takeout/delivery orders drop-down.
- Click Save to save changes.
Accept and finalize incoming online orders options
| Option name | Description |
| Manually accept and finalize |
We don’t typically recommend this option as there are others that will automatically accept and/or finalize orders. Employees will need to manually send online orders to the kitchen or bar and close them out after they appear on the POS. |
| Automatically accept |
Use this option with Order Anywhere. Online orders will be automatically sent to the kitchen or bar after they appear on the POS, but employees must manually close them out. This leaves orders open in case you need to make changes. |
| Automatically accept and finalize |
This option is not supported for use with Order Anywhere. If using Lightspeed Delivery and not Order Anywhere, this option will automatically send orders to the kitchen or bar and close them out after they appear on the POS. Only orders that contain a payment can be auto-finalized. |
Setting user permissions for online ordering
User permissions allow employees to accept, finalize, or cancel incoming Order Anywhere orders. If your online orders are set to be manually accepted or finalized, you will need to enable some of these permissions for users to process orders on the POS.
- Log in to Restaurant Manager with your admin credentials.
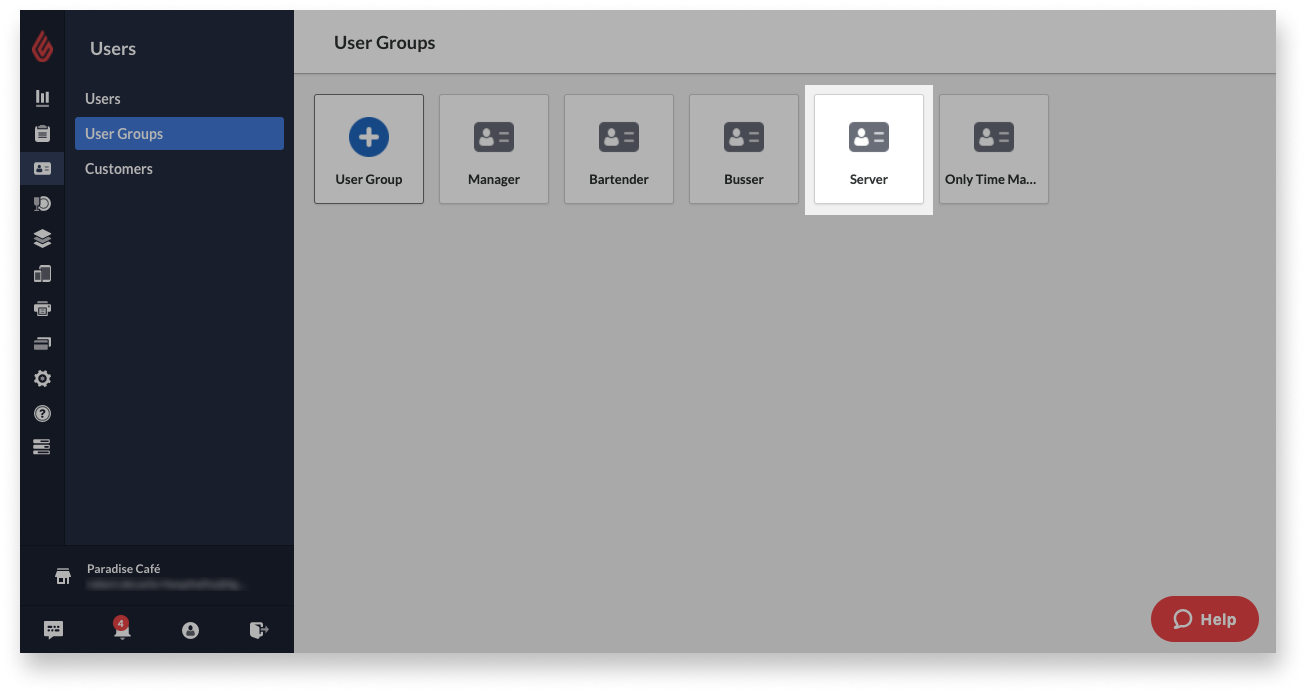
- From the navigation menu, go to Users > User groups.
- Select a user group for which to edit permissions.
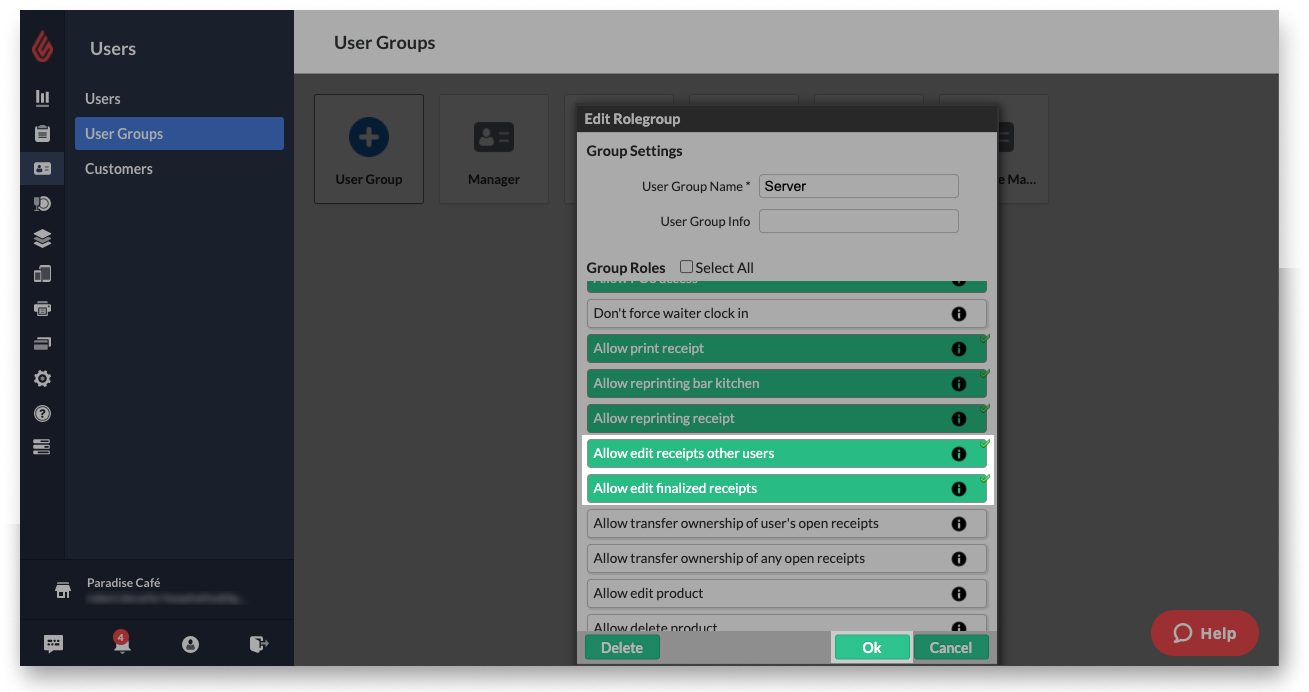
- (Optional) To allow users to finalize incoming orders, select Allow edit receipts other users.
- (Optional) To allow users to cancel orders at the POS, select Allow edit receipts other users, Allow void receipt, and Allow edit finalized receipts.
Canceling an order at the POS will not automatically refund its payment to the customer. To learn more, see Processing Order Anywhere Orders. - Click Ok to save changes.
- (Optional) Repeat steps 2–6 as needed to configure permissions for other user groups.
Printing customer information on order tickets
Enable the Show customer setting to print customer information, such as name and contact details, on prep tickets for Order Anywhere orders.
- Log in to Restaurant Manager with your admin credentials.
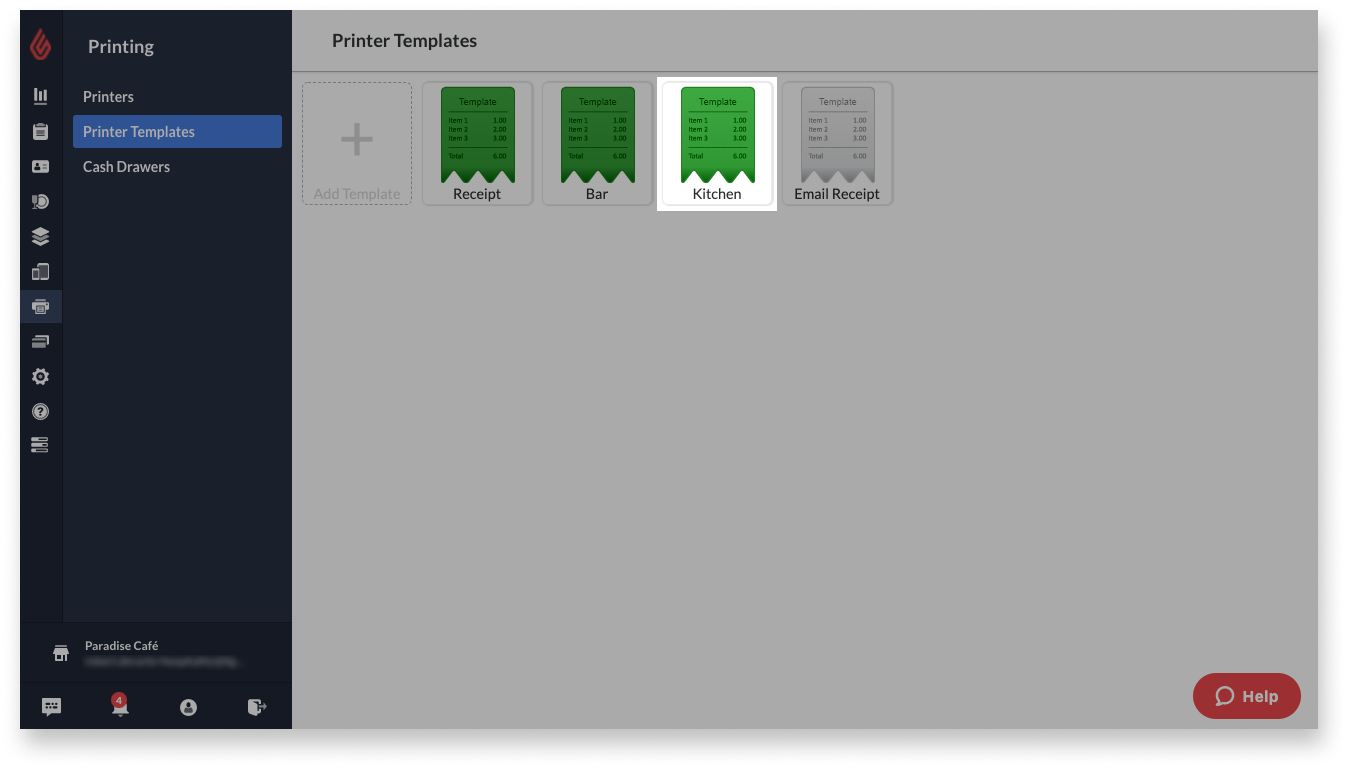
- From the navigation menu, go to Printing > Printer Templates.
- Select the printing template associated with your prep station (for example, Bar or Kitchen printer template).
- Enable Show customer.
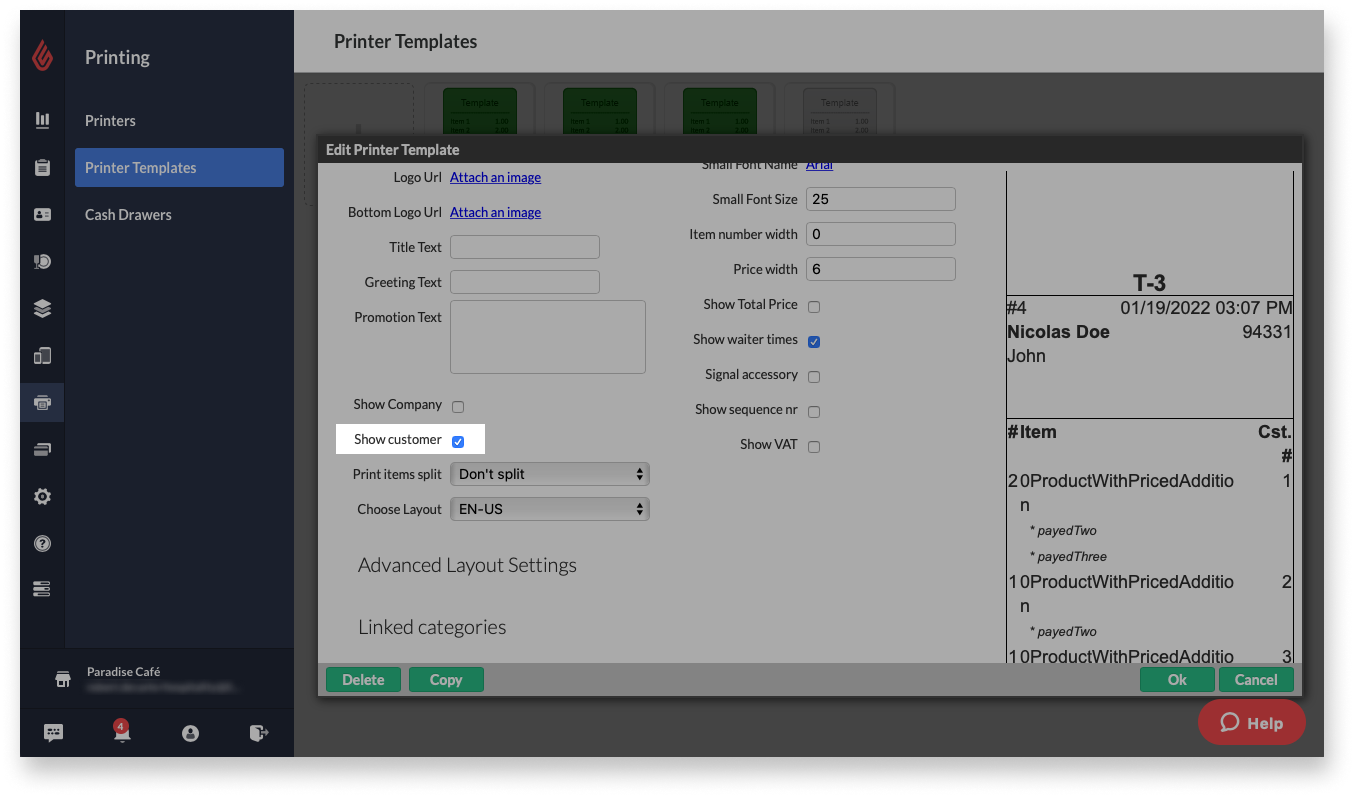
- Click Ok to save changes.
- (Optional) Repeat steps 2–6 as needed to enable this setting for other printer templates.
What's next?
- After getting started, learn how to set up Order Anywhere payments, profiles, and settings.