A QR code is a type of barcode and authentication tool for smart devices. QR codes are often used on posters, tickets and websites as a way to quickly link a customer's phone to a particular platform. In practise, you scan a QR code with your smart device, the smart device reads the code, and then you're redirected to an external link.
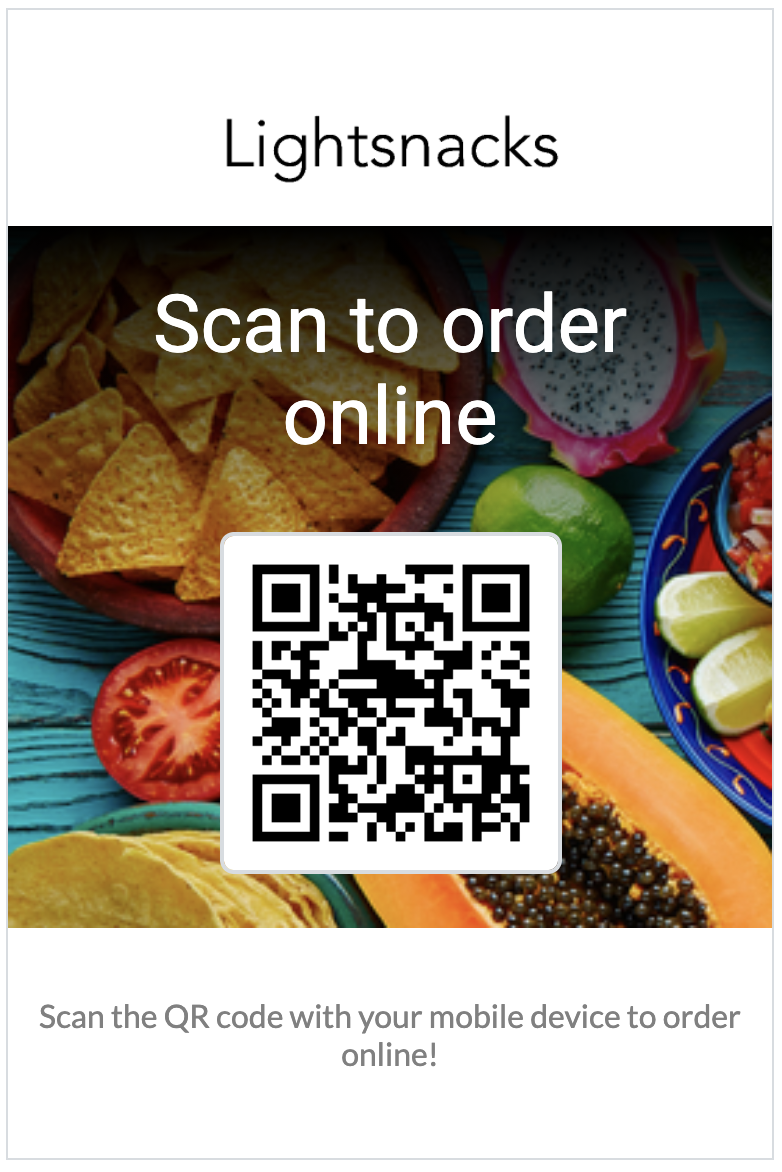
The QR code generator with Order Ahead allows you to better facilitate contactless ordering with your customers. To use QR codes, set up them up on the Order Ahead Back Office and then print them out as table signs or add them as an image to your website. Once set up, customers scan your QR codes with their phones and are automatically brought to your Order Ahead web app.
Set up QR codes today to promote contactless dining.
How to create QR codes
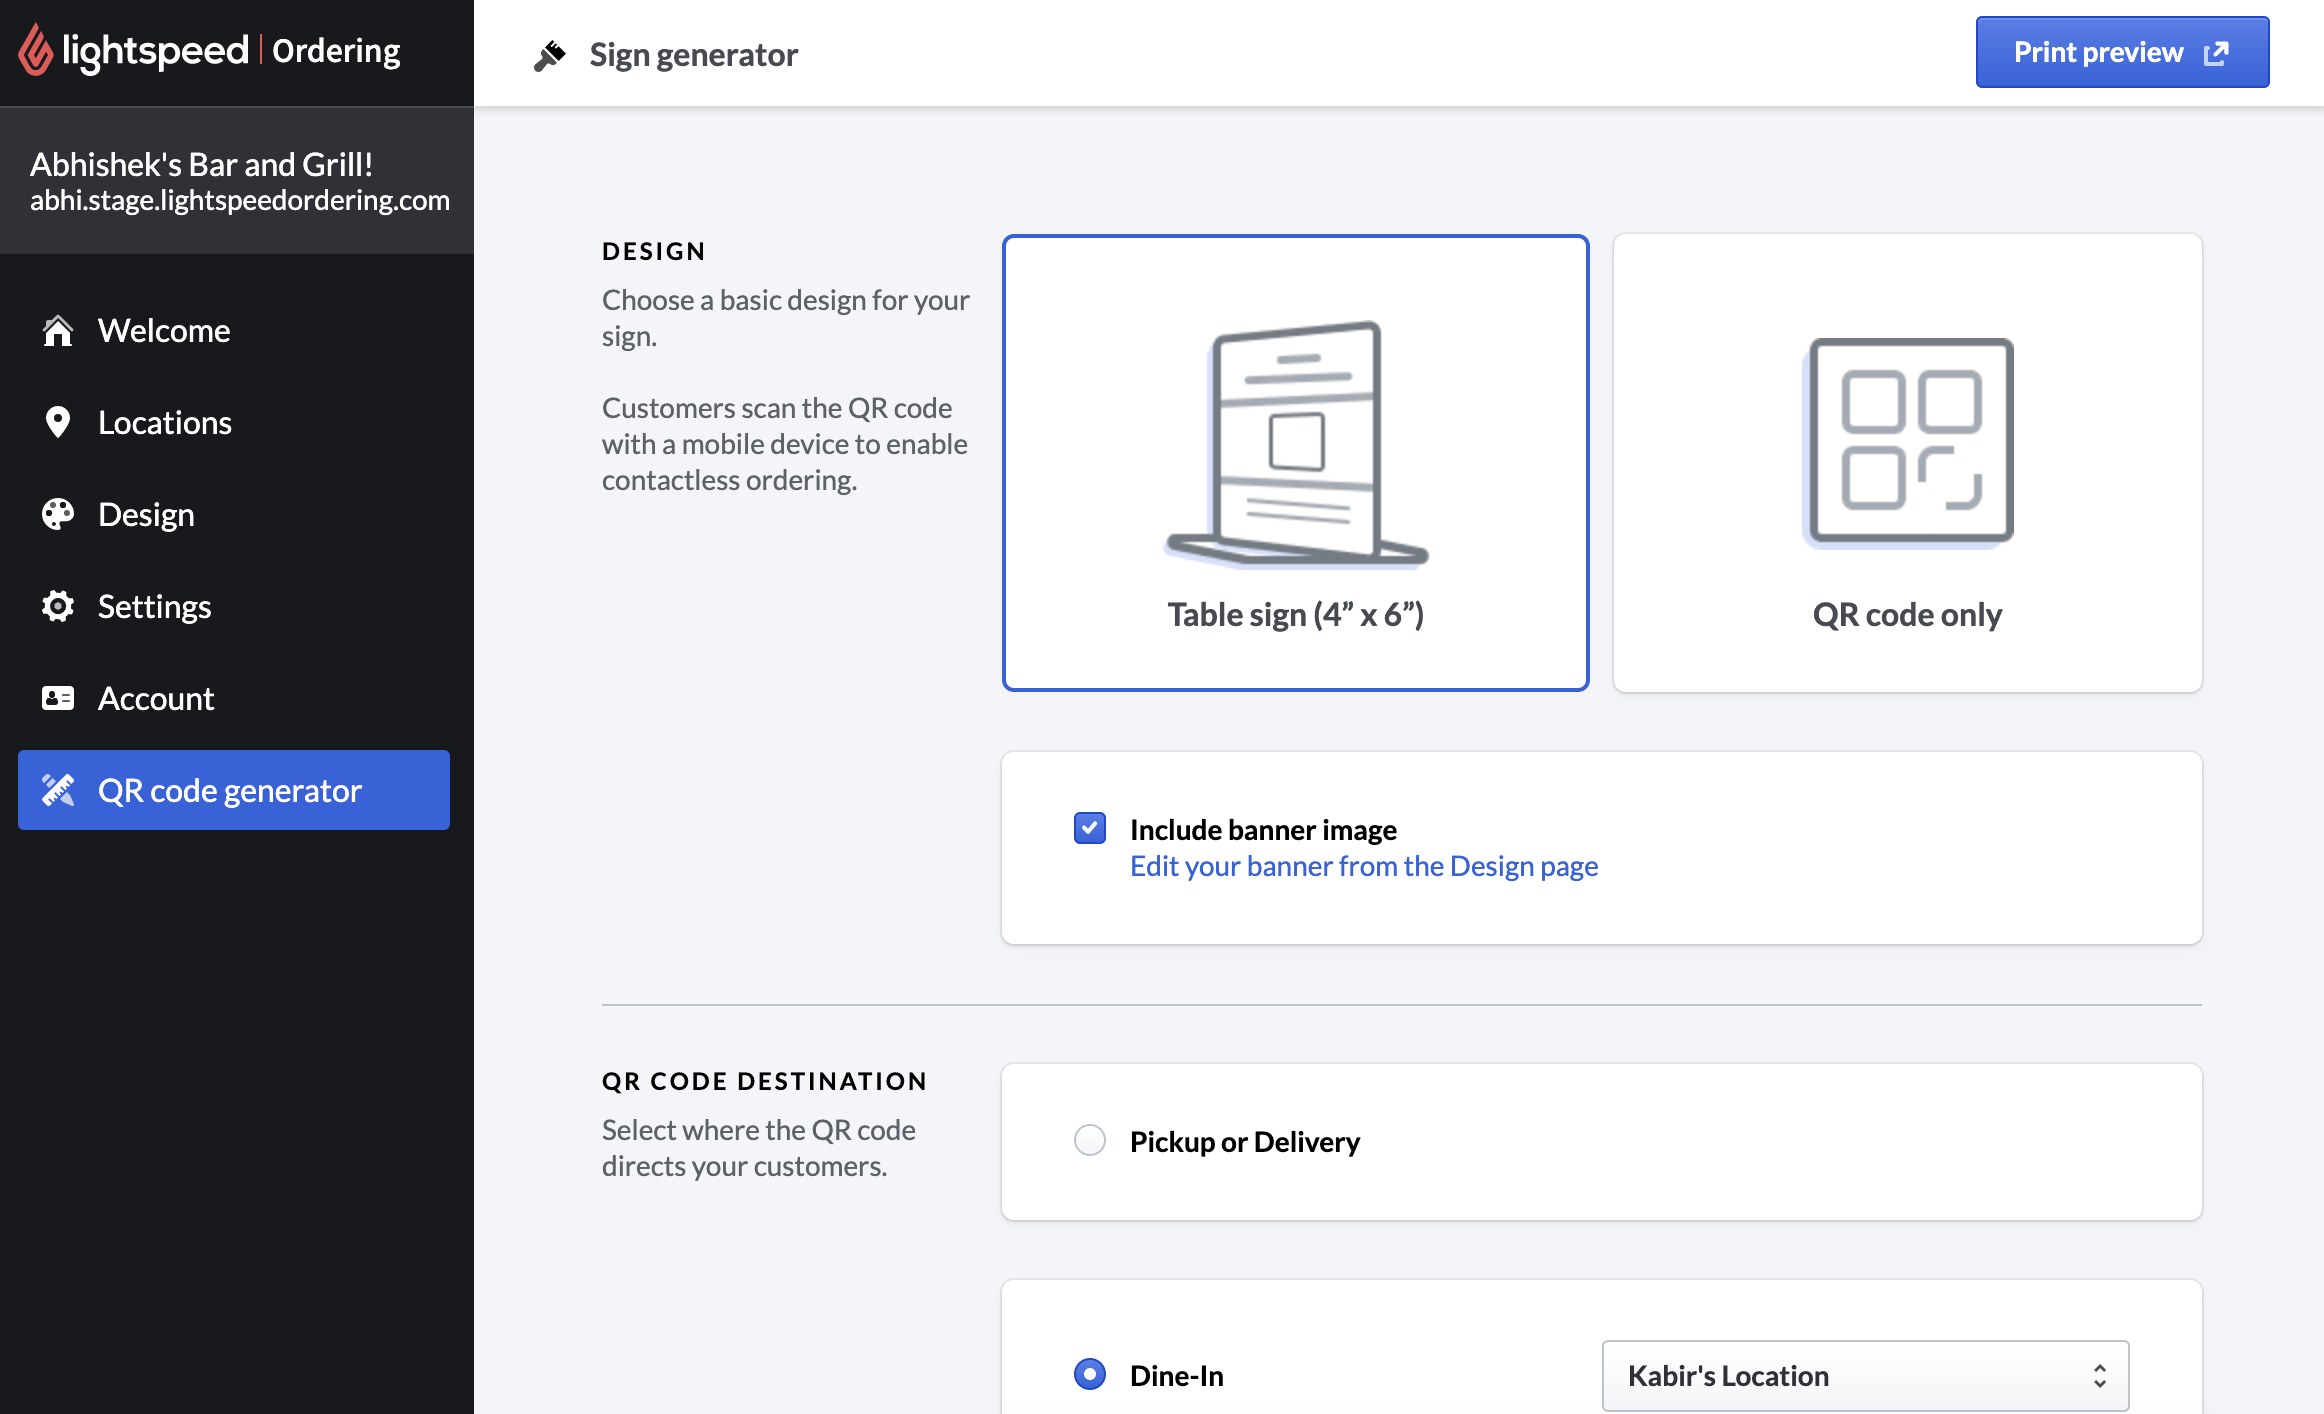
Log in to your Order Ahead Back Office and navigate to the QR code generator page on the left-hand menu.
- From the QR code generator page, adjust design details.
- After you've decided on a design, specify a QR code destination. This defines where your customers are directed after scanning your QR code. From this section, you can also determine a dine-in location for where the customers may be ordering from.
- If you're generating a sign, add custom messaging.
Once you're finished setting up your QR code, you can select Print preview at the top of the page to either print or save the image.
1. Adjust design
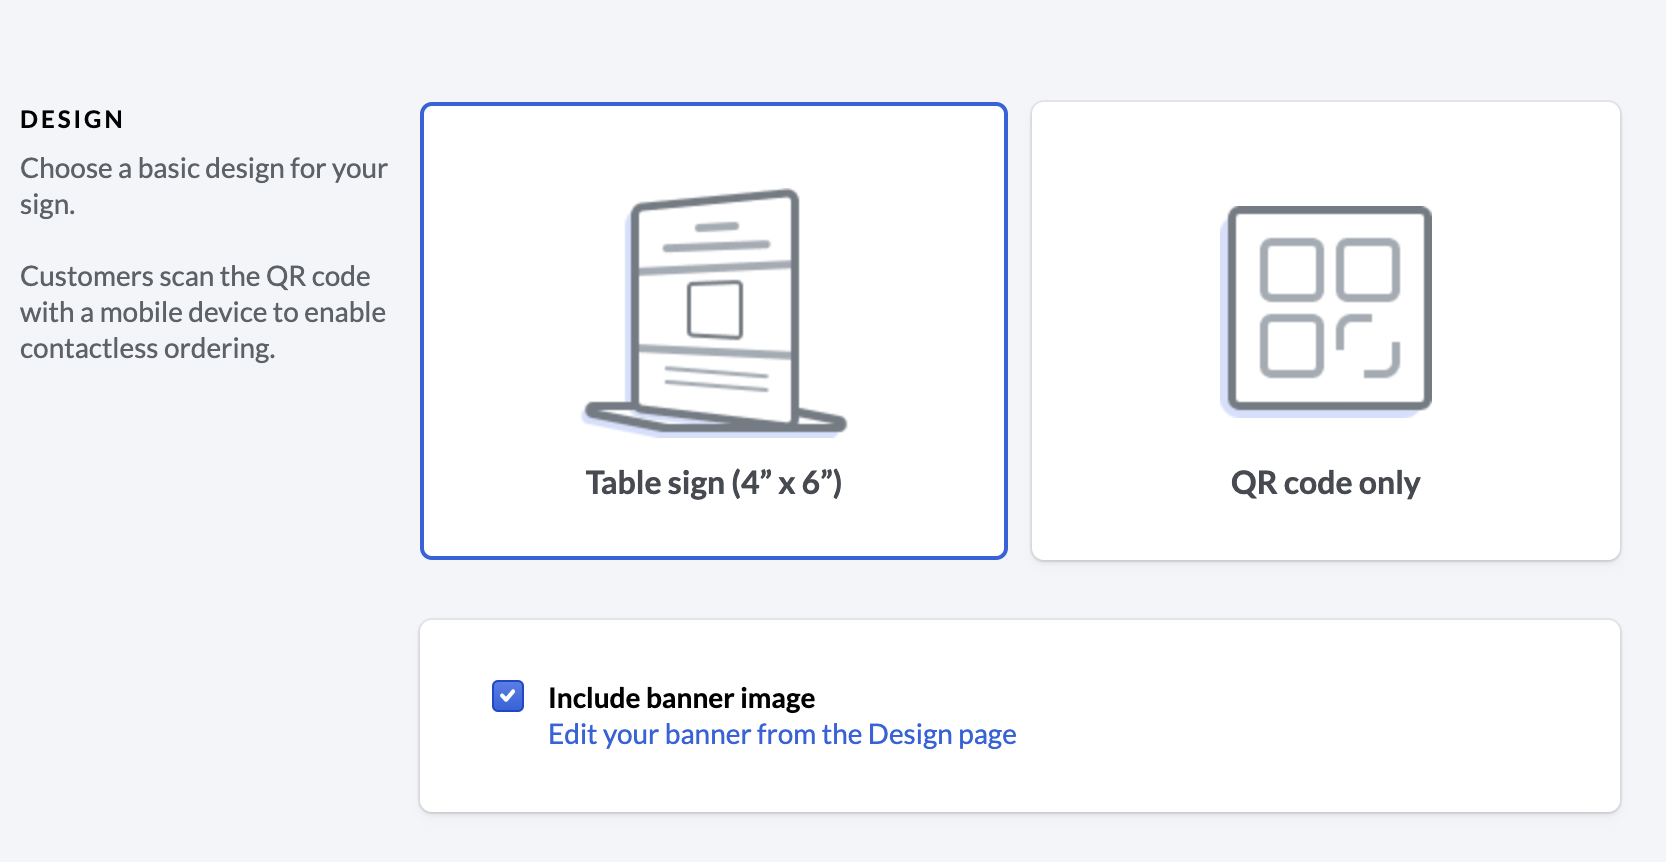
Specify a format for your QR codes from the Design section. If you want to create printable signs with a QR code, select Table sign. If you wish to just create a QR code, select QR code only. To include your Order Ahead banner on your Table sign design, select Include banner image. This is the same banner image that appears on your Order Ahead web app. To change this banner image, select the link Edit your banner from the design page, and you'll be redirected to the Design page.
2. Specify QR code destination
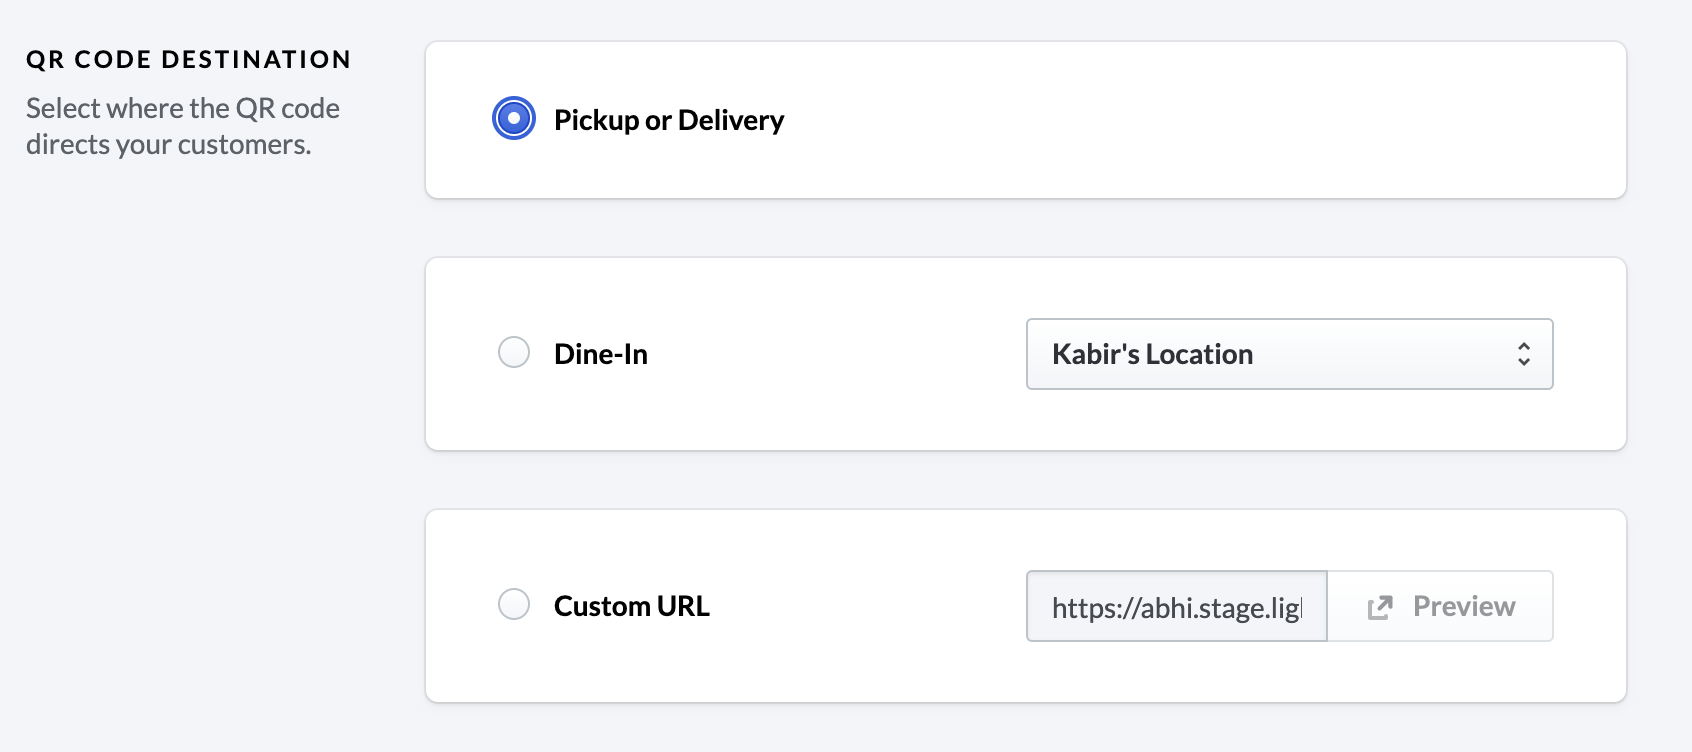
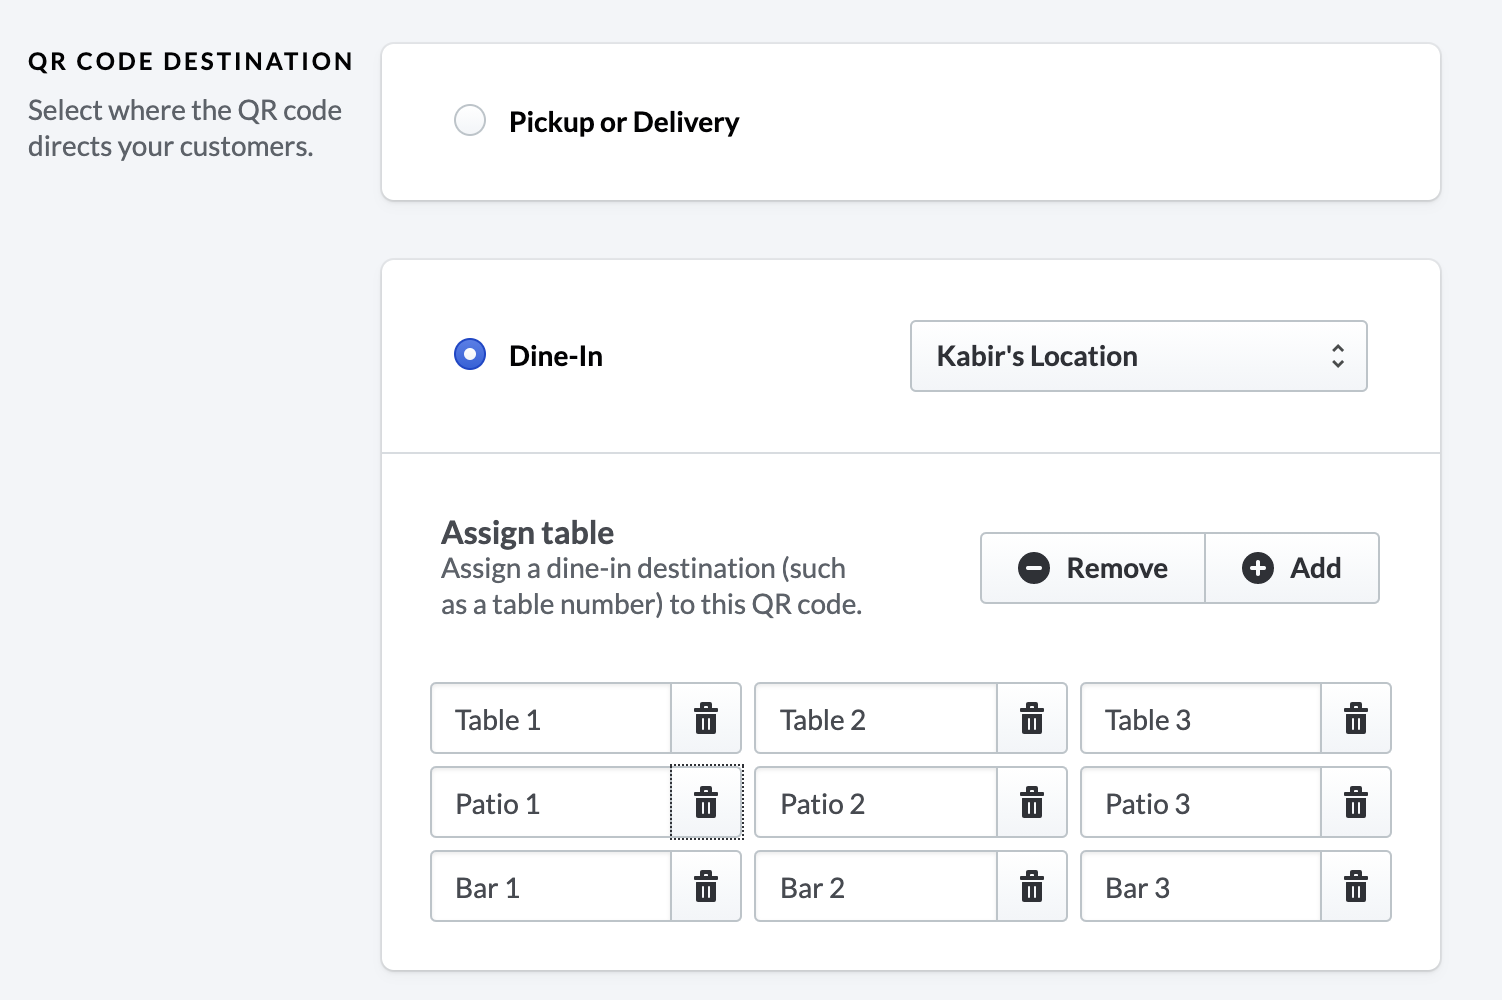
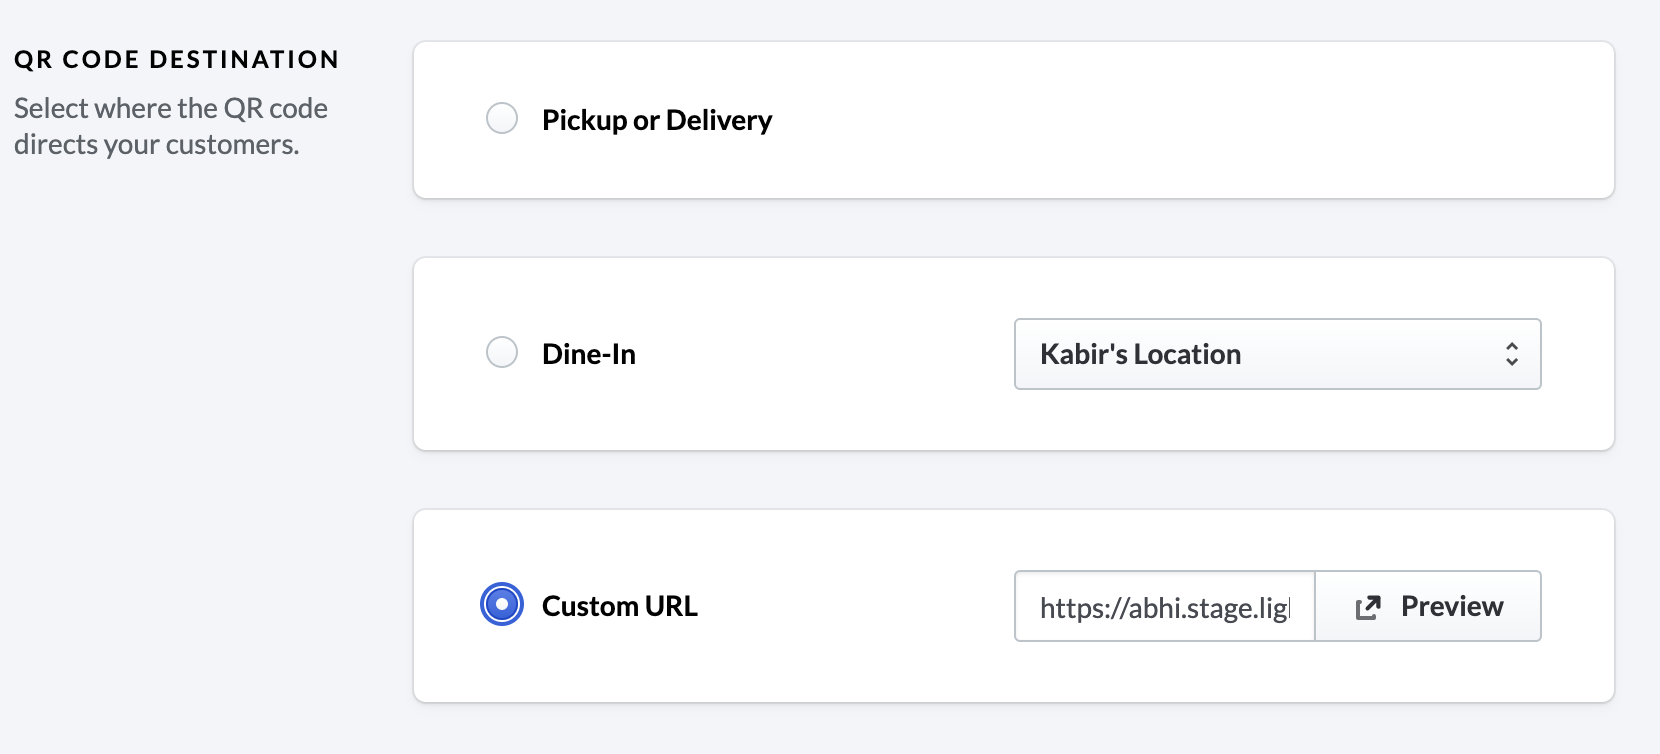
From the QR code destination, select where you want this QR code to direct your customers.
If you select Pickup or delivery, customers scanning your QR code will be brought to your Order Ahead web app for pickup or delivery ordering.
If you select Dine-in, customers scanning your QR code will be brought to your Order Ahead web up for contactless, dine-in ordering. Please note: to use the dine-in QR code destination, you'll need to enable the dine-in feature from the Locations page.
If selecting Dine-in for your QR destination, you'll have the option to choose a custom table number or name for the QR code. This is useful for auto-identifying where the dine-in order is coming from in your restaurant. For instance, if you use a table system at your restaurant, add a custom table number or name each sit-down location of your establishment (such as Table 1, or Patio). The assigned table number or name is assigned to each QR code. Place each QR code at the corresponding table, where your customers can then scan the code and their custom table number will display on the incoming order. Please note: a QR destination table number or name is not linked to tables in Lightspeed Restaurant.
If you don't want to specify pick-up, delivery or dine-in ordering as your QR destination, you can also add a general redirect link to your Order Ahead web app by selecting Custom URL.
3. Add custom messaging
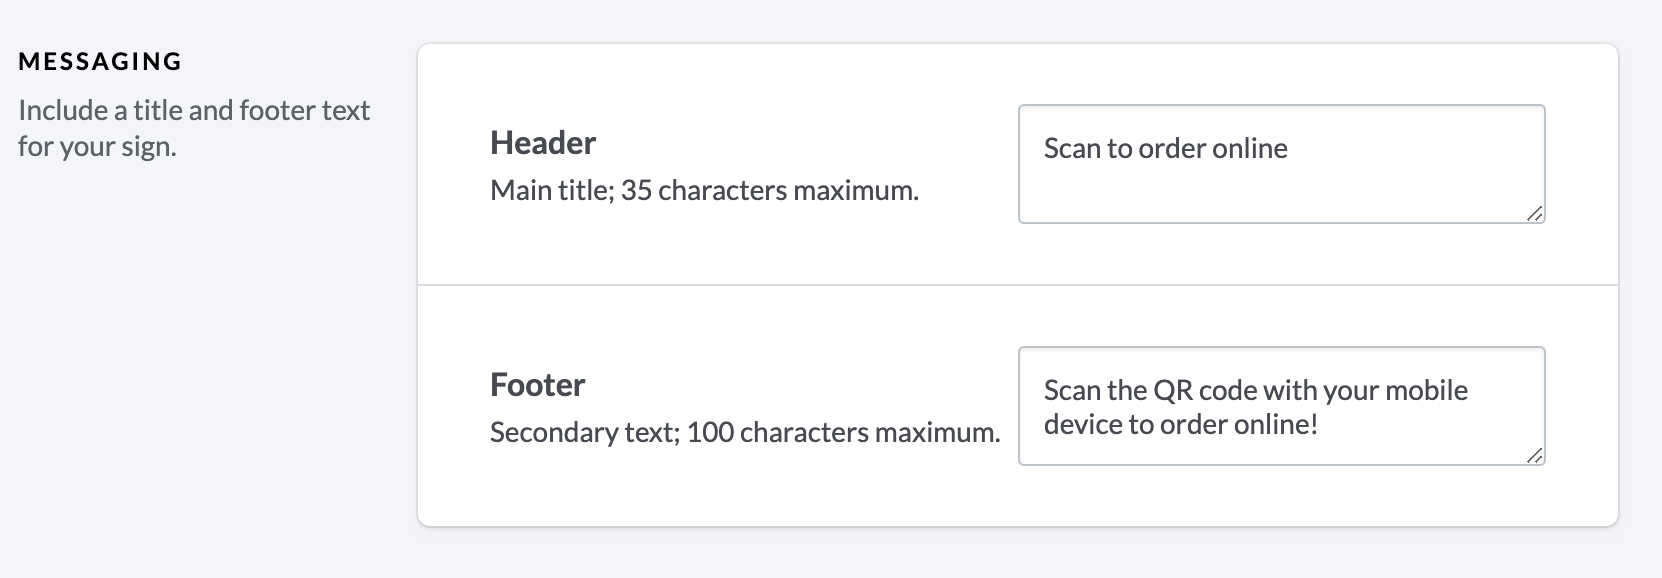
If you're generating a sign with your QR code, add custom messaging. This text will appear at the top and bottom of your table sign.
In the field beside Header, add a main title for your sign. This can be your business name, or a short call to action for your customers. By default, the sign header text is Scan to order online. You can edit this to anything 35 characters or less. This should be a main message that grabs your customer's attention.
In the field beside Footer, add some secondary text for your sign. The footer text is smaller than your header, and so can be a longer message or instruction. By default, the sign header text is Scan or visit lightspeedordering.com to order! Please note the footer text is limited to 100 characters or less.
That's it! Once you've set up your QR codes, you can select Print preview at the top of the page to either print or save the image.
What's next?
For more information on setting up or managing Order Ahead, see Managing Order Ahead.
For more information on using the Order Ahead web app, see Using Order Ahead.
