The Verifone P400+ terminal is quick and easy to set up with Lightspeed Payments. When you receive the terminal from Lightspeed, it will already be configured for your account, so all you will need to do is plug in and pair the terminal.
It is important that you only use the terminal supplied to you by Lightspeed, as any terminal obtained from a third party may not be correctly configured for your account and could present a security risk.
Plugging in the terminal
To set up your payment terminal, you will need:
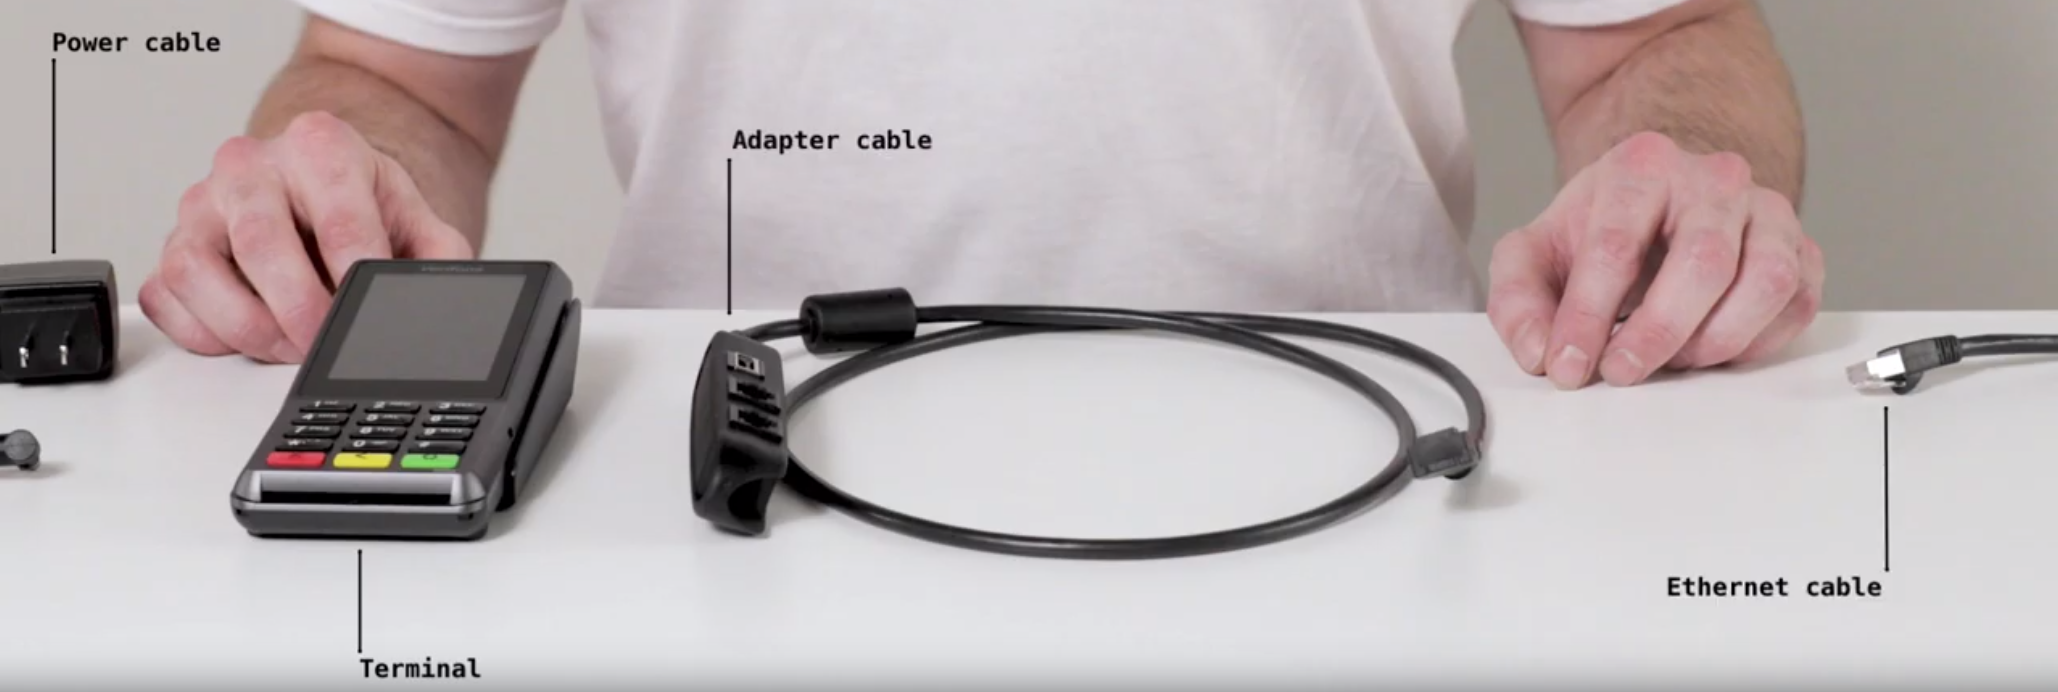
- 1 power cable
- 1 Verifone P400+ terminal
- 1 adapter cable
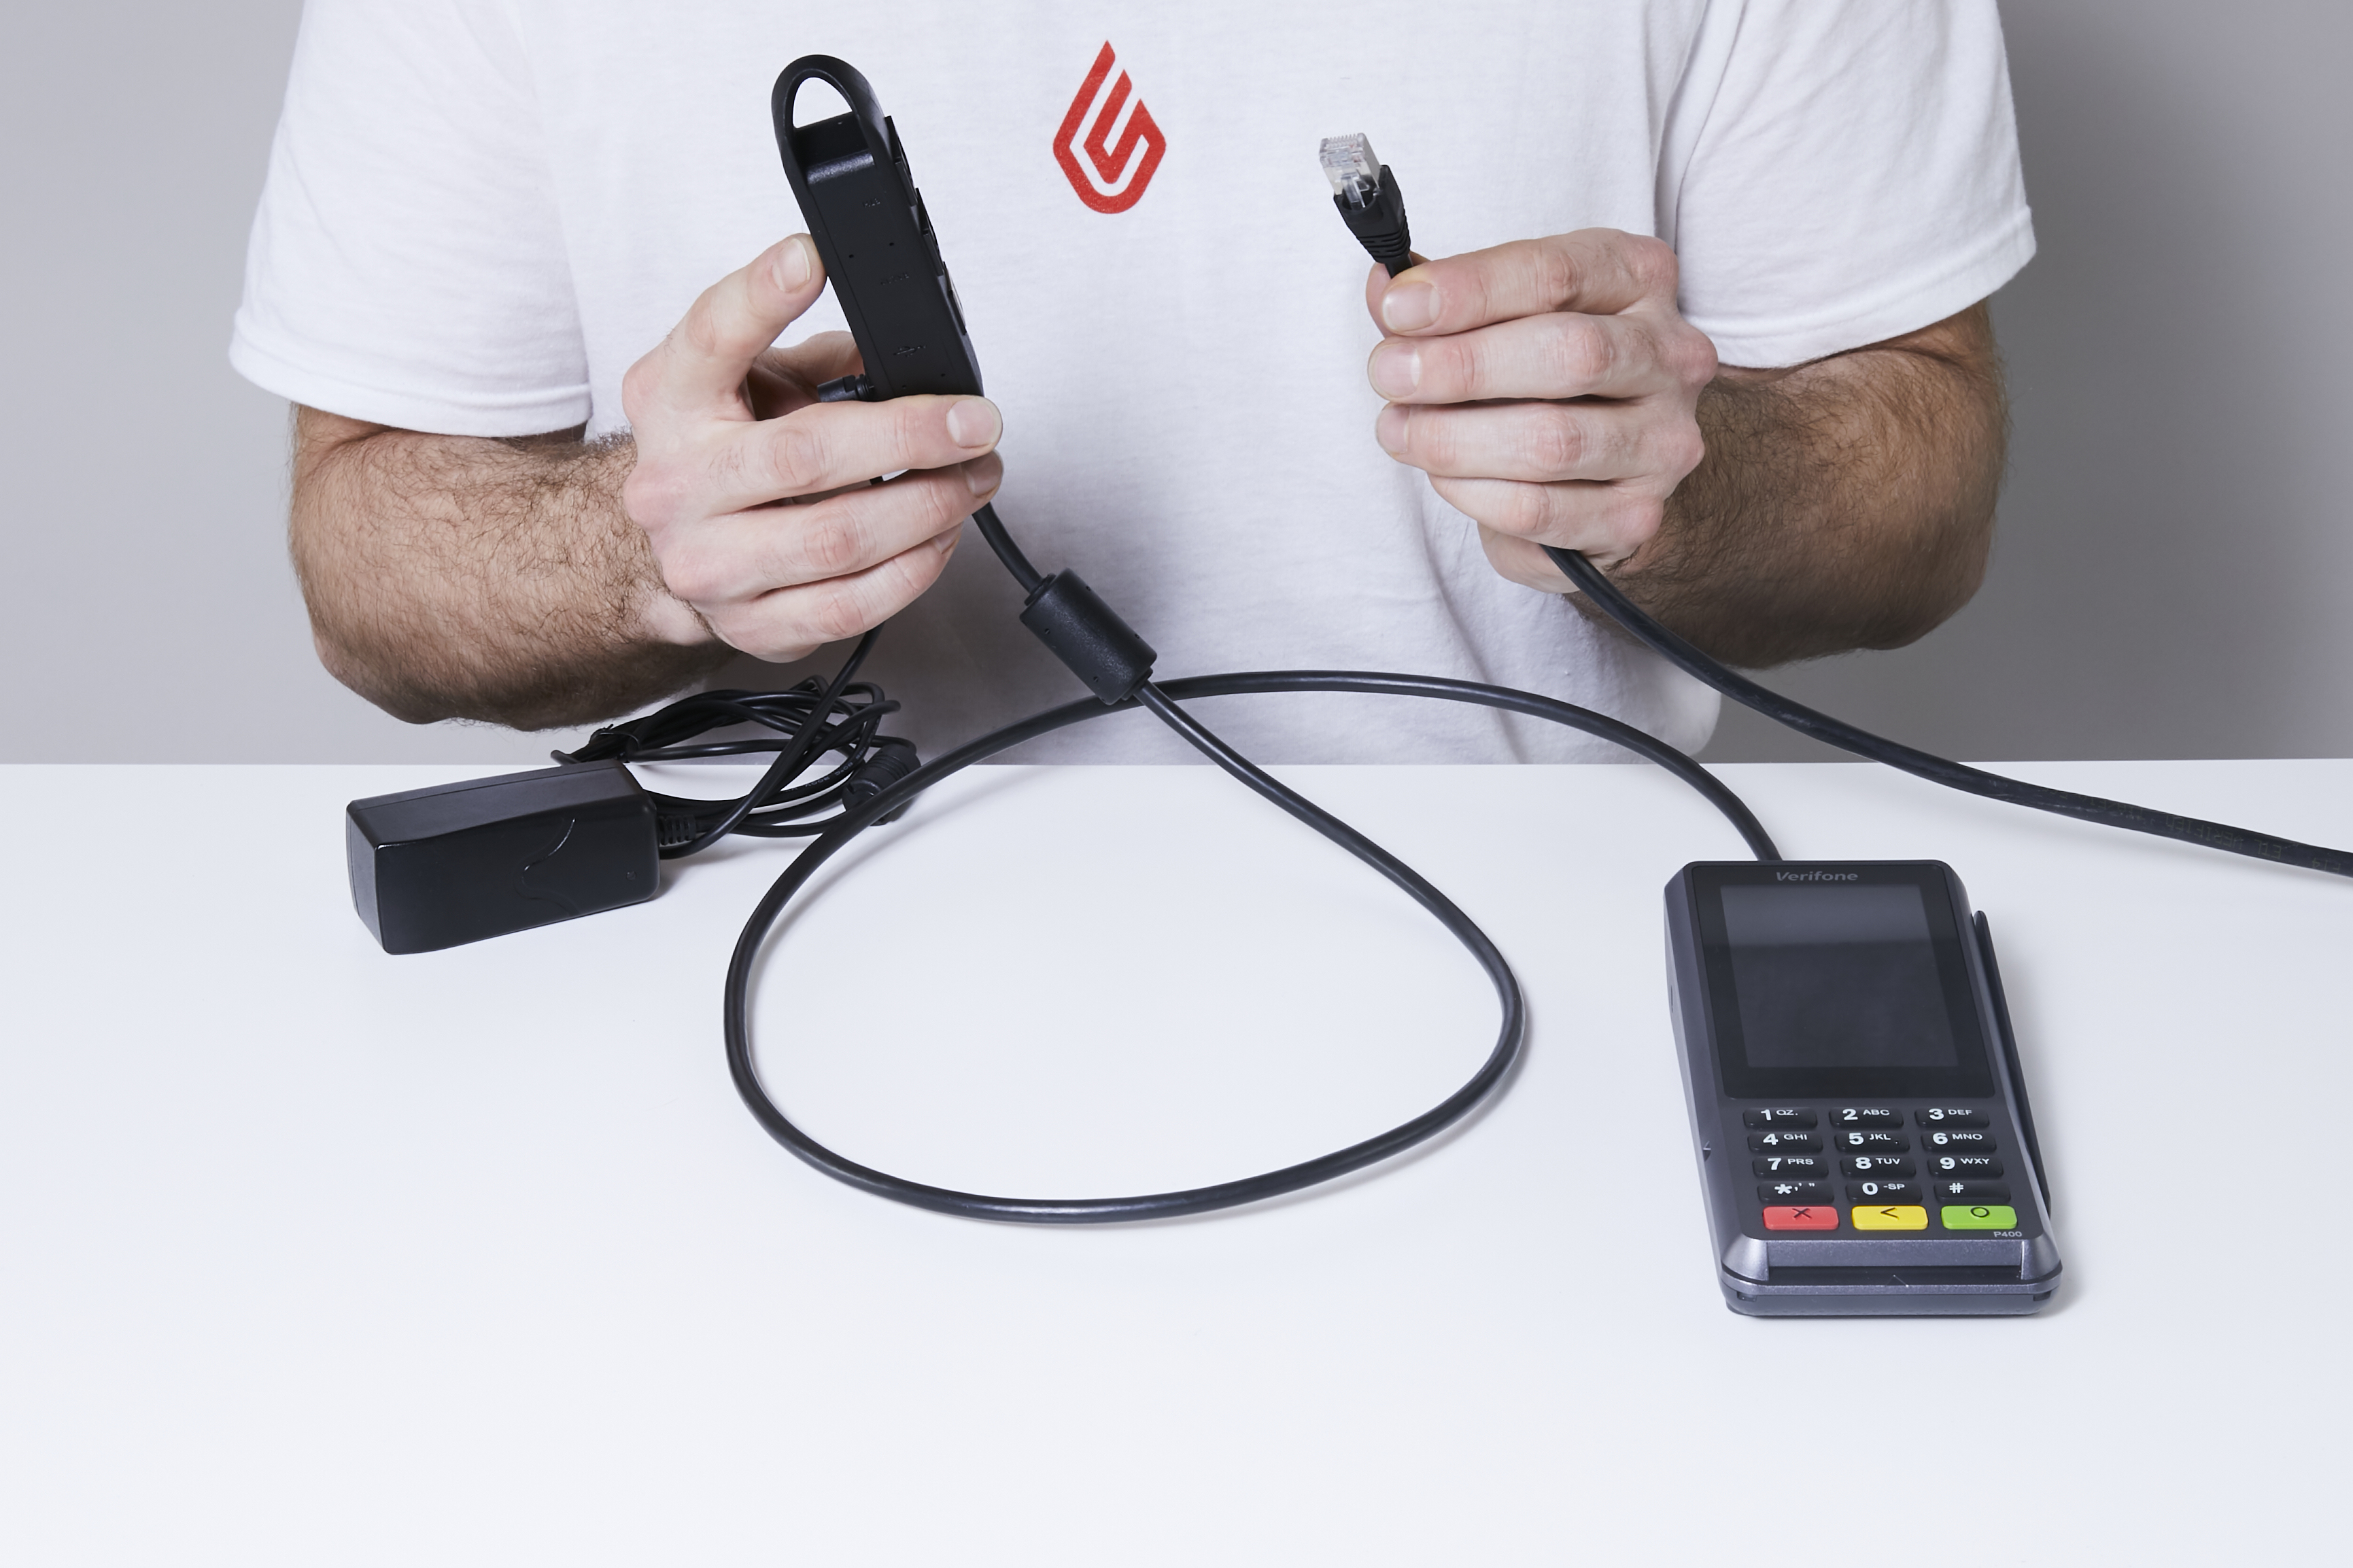
- 1 ethernet cable (not included)
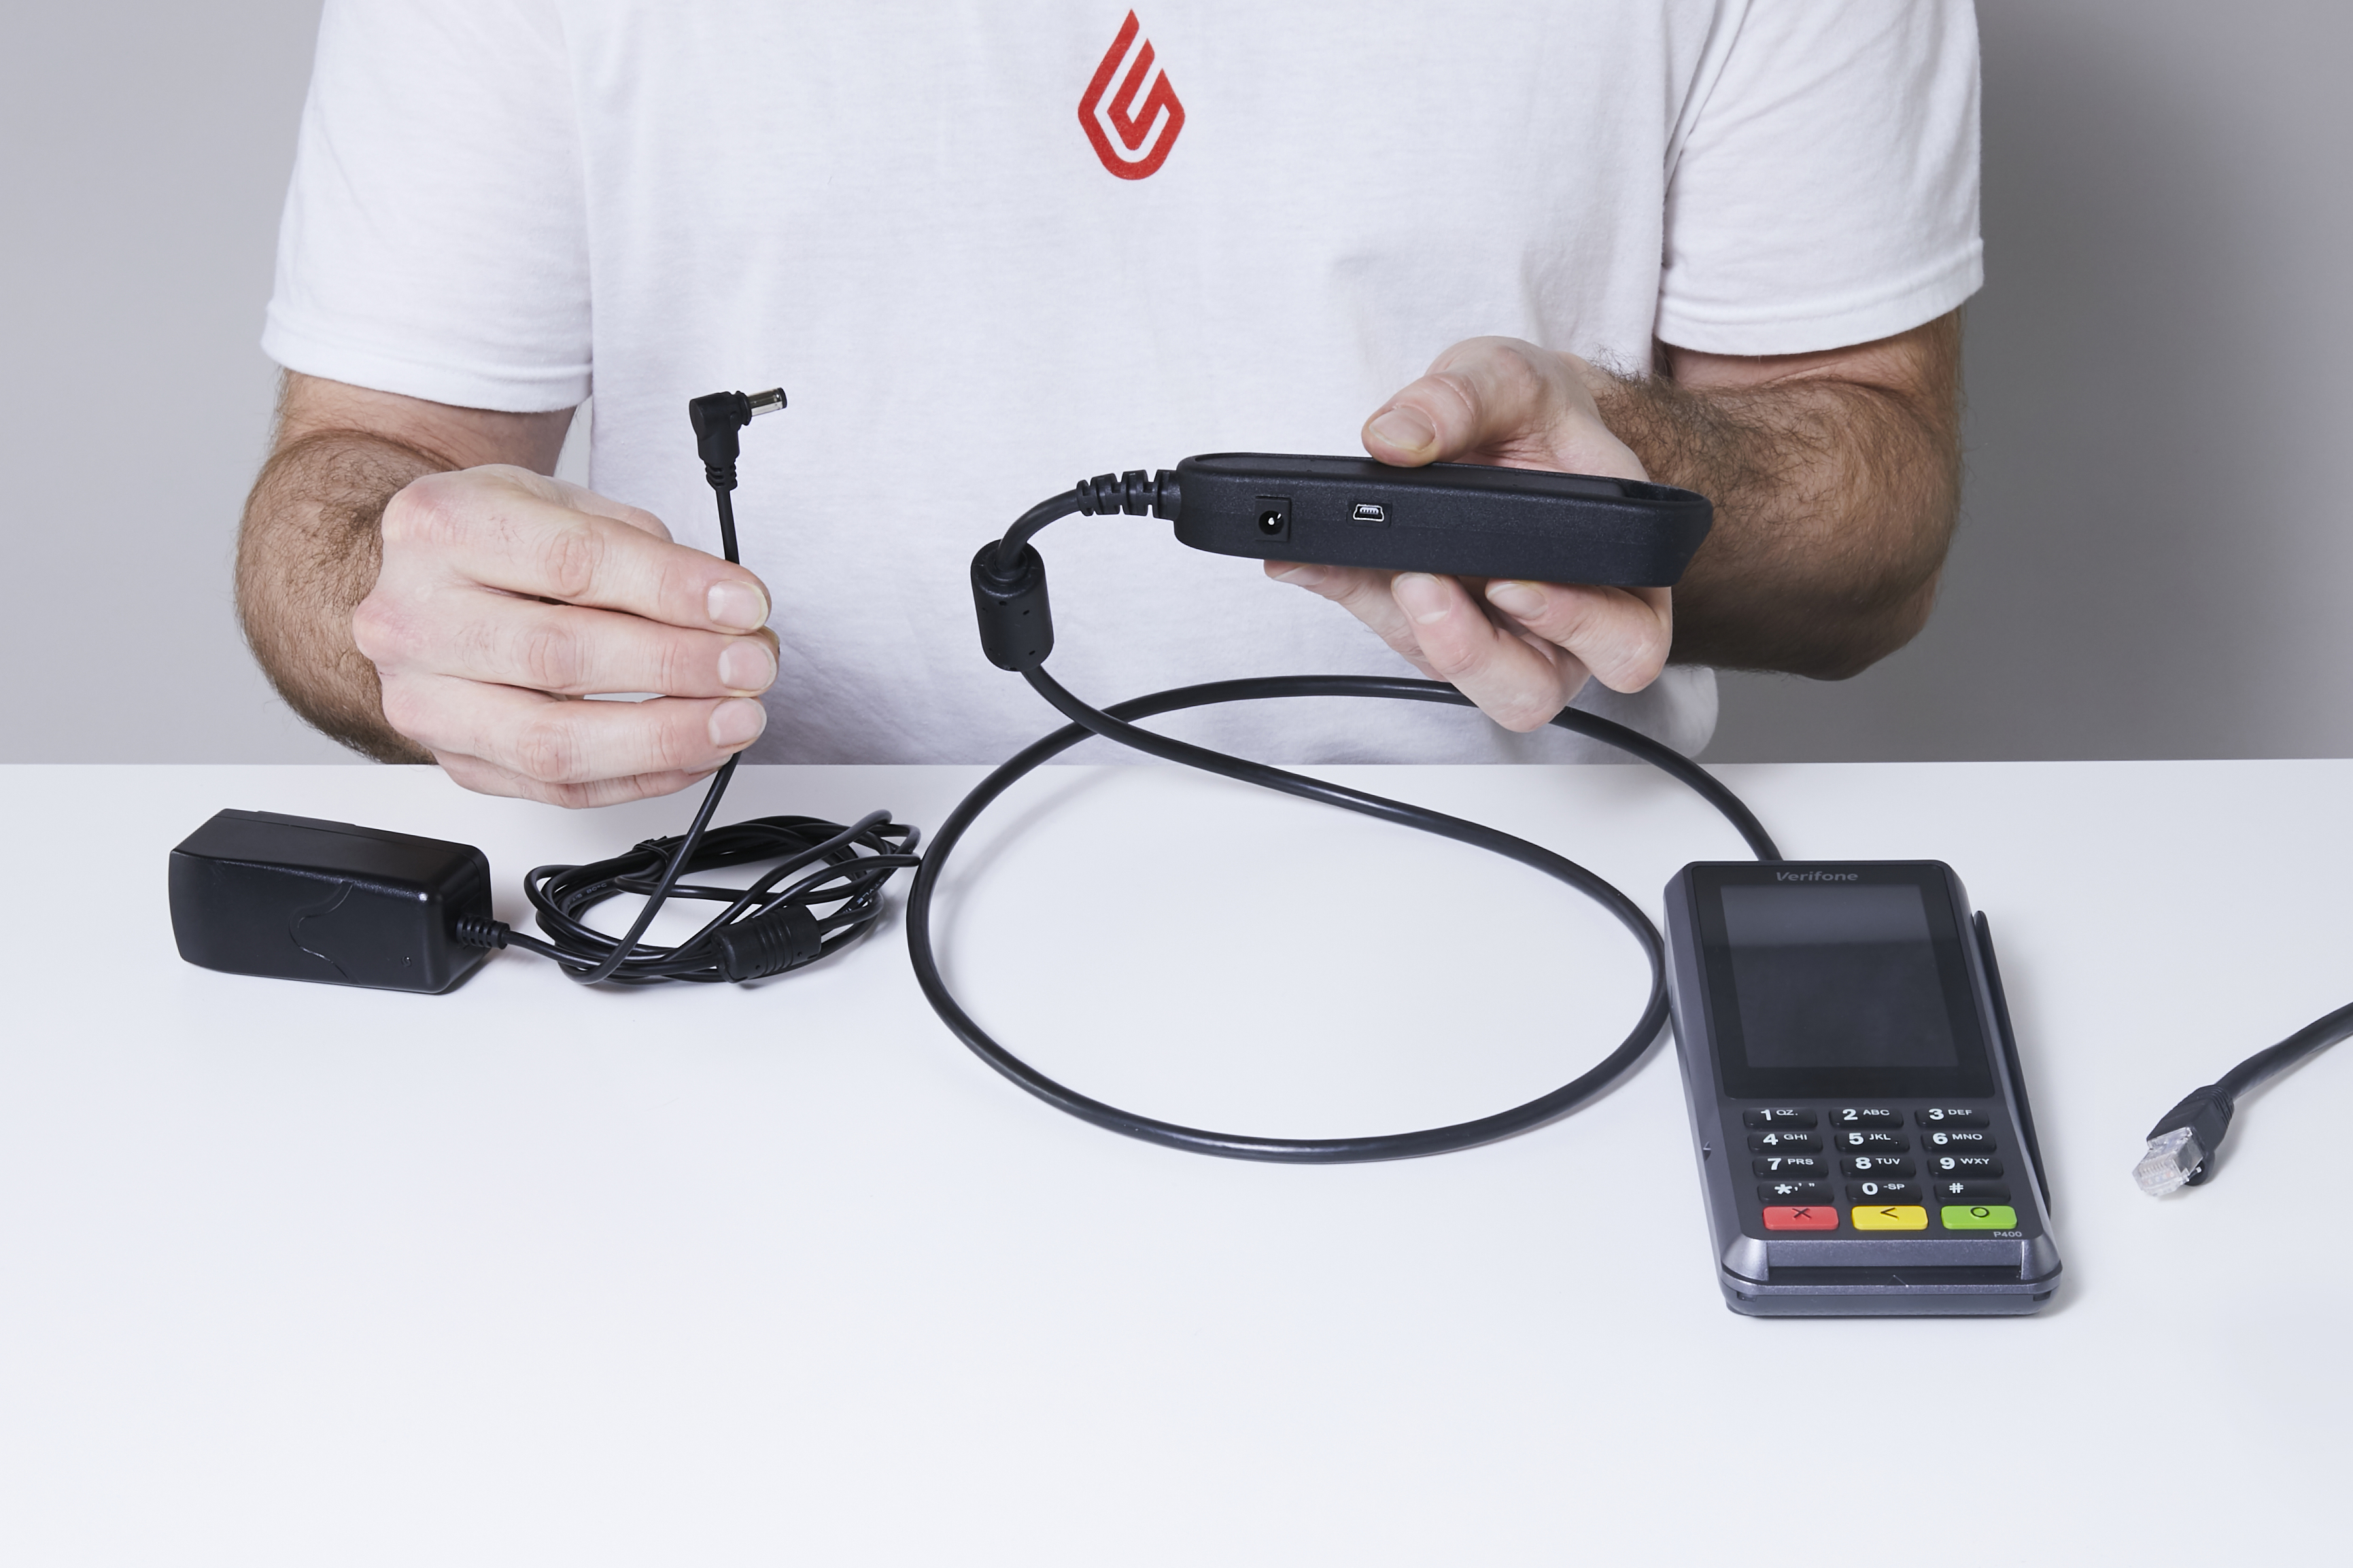
To set up the terminal:
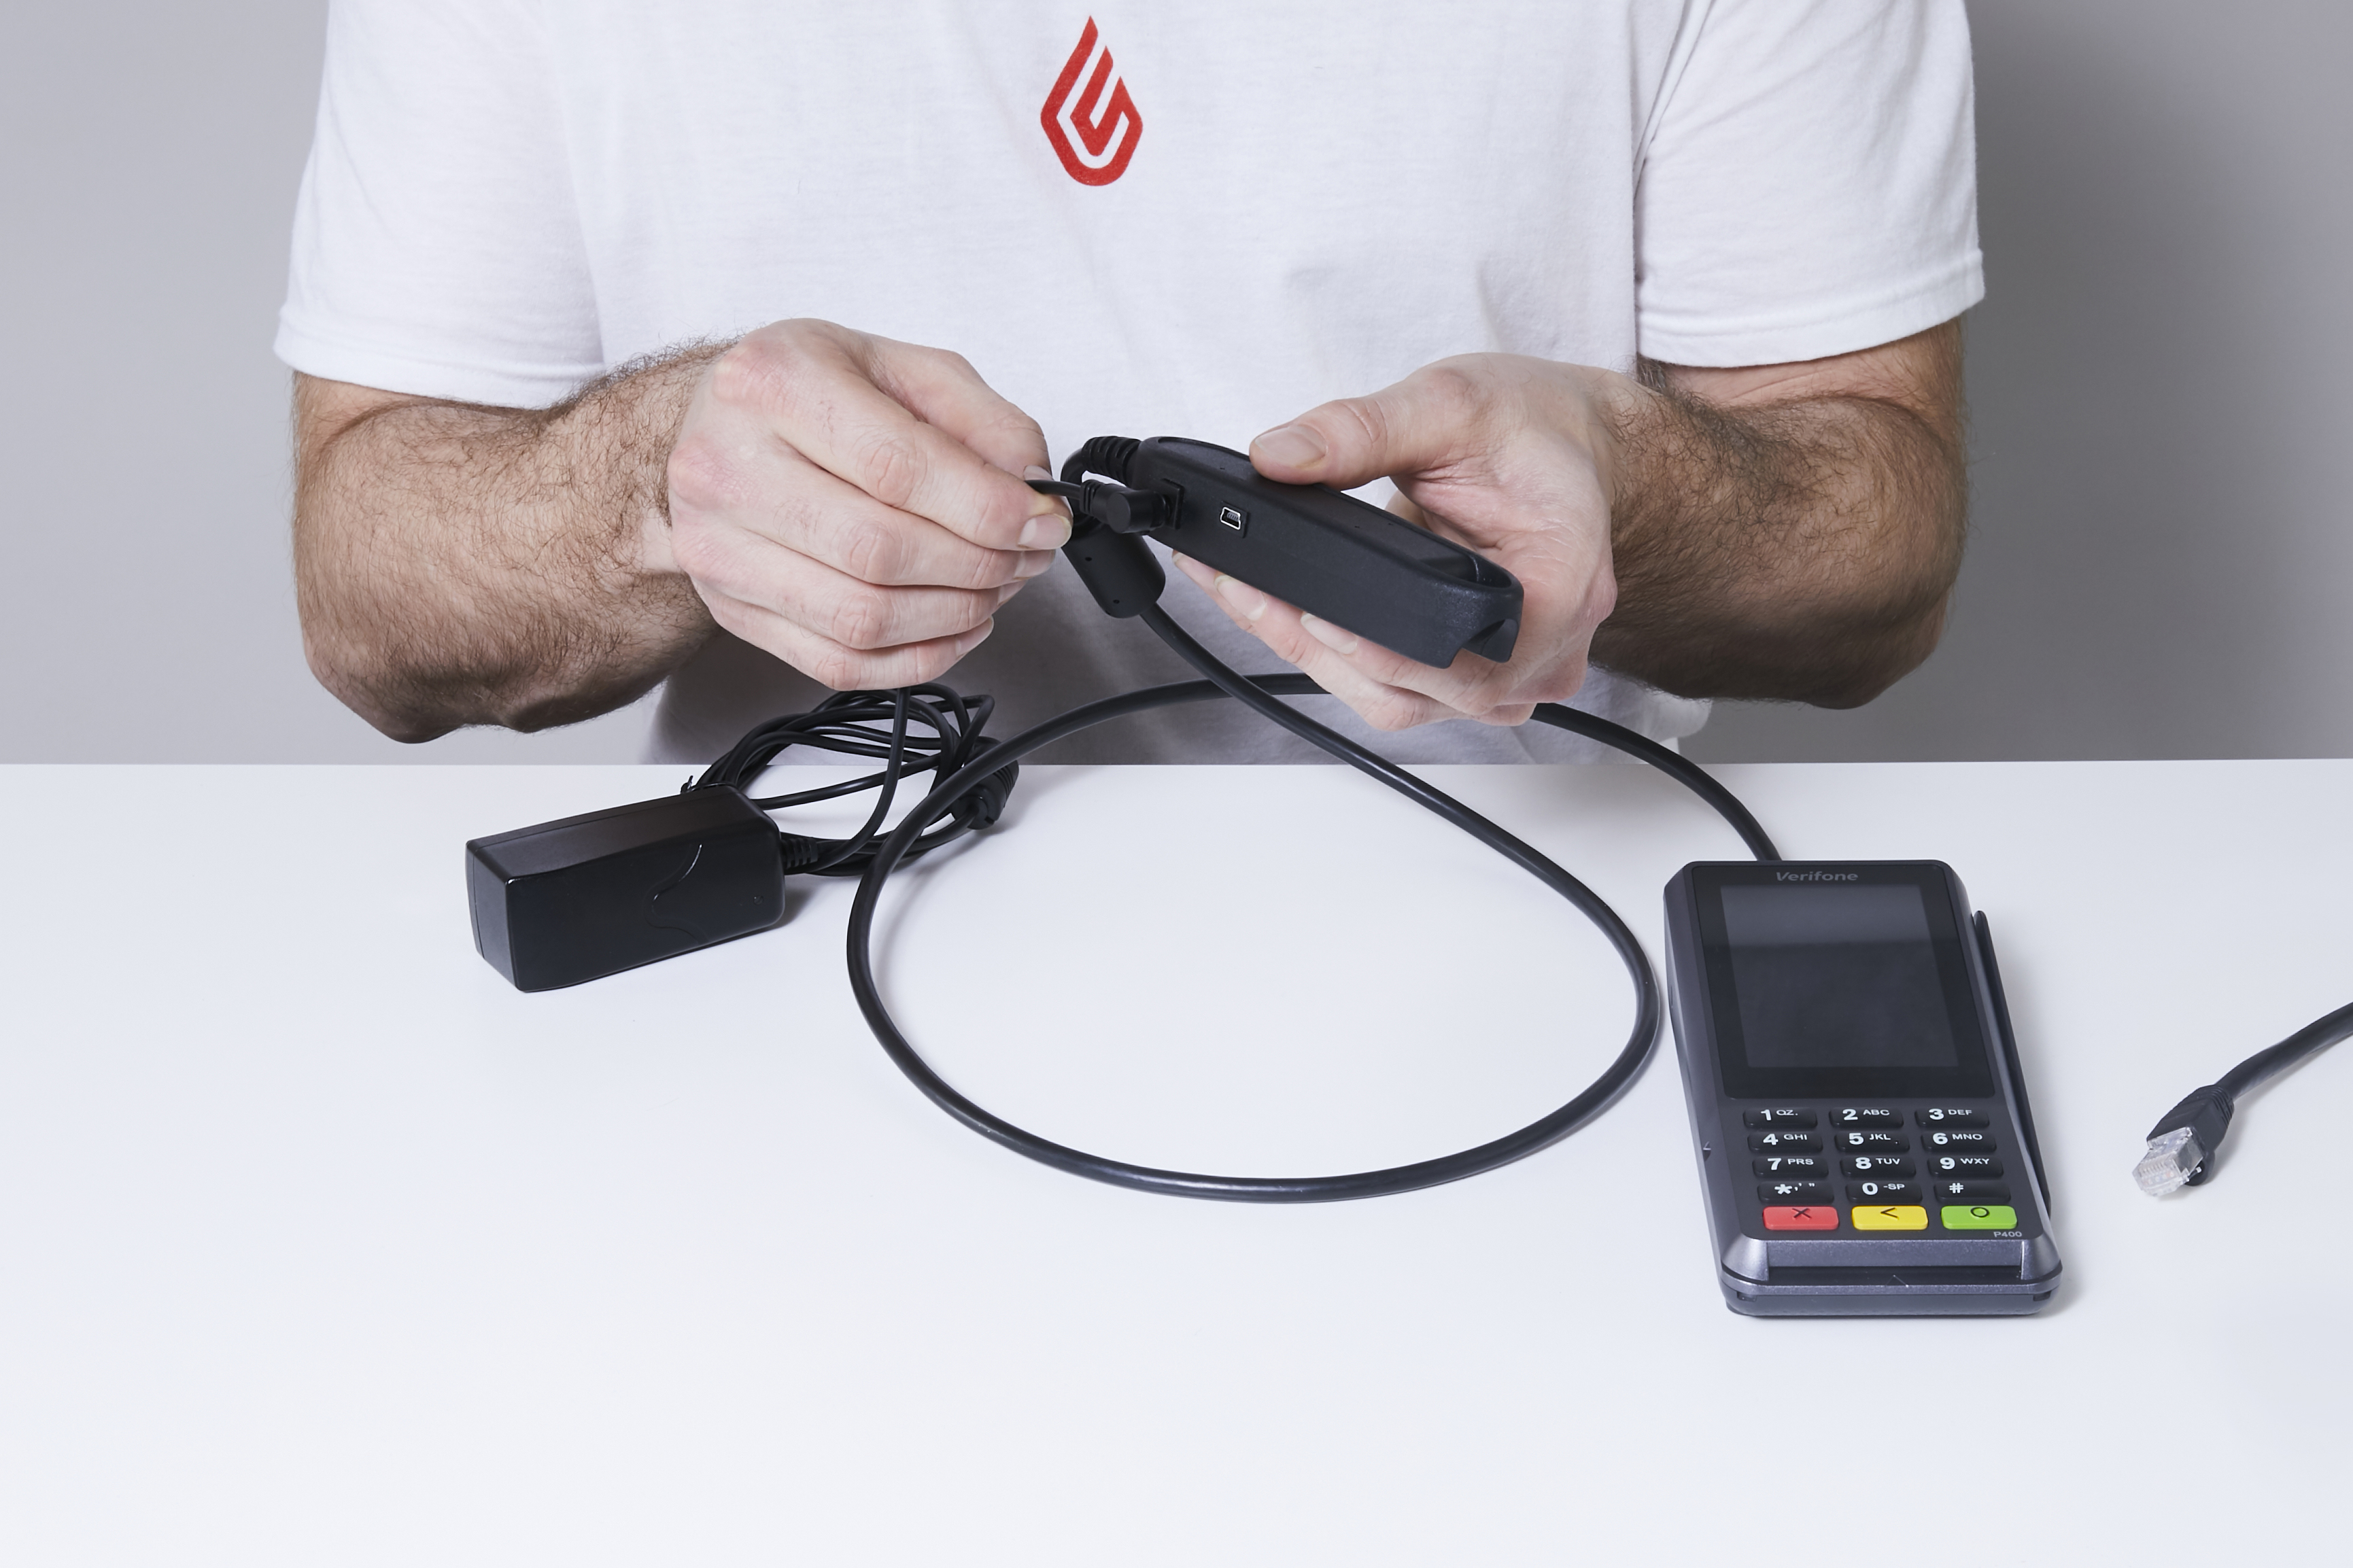
- Open the back of the terminal by sliding the tab up and pulling away.
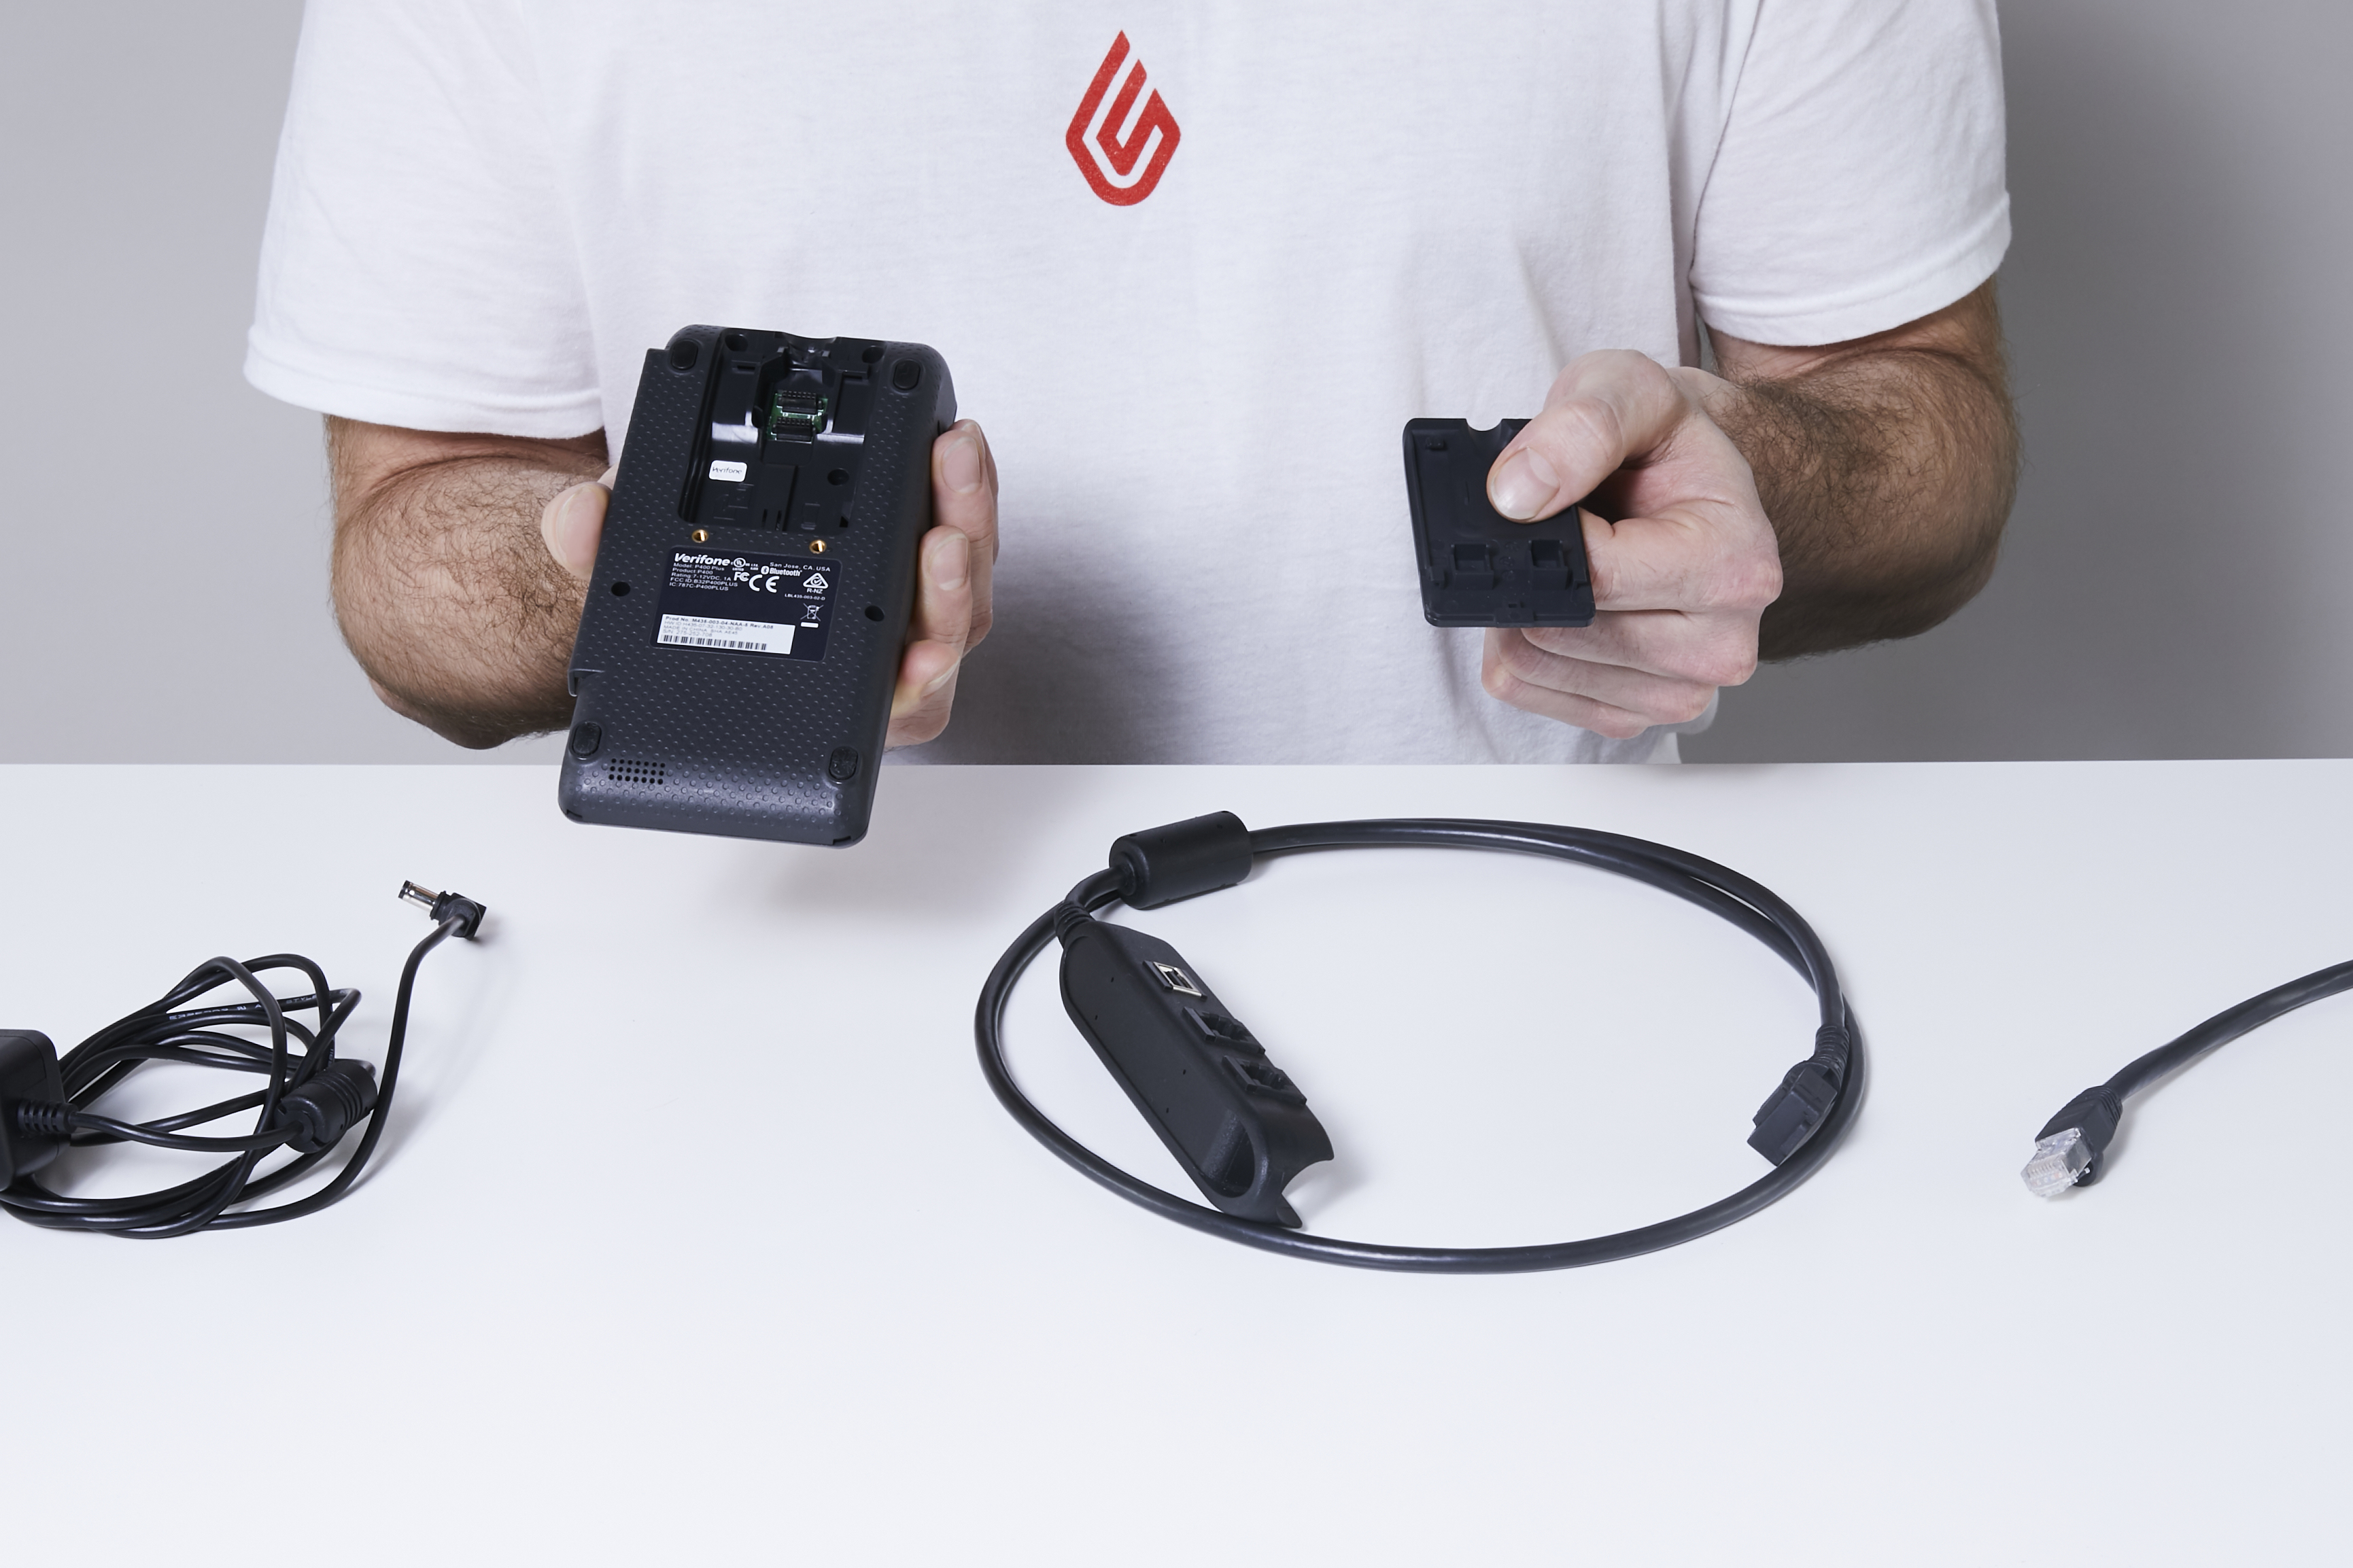
- Plug the adapter cable into the back of the terminal.
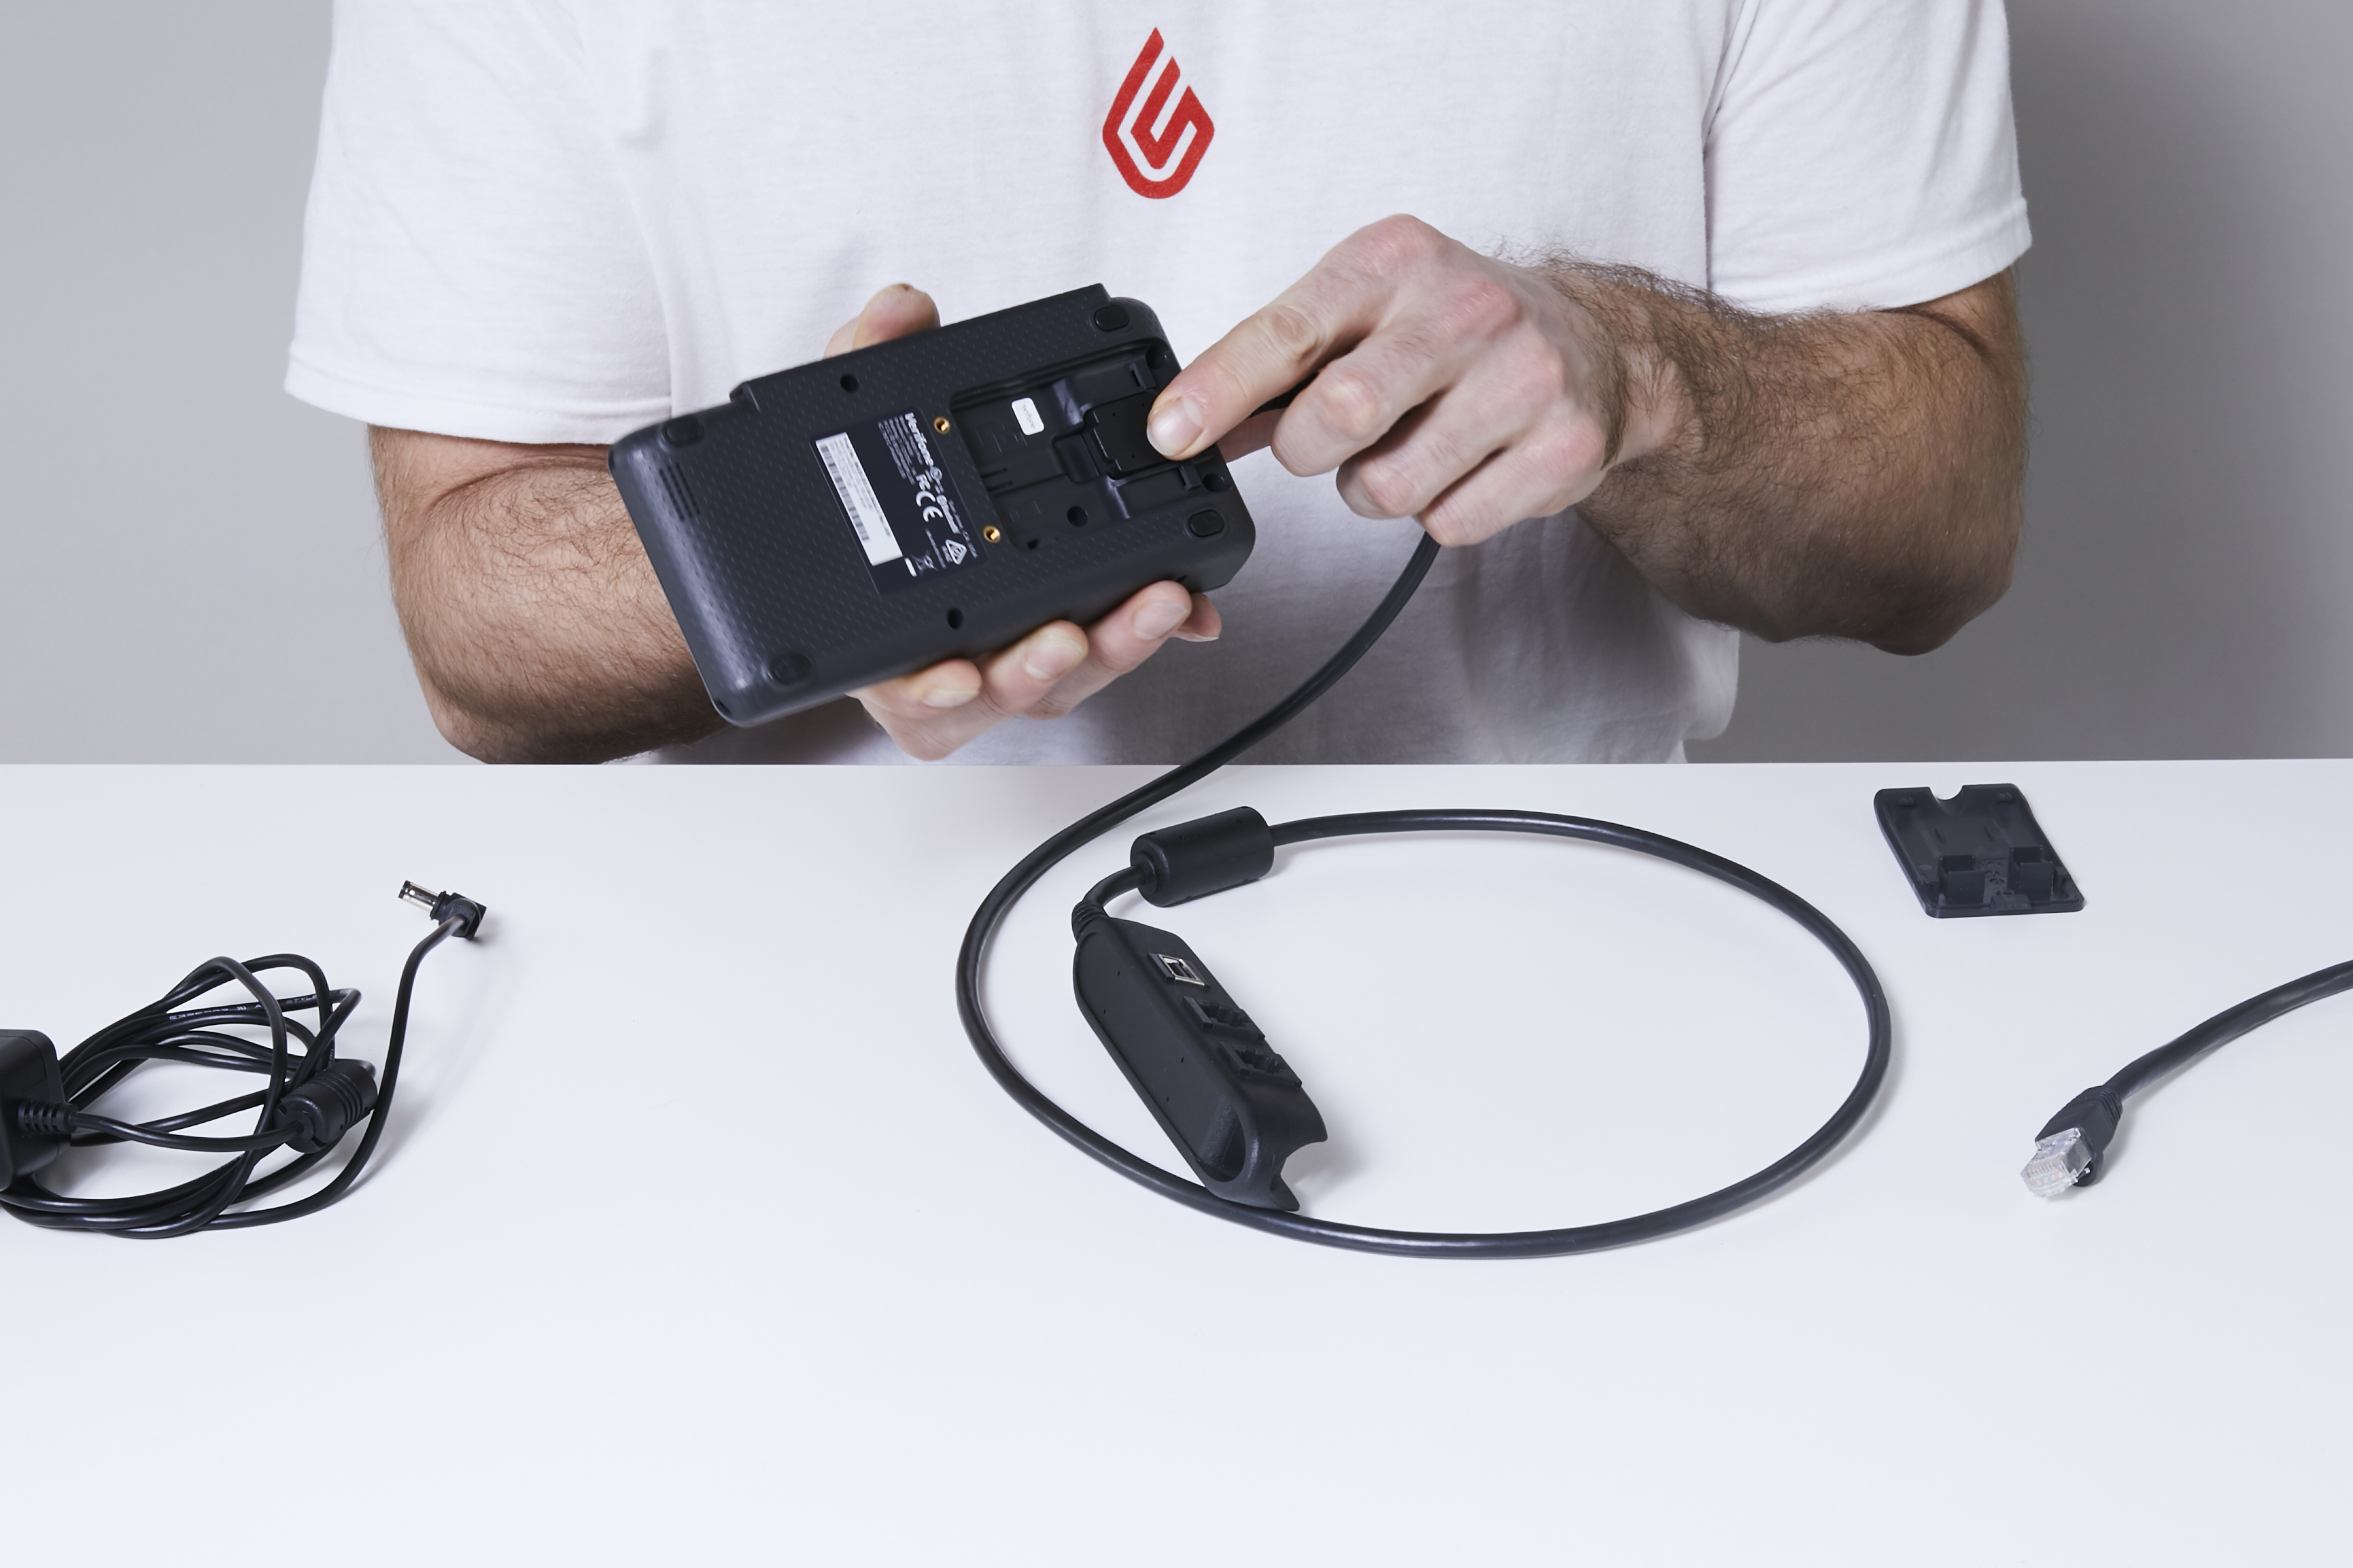
- Replace the tab.
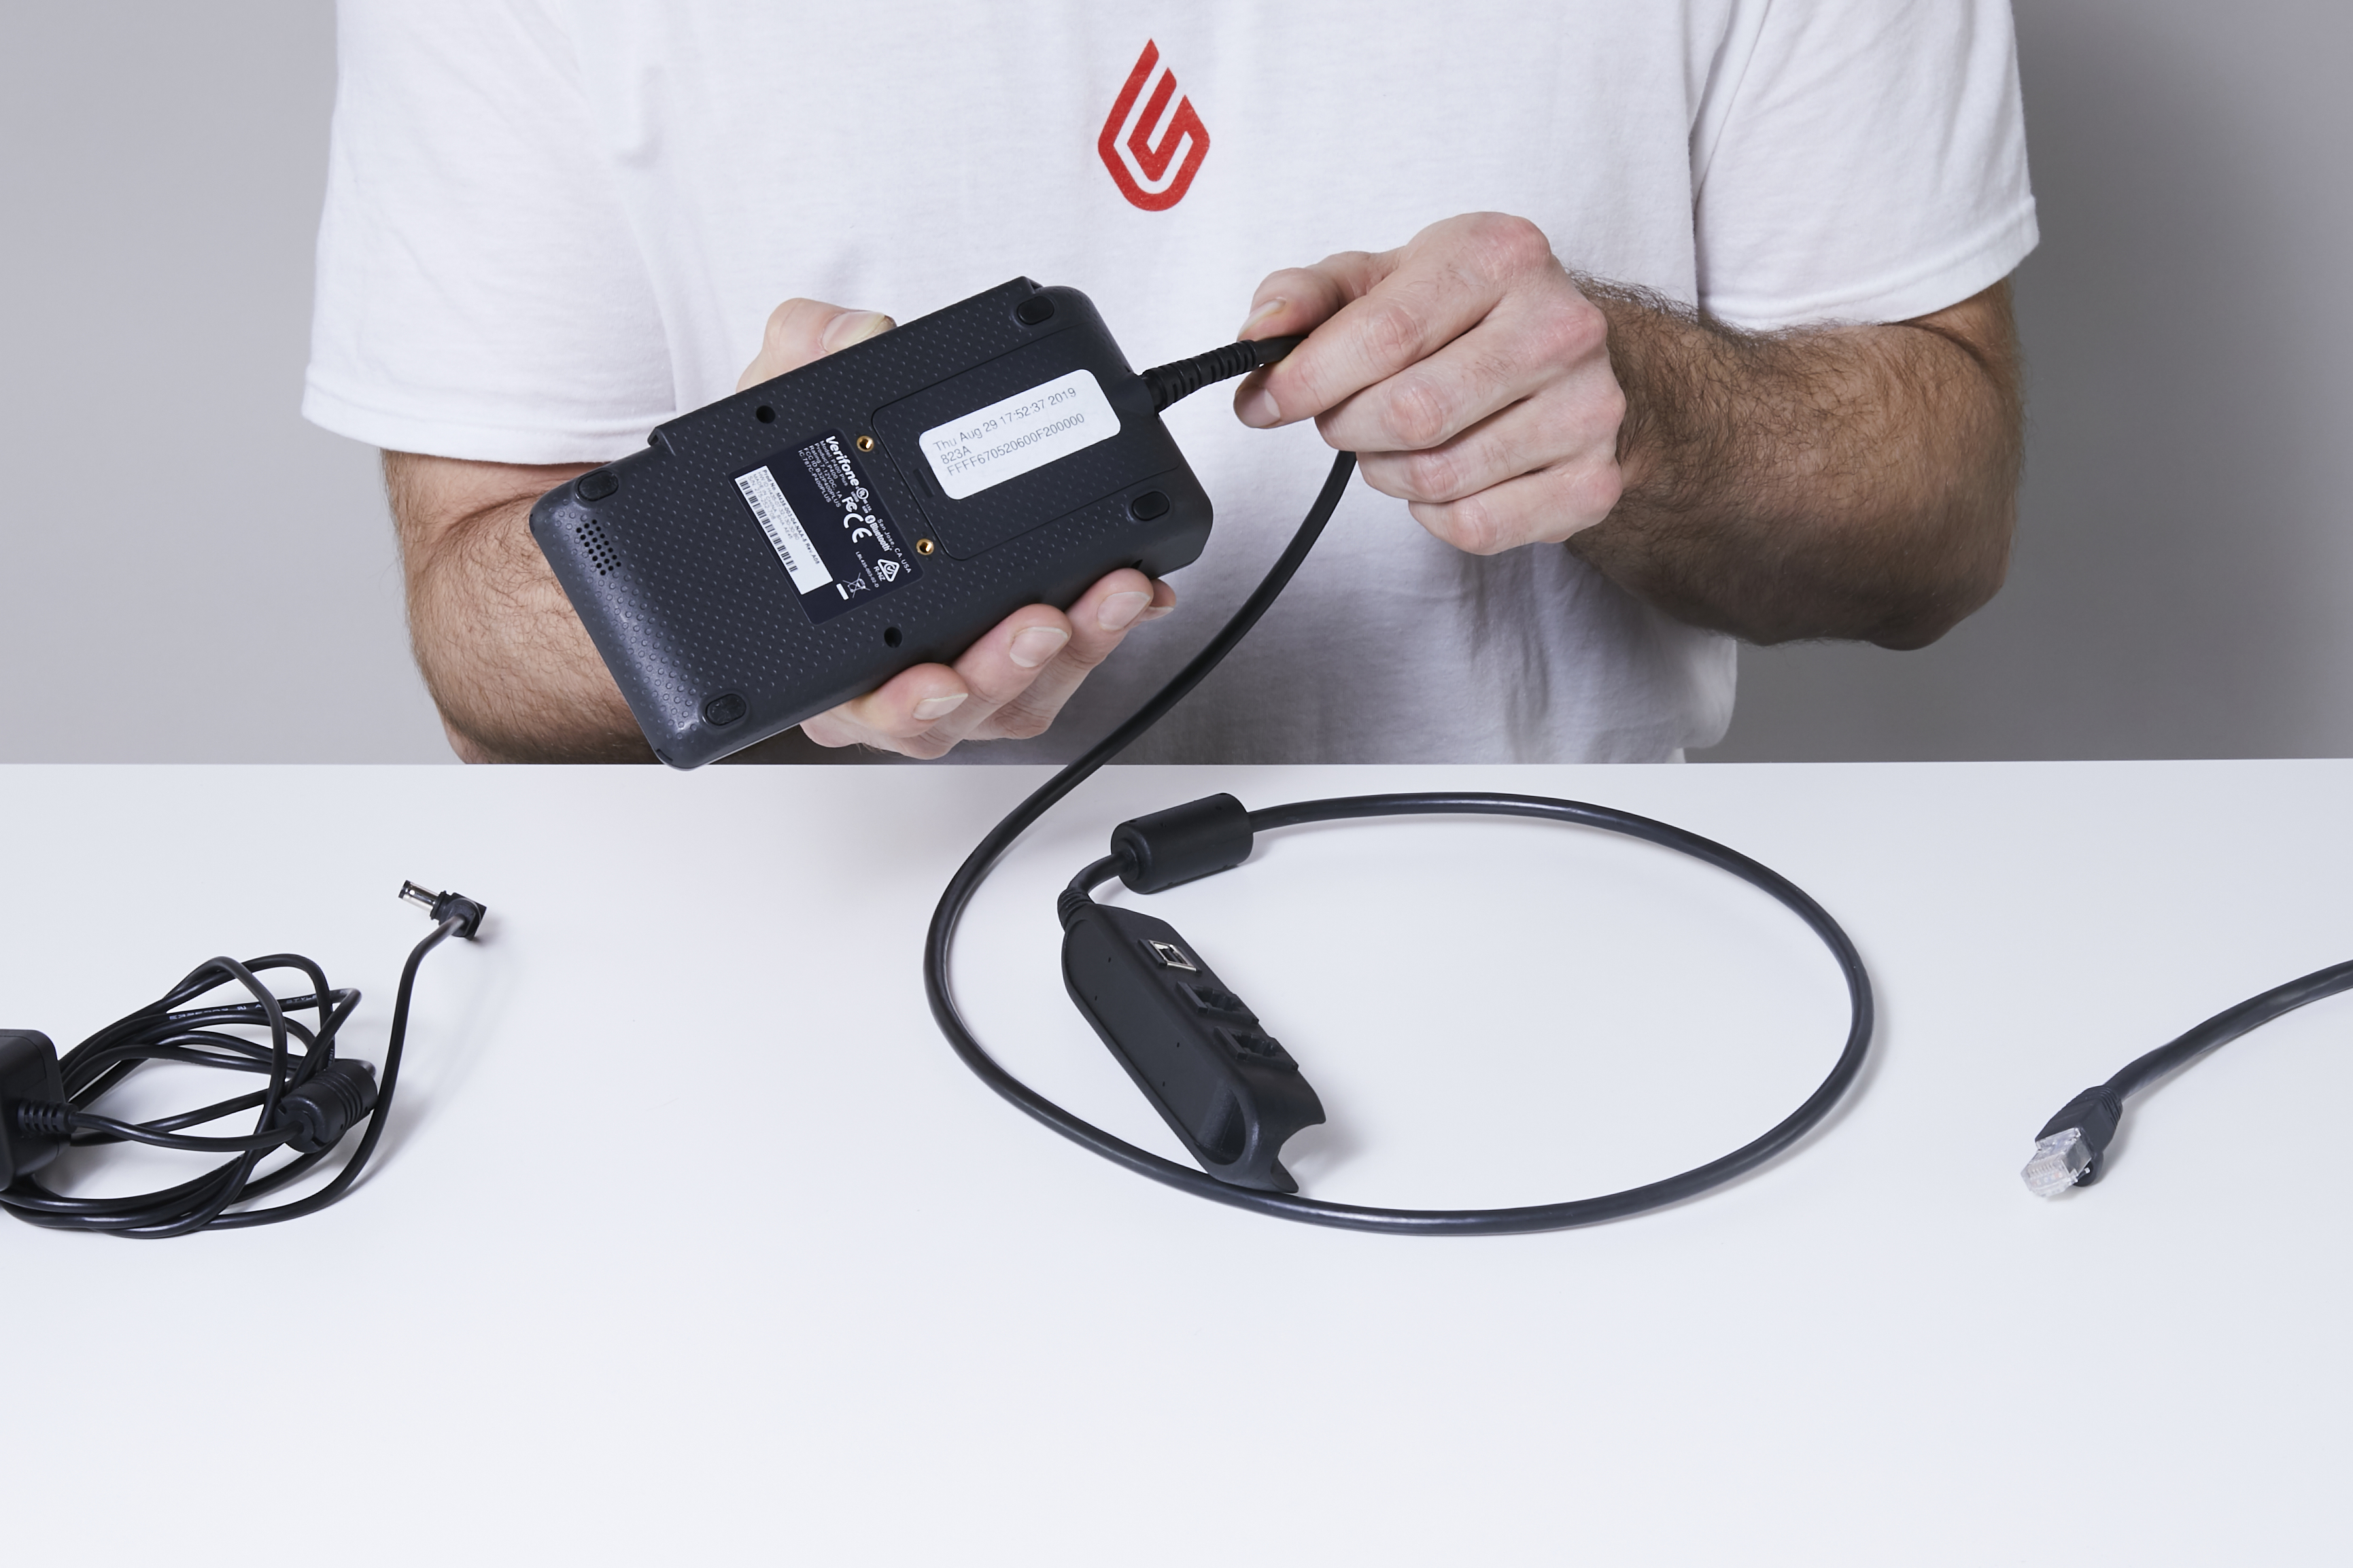
- Plug the power cable into the electrical port on the adapter cable.
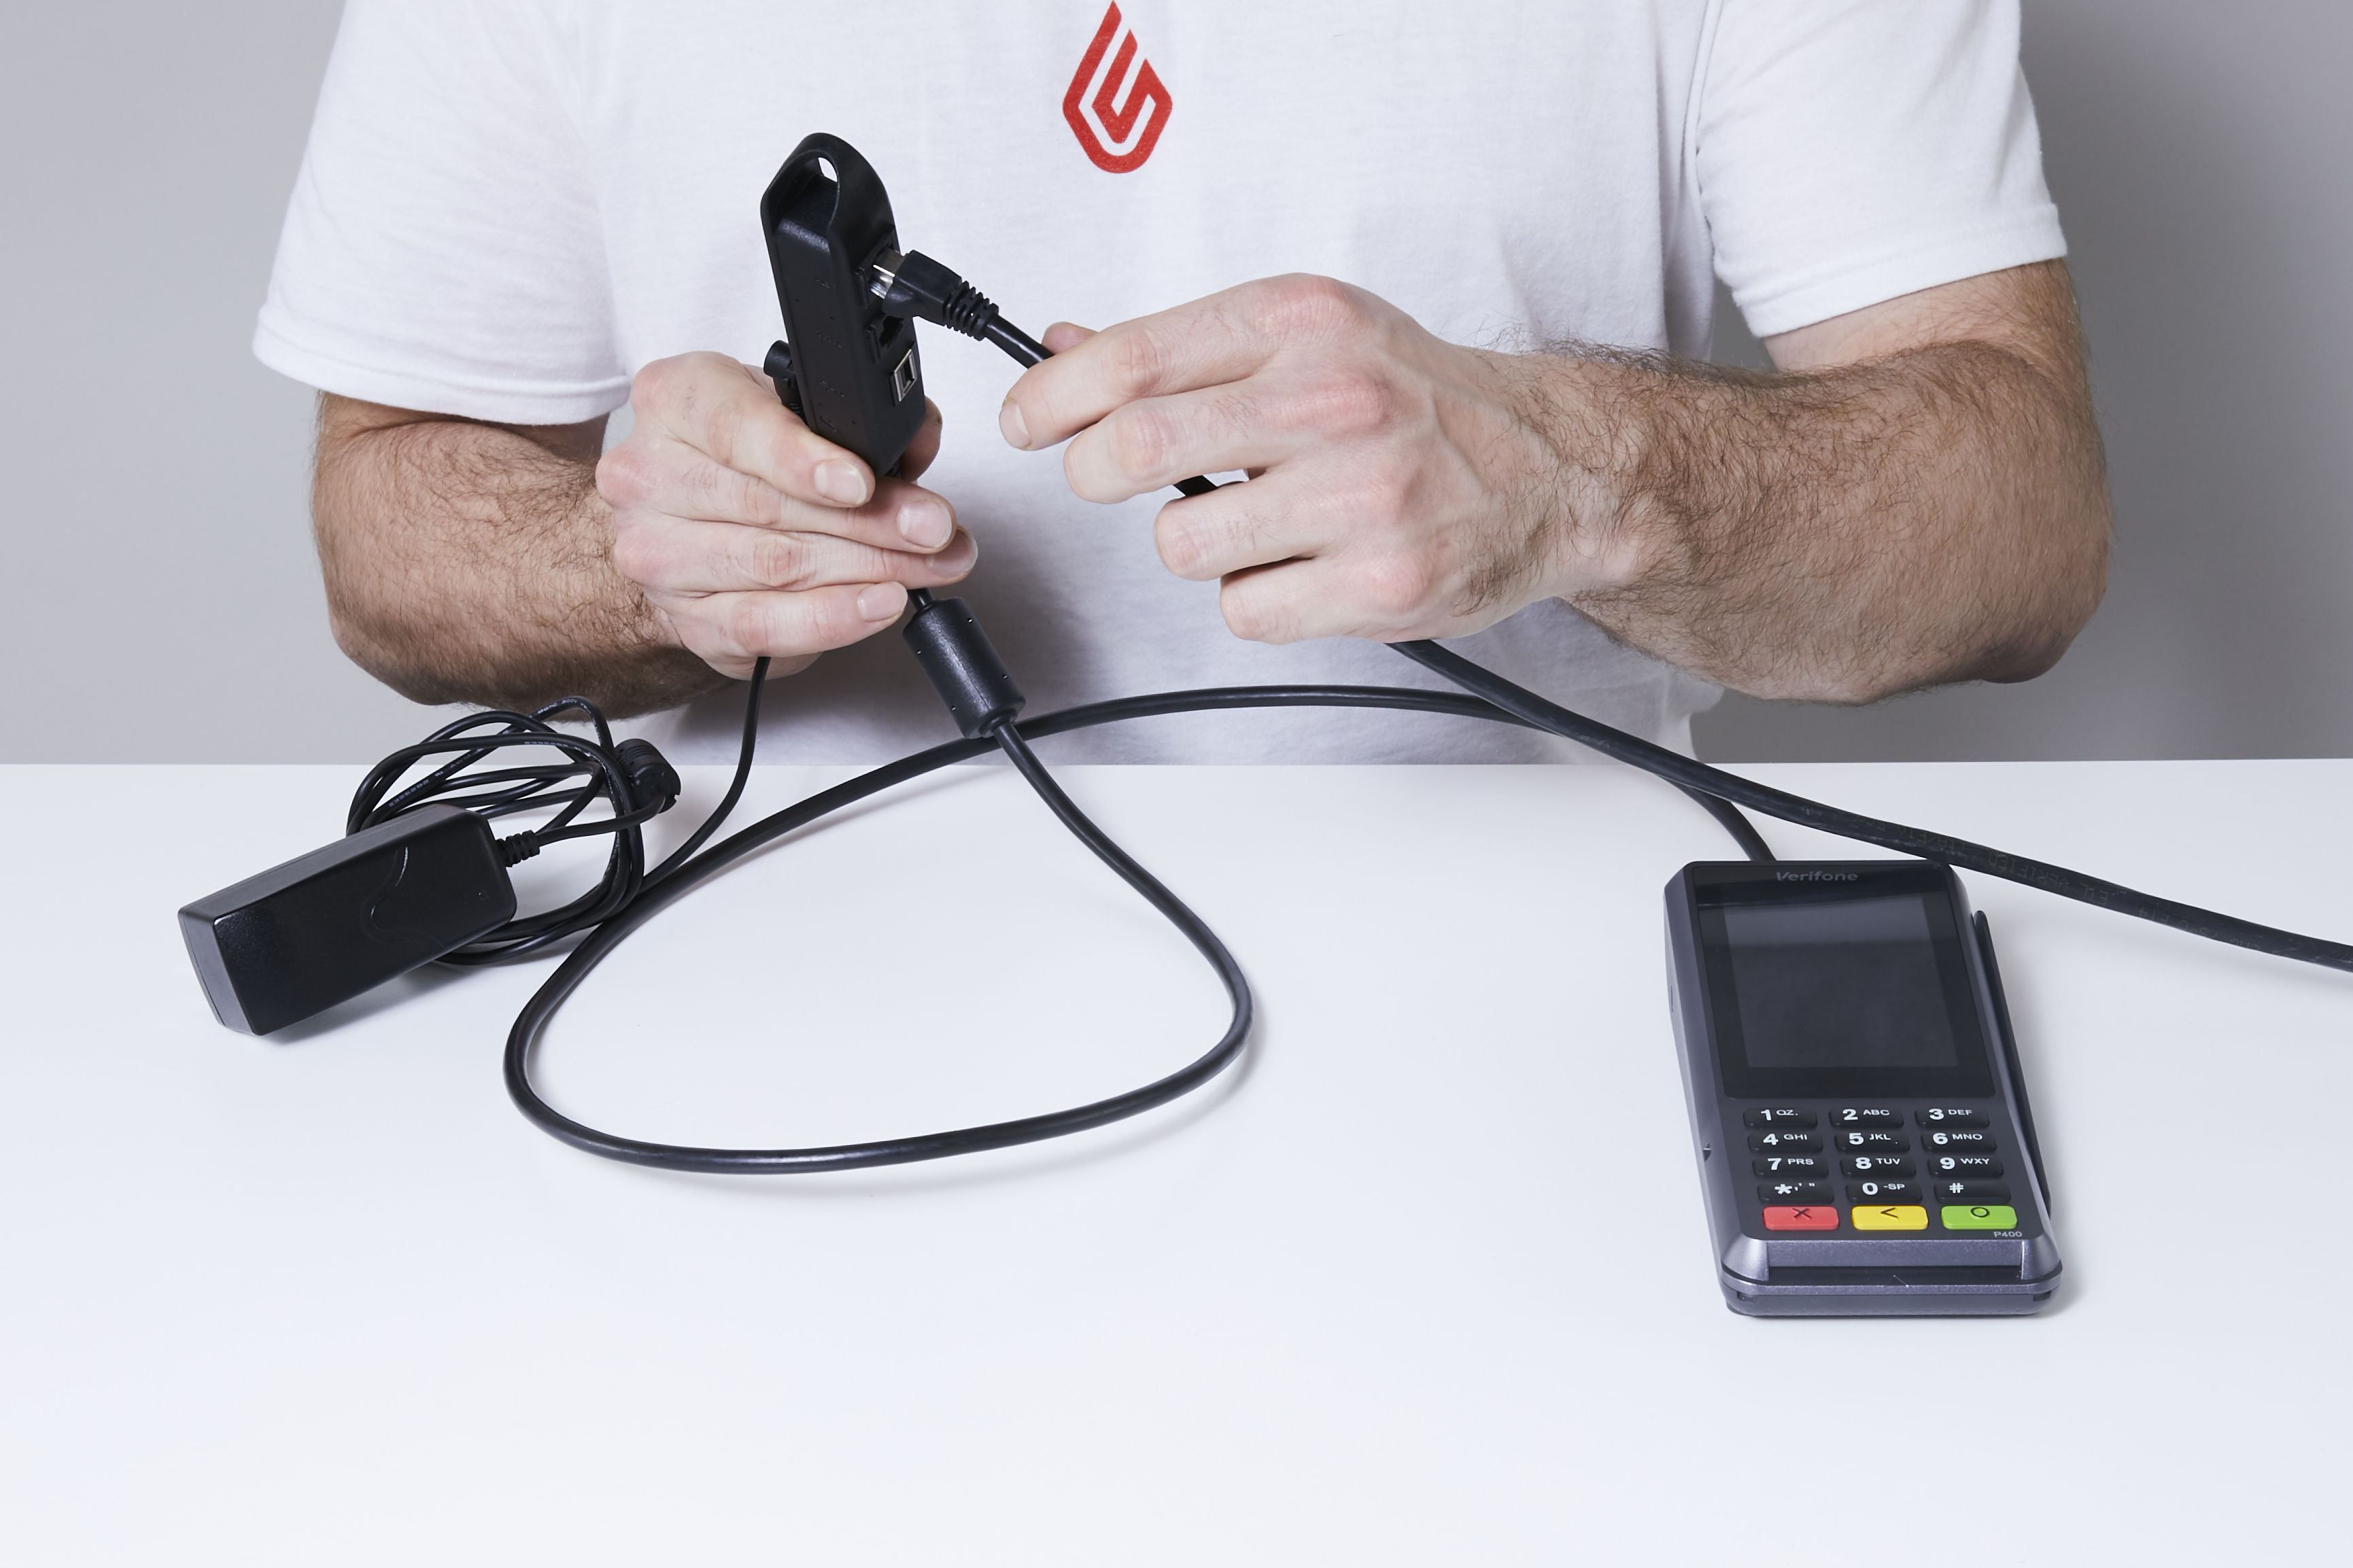
- Plug your ethernet cable into the port on the adapter cable labeled ETH.
- Plug the other end of the power cable into a power source.
The terminal will boot up immediately - there is no power switch. If the terminal is plugged in, it's on.
Pairing the terminal with Lightspeed Payments
Once the terminal has finished booting, you'll need to pair it with your account. The pairing process will differ depending on the firmware your terminal is running. Some terminals will display a Lightspeed Payments logo when booting, while others will display a Genius logo when booting.
To continue the pairing process, please select the logo that displays when your terminal is powered on.
-
If you have not already added the Lightspeed Payments Payment type, follow the steps in our article, Configuring Lightspeed Payments, before pairing your terminal.
The pairing process will require information that can be found on the terminal's device info page. You can access this page by pressing 5 then the green circle key on the terminal's number pad.
Make note of the following:
- The model
- The serial number
- The IP address
Once you have this information, you can begin the pairing process. To do so:
- In the back office, navigate to Payments > Payment terminals.
- Click Add terminal.
- Enter the terminal name which will identify this terminal in your account. It can be whatever you like it to be, but whatever name you choose should distinguish this terminal from any others in your establishment. For example, choose a name that indicates where it will be located, such as "Take-out counter."
- Enter the terminal's IP address on your network.
- Enter the terminal ID. The terminal ID consists of the model and the serial number in the following format: P400Plus-#########, where the number symbols represent the terminal's serial number. For example, if your terminal's serial number is 123-456-789, your terminal ID would be P400Plus-123456789.
- Do not check the print transaction slip checkbox. This terminal does not have an onboard printer.
- Click Save.
The terminal will now be paired with your account and you'll be able to process card payments using your payment terminal.
-
The pairing process will require information that can be found on the terminal's admin page.
To access the admin page:
- Press 000 on the number pad.
- Enter the password 9416557.
- Press the green confirmation button or tap Ok on the touch screen.
The admin overview page will display the terminal's IP address. Take note of this address as we'll need it later. Press the red cancel button to return to the idle screen.
Next, you'll need to add the terminal in Restaurant Manager.
Verifying the payment processor settings
- On Restaurant Manager, select Payments > Payment Processors from the left-hand menu.
- From the Payment Processors page, select the Lightspeed Payments button.
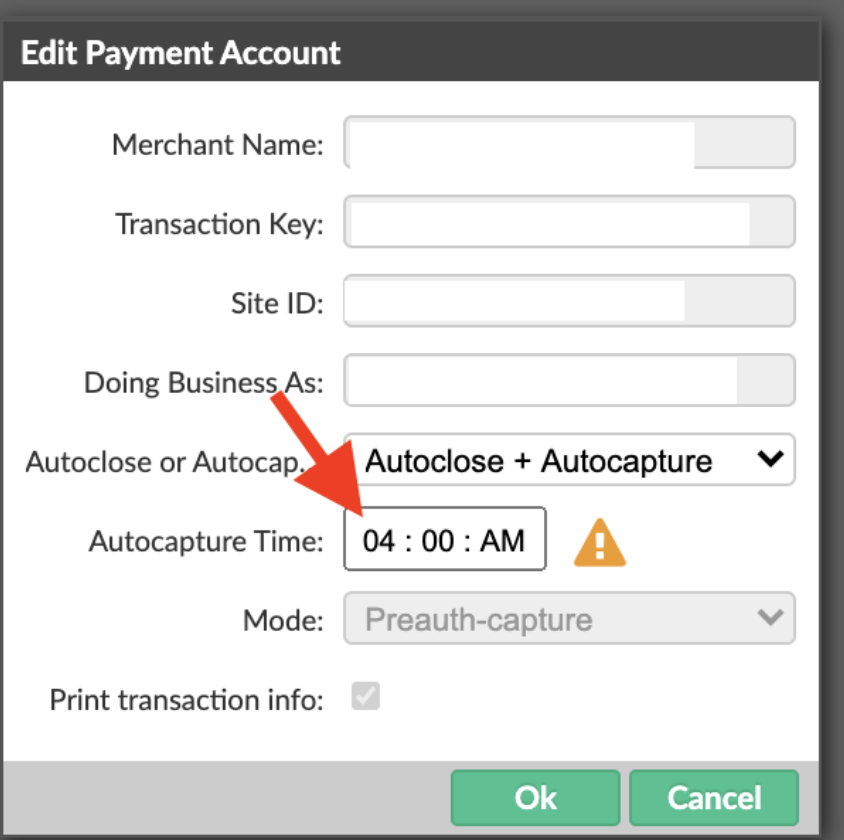
- An Edit Payment Account popup will open. Your account credentials are already applied (Username, Password, and SiteID), but from here you can adjust your payment capture schedule.
- For the setting Autoclose or Autocapture, it is recommended that you select Autoclose + Autocapture. This setting allows you to specify an AutoCapture Time (by default, the AutoCapture time is set to 4am). Up until the AutoCapture Time, payments and tips can be manually adjusted on Restaurant POS via the Orders List. After the AutoCapture Time, payments will no longer be editable in Restaurant POS or Restaurant Manager. Shortly after the AutoCapture Time, the batch will Autoclose, meaning the payments will be archived in Lightspeed Restaurant.
- Press OK to save and exit.
Adding the payment terminal
- In Restaurant Manager, select Payments > Payment Terminals from the left-hand menu.
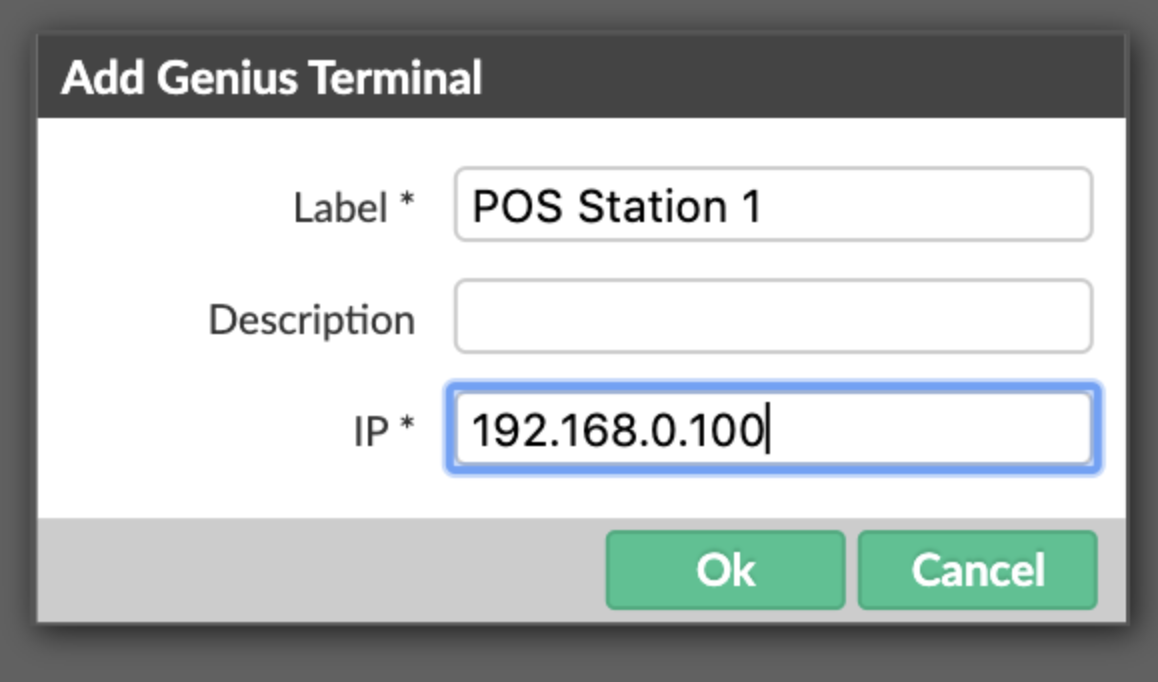
- Click Add Genius. An Add Genius Terminal popup will open.
- Enter the label which will identify this terminal in your account. It can be whatever you like it to be, but whatever name you choose should distinguish this terminal from any others in your establishment. For example, choose a name that indicates where it will be located, such as "Take-out counter."
- Enter the terminal's IP address on your network, as noted earlier.
- Click Ok.
Assigning the terminal to a POS device
- In Restaurant Manager, navigate to Devices > Devices.
- Select a POS device from the list.
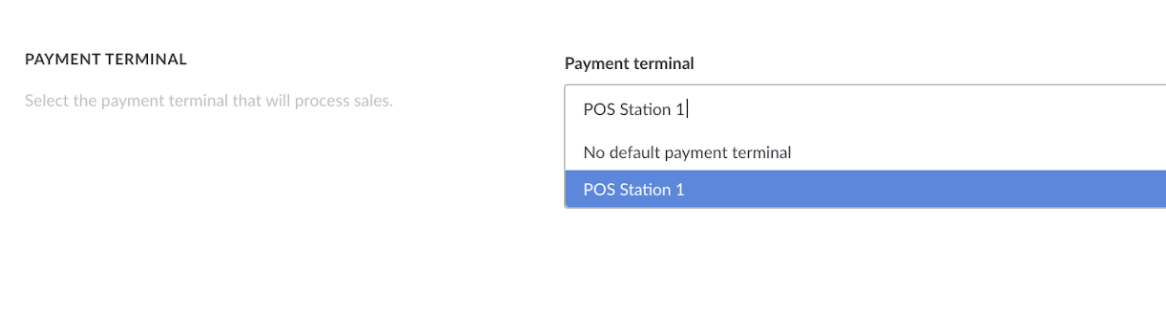
- Under Payment Terminals, use the drop-down menu to select the terminal you just added.
- Press Save when you are done.
Adding a payment type
Finally, we'll need to create a dedicated payment type button for the POS screen.
- In Restaurant Manager, navigate to Payments > Payment Types.
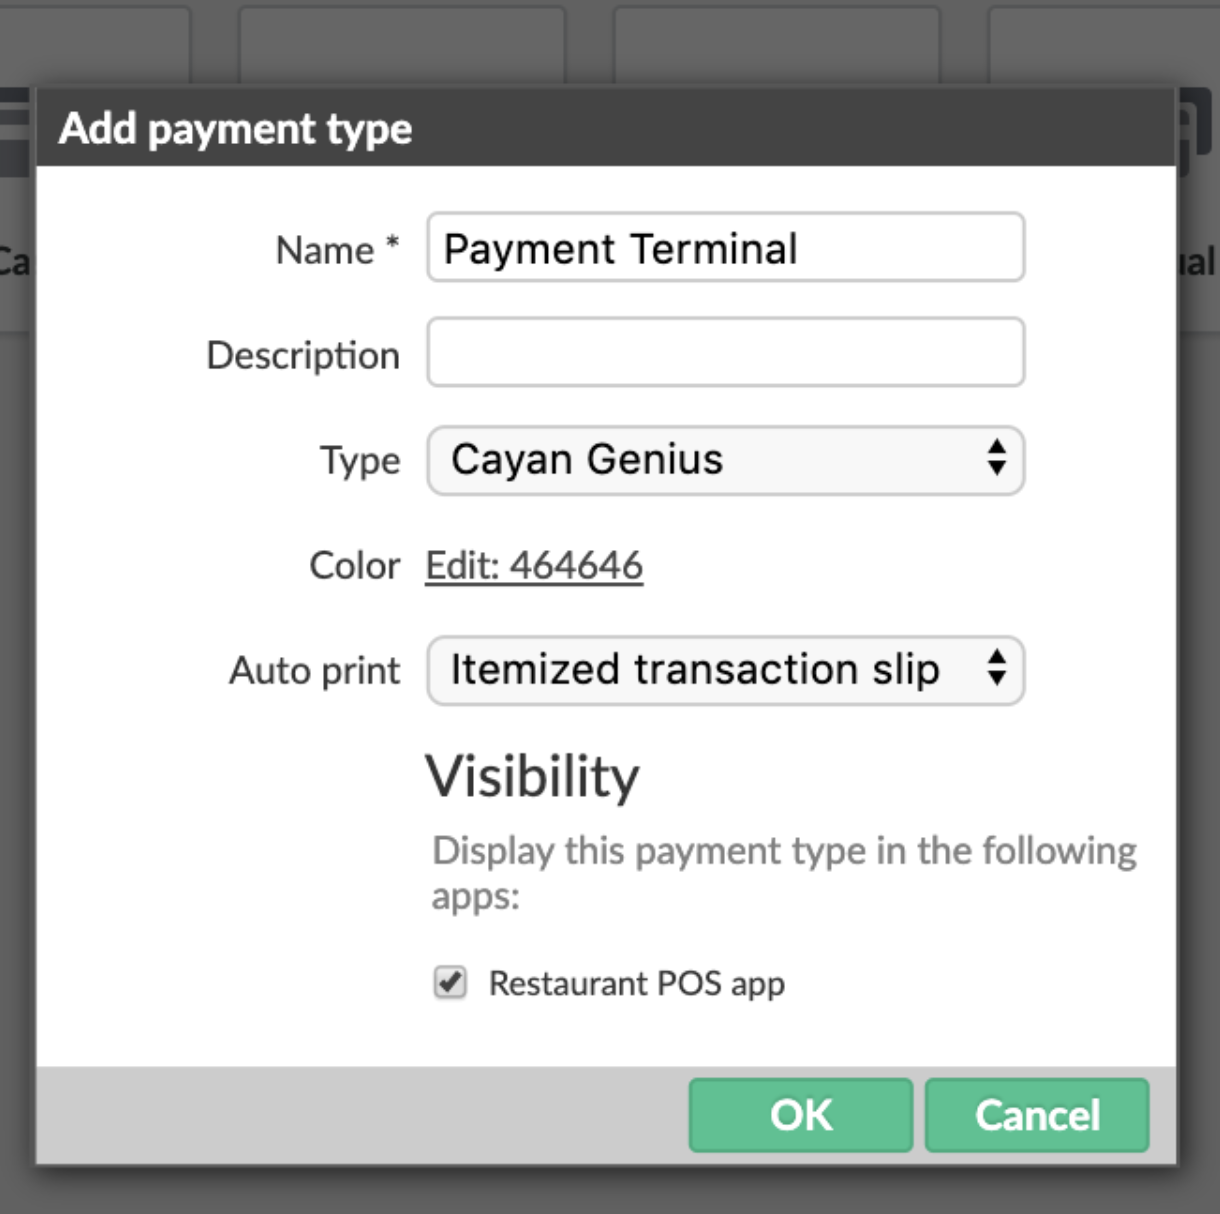
- Click Add Payment.
- Enter a Name and Description for the button. This is the name that will appear on the Payments screen for your POS users.
- Specify the payment Type as Cayan Genius.
- Press Ok to save and exit.
You are now able to process card payments on your P400+ terminal.