A shortcut category allows you to group products from different categories into one place that's also easily navigable from the POS. The shortcut category will not create duplicate products, and all reporting and settings for the original product are maintained.
Why create shortcut categories?
Popular products: Your restaurant may have products that are very popular among your customers. However, they may exist in different categories. You can pull your most popular products into one shortcut category so your team has less navigation to do on the POS.
Different behaviours: Some POS workflows are dependent on the settings of a product category (eg. printing, tax rates, discounts, etc.). You may wish for some products to be grouped together though they have different behaviours on the POS. A shortcut category will allow you to achieve this since the settings for the product's original category remain the same.
Creating a Shortcut Category
- From the left-hand menu on Restaurant Manager, navigate to Products > Categories.
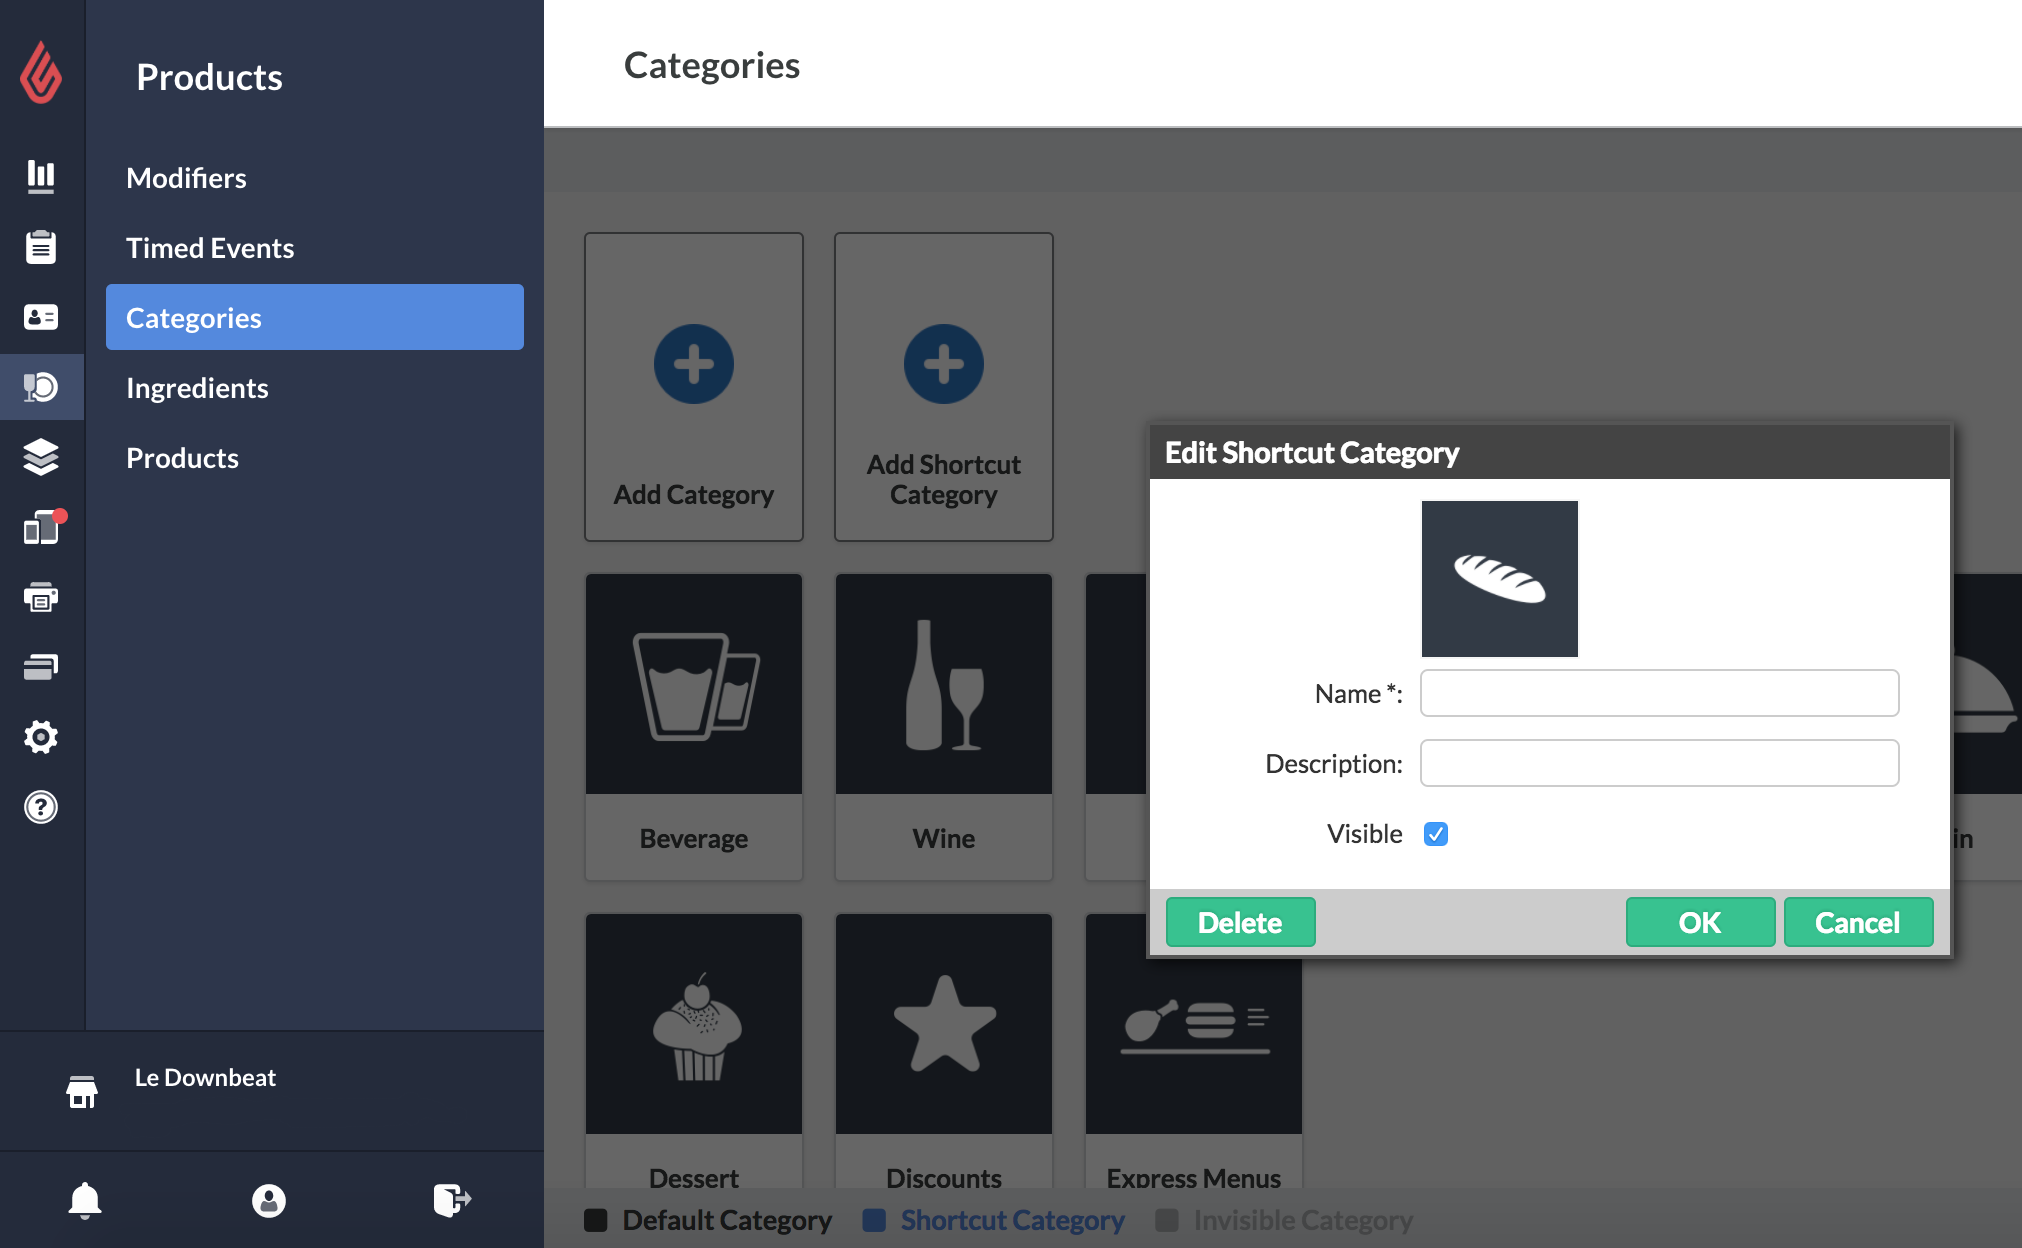
- Select Add Shortcut Category. A pop-up modal will appear on screen.
- Input the following information on the modal:
- Image: Add an image for the category button in Restaurant POS. Please note that it’s only possible to upload an image from a computer (not an iPad or iPhone, for instance).
- Name: Give the shortcut category a name to best describe the products it contains. For example, Favourites.
- Description: Add a short description for the shortcut category. For example, Most commonly ordered products.
- Visible: Select whether the shortcut category is visible within the Restaurant POS app.
- Once you have created the shortcut category, save your changes by selecting OK.
- To edit the position of the shortcut category on the POS, you can toggle on Enable sorting from the Categories page to drag and drop the shortcut category into a different place.

What’s next?
Now that you have a shortcut category, you can add products to it. See Adding Products to Shortcut Categories.