In this article
After configuring your online menu, adjust a few important settings from Restaurant Manager. These settings impact how your POS users interact with Order Ahead, and are customizable depending on your preferred workflows.
Online ordering settings
You have the option to specify if your incoming Order Ahead transactions are manually or automatically accepted on the POS. We recommend that you select incoming orders to automatically accepted to reduce the manual steps required on your POS. Please note that these settings must be applied for each POS device at your establishment.
- Log in to Restaurant Manager with your admin credentials.
- Navigate to Devices > Restaurant app settings from the left-hand menu.
- Select the device profile you want to apply these settings towards.
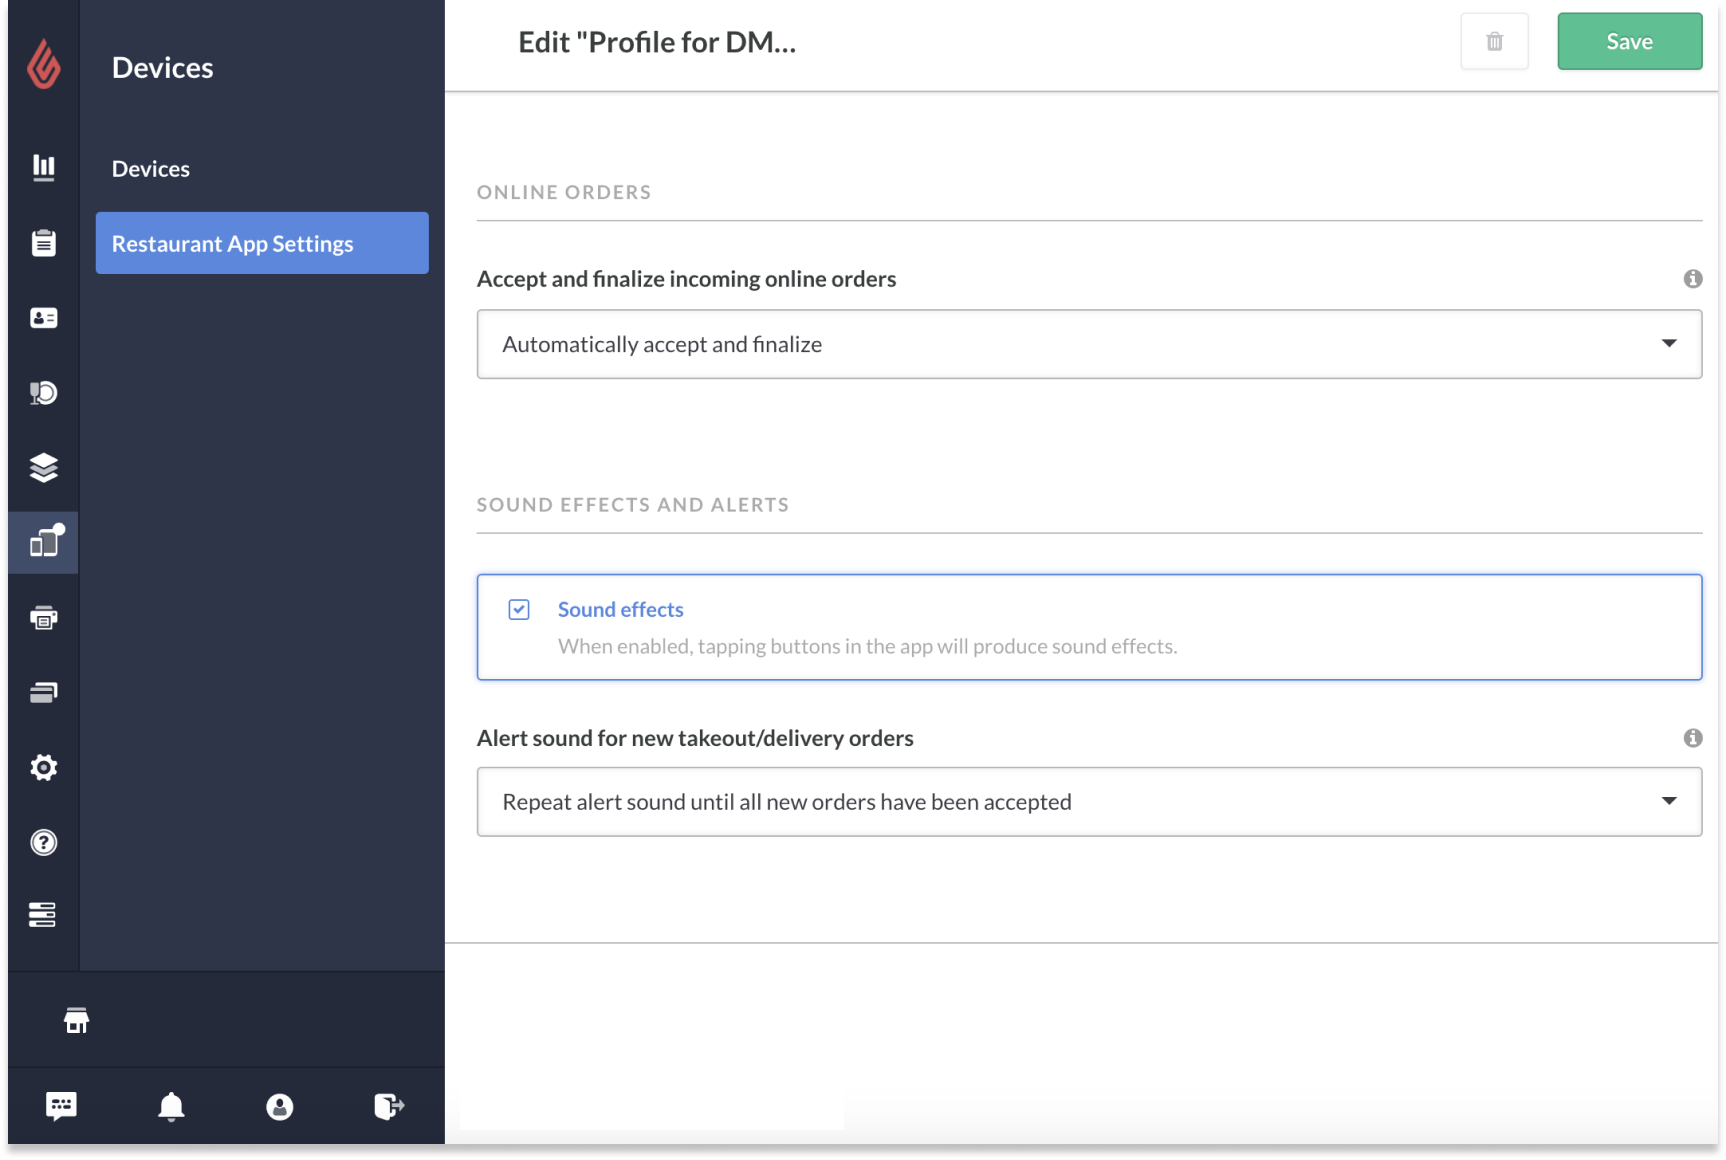
- From the Restaurant App Settings page for the selected device, scroll down to General Settings.
- Under the Accept and finalize incoming online orders setting, select how you want your orders to be processed. For example, Automatically accept means incoming orders will be automatically sent to the kitchen or bar, so POS users don't need to manually accept them.
Important: Automatically accept and finalize is not supported for use with Order Ahead. Instead, use Automatically accept.
- In the same group of setting, tap the checkbox beside Disable device sleep, to ensure that the device does not go to sleep while running Restaurant POS. This will ensure your incoming online orders are received.
- If you want the device to play a notification bell sound for each incoming online orders, tap the checkbox beside Sound effects and from the drop-down menu, specify how you want the notifications to sound.
💡 What's the difference between online ordering settings?
The customer-facing order status (Order placed, Order in progress, Order complete) is dependent on the online ordering settings configured from Restaurant Manager:
- If your device profile is set to Manually accept and finalize online orders: the order is sent to your POS where a user must manually accept and finalize the incoming order. Only when the order is accepted and finalized will the customer see a status update on Order Ahead. We don’t typically recommend this option as there are others that will automatically accept and/or finalize orders.
- If you device profile is set to Automatically accept online orders: the order is automatically received by the POS; the customer-facing message on Order Ahead auto-updates to "We are preparing your order." Only once a POS user finalizes the receipt does the message on Order Ahead change to "Order ready for pick up." Use this option with Order Ahead.
- The Automatically accept and finalize option is not supported for use with Order Ahead. If using Lightspeed Delivery and not Order Ahead, this option will automatically send orders to the kitchen or bar and close them out after they appear on the POS. Only orders that contain a payment can be auto-finalized.
User permissions
Depending on your POS workflow preferences, there may be a few user settings you want to verify. For instance, if your online orders are set to be manually accepted or finalized on the POS, we recommend enabling the following user permissions:
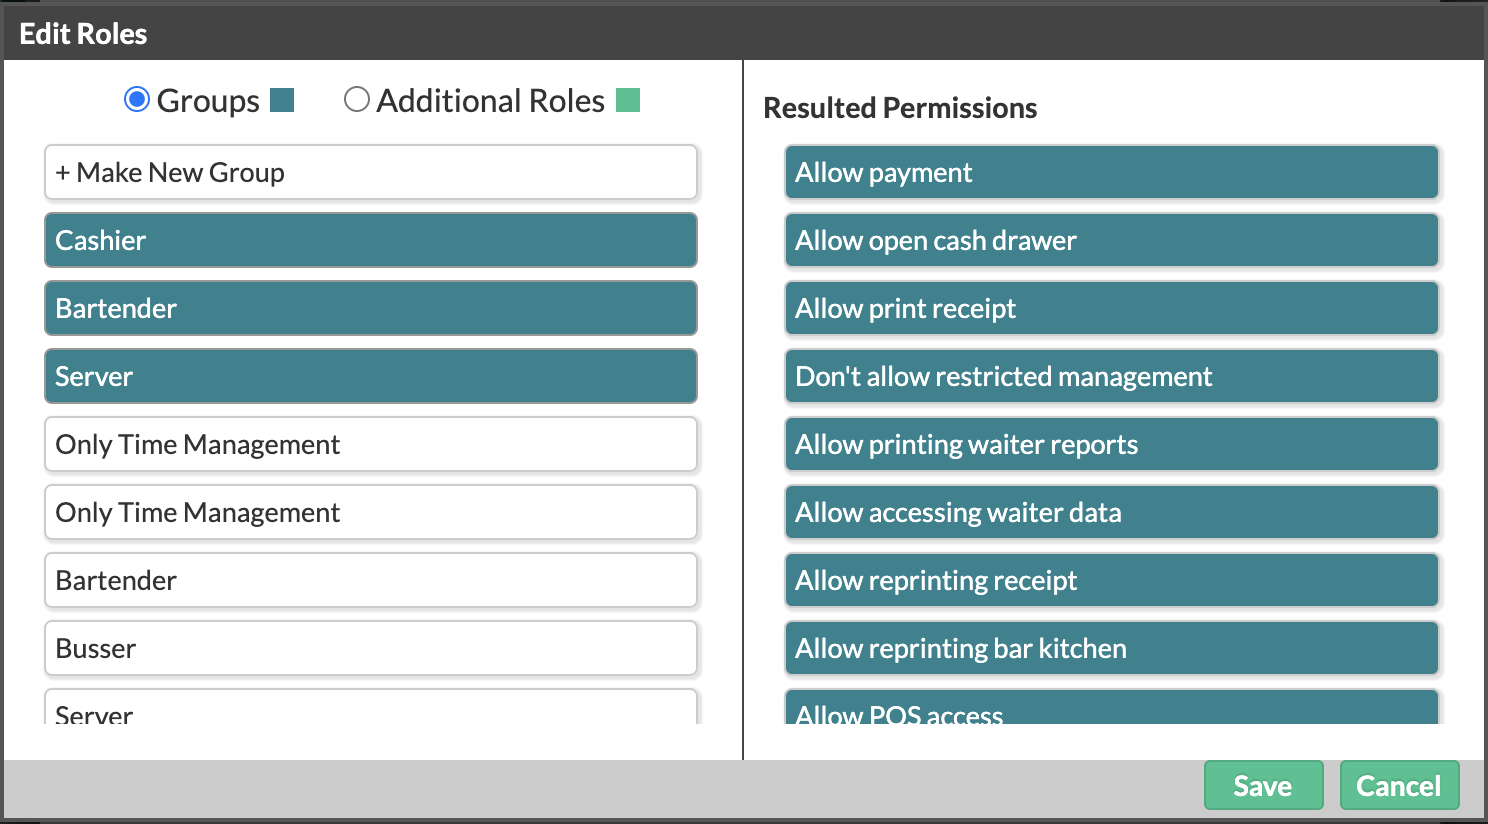
- Navigate to Restaurant Manager > Users > User groups. Select the user group you wish to edit the permissions for.
- To allow users to accept and finalize incoming orders, select Allow edit finalized receipts and Allow edit receipts other users.
- To allow users to cancel or issue refund, select Allow void receipt. We recommend this setting for manager-type users.
For more information on user groups and permissions, please see Assigning user groups and Assigning user roles.
Order tickets
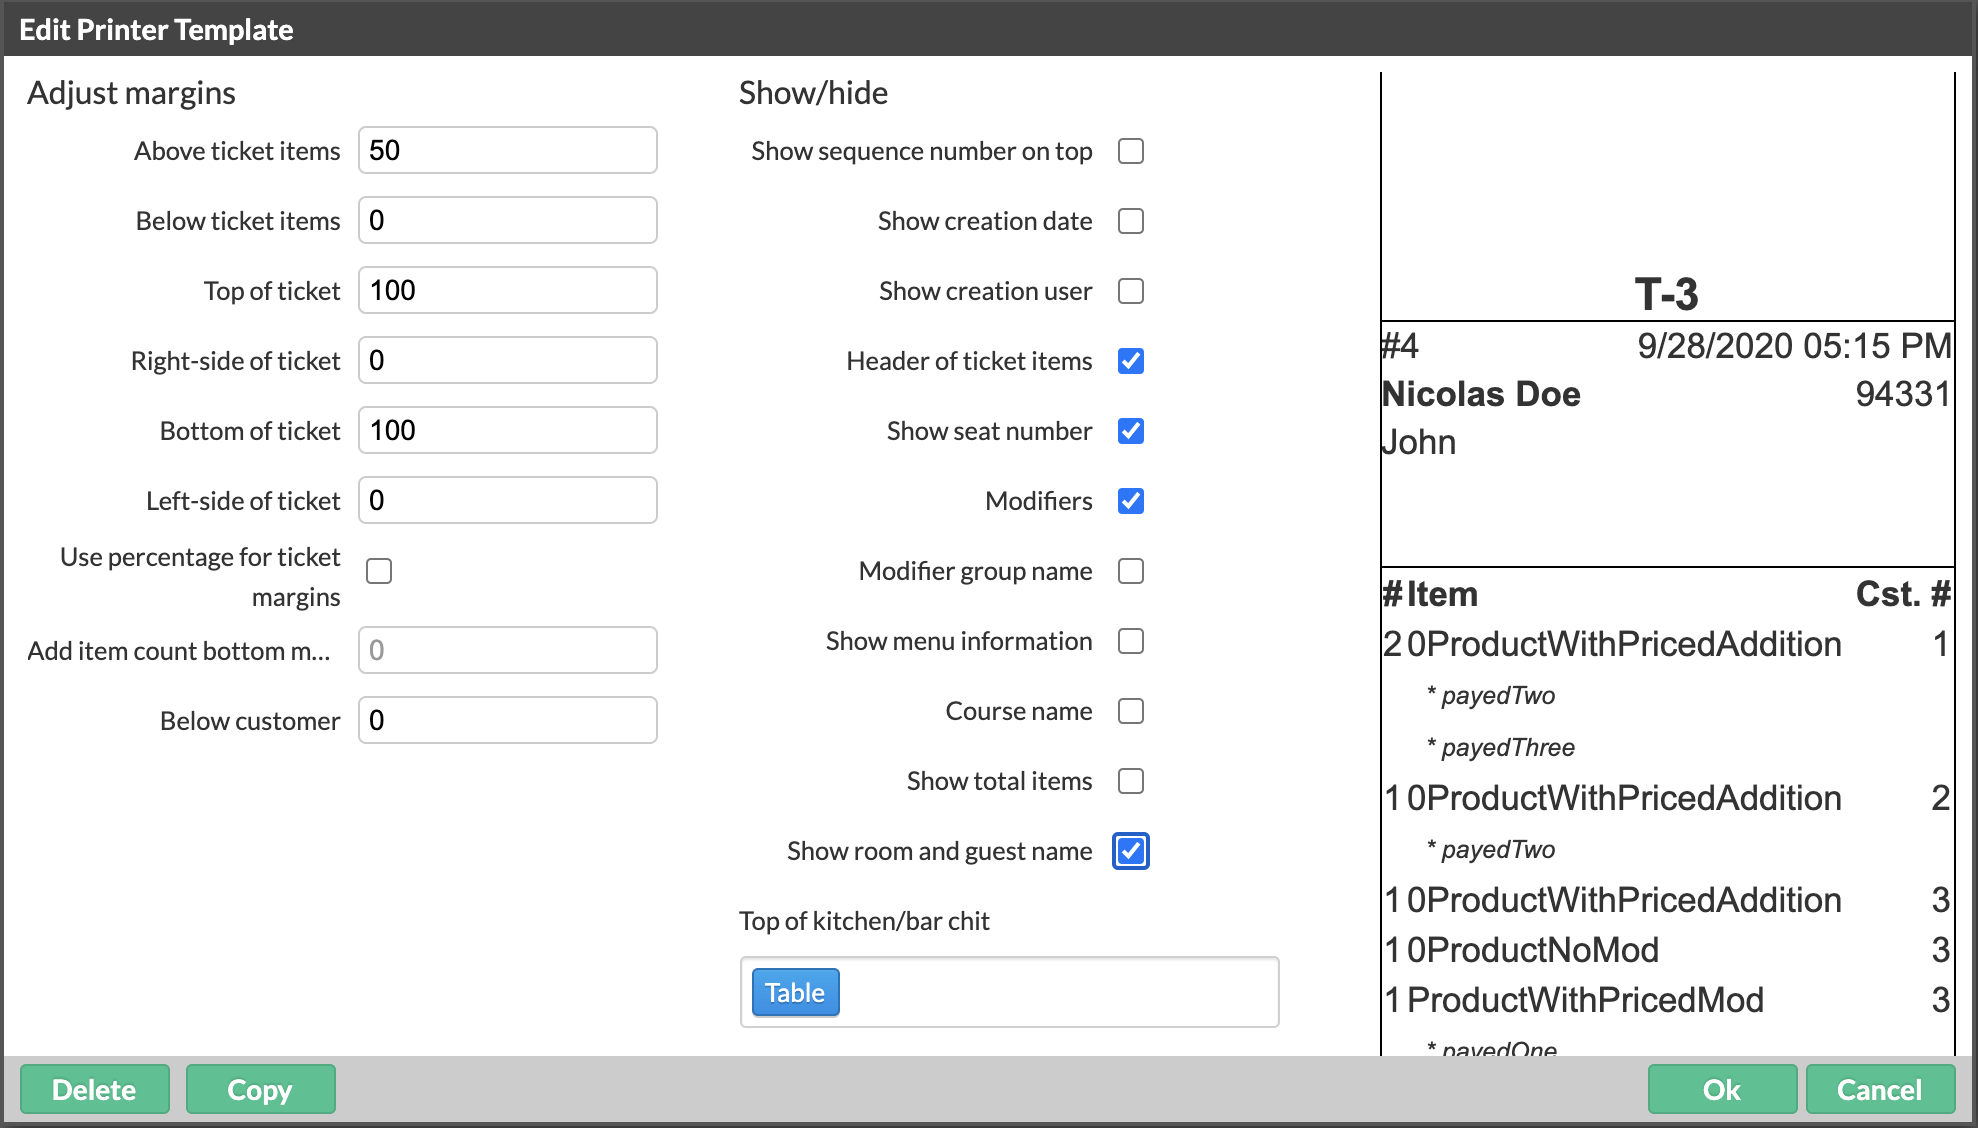
When a customer places an order through Order Ahead, their name and basic contact information will be attached to the transaction. In order for this customer name to display on incoming prep tickets, make sure your bar or kitchen printing template has the Show guest and room name setting enabled.
- Navigate to Restaurant Manager > Printing > Printer Templates. Select the printing template associated with your prep station (eg. Bar or Kitchen printer template).
- From the receipt template popup, scroll down to the Advanced Settings and enable Show guest and room name.
- When done editing the template, press Save.
For more information on printer templates, see Advanced printer template settings.
What's next?
Is your Order Ahead menu all set up? See Creating or editing your online menu for more info.
Then, navigate to the Order Ahead Manager to set up payments with Stripe, specify your location and hours, and customize your Order Ahead design.
Already set up? Learn more about using Order Ahead with Restaurant POS.