After completing initial setup, learn how to manage your delivery menus and products in Lightspeed Delivery. Sync new and updated products from Restaurant Manager, set menu availability to determine when customers can place orders, publish menus to push changes live to your delivery channels, and much more.
Table of contents:
- Syncing products from Lightspeed Restaurant
- Managing menus
- Managing menu categories and products
- Setting menu availability
- Publishing menus
Syncing products from Lightspeed Restaurant
After adding, editing, or deleting products in Restaurant Manager, sync products to apply those changes in Lightspeed Delivery.
- Log in to the Lightspeed Delivery Dashboard.
For help, visit our Logging in to the Lightspeed Delivery Dashboard article.
- From the navigation bar, click Locations.
- Select a location.

- Click Sync products to sync all products from Lightspeed Restaurant to Lightspeed Delivery.
- New products added to your categories in Restaurant Manager will be added to Lightspeed Delivery.
- Changes made to a product's name, PLU, image, price, tax rate, or description in Restaurant Manager will sync to Lightspeed Delivery.
- Items deleted from a category in Restaurant Manager will be removed from Lightspeed Delivery.
- (Optional) From the navigation bar, click Operations and select Operation reports to see details of which items were added, modified, or deleted due to the sync.
- (Optional) Follow the steps in the Managing menu categories and products section to add any new products to a menu.
- (Optional) Repeat steps 3–6 for each other desired location.
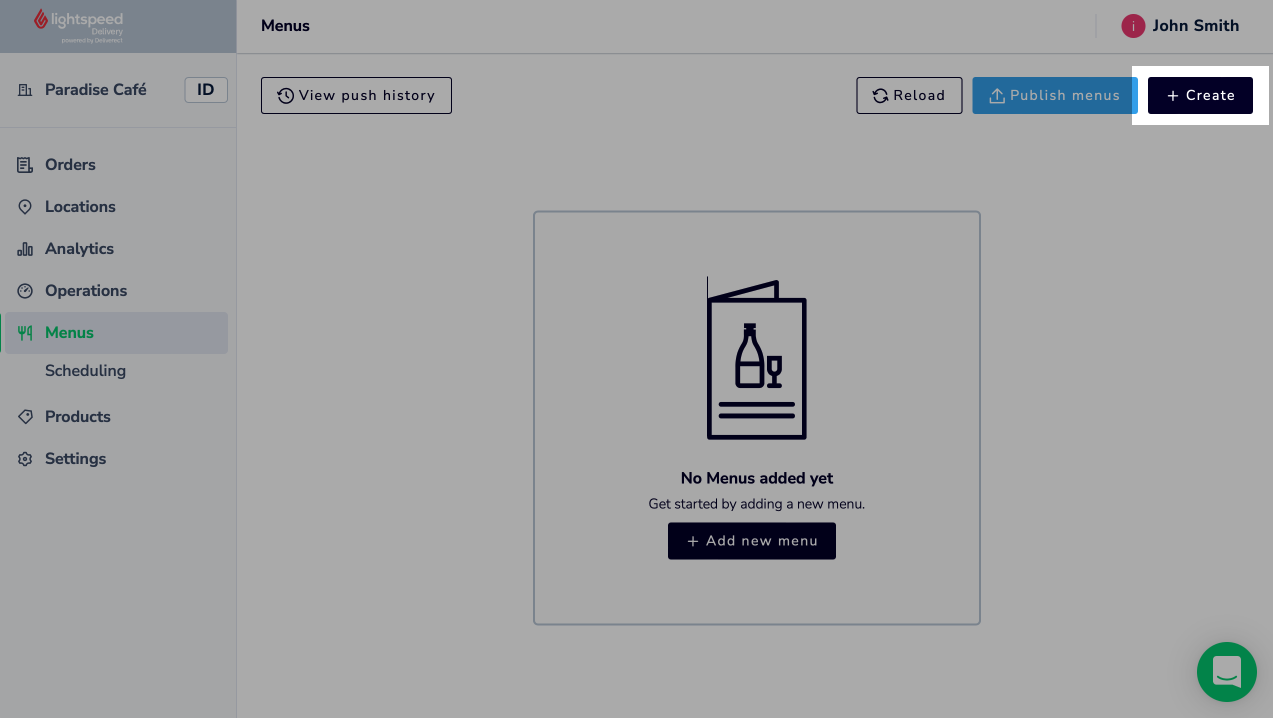
Managing menus
Create a new menu in Lightspeed Delivery for each combination of products you want to sell during a specified time period (for example: a Breakfast menu, Lunch menu, etc.). Edit an existing menu to change its name, categories, products, or other related options. Delete a menu if you no longer need it.
- Log in to the Lightspeed Delivery Dashboard.
For help, visit our Logging in to the Lightspeed Delivery Dashboard article.
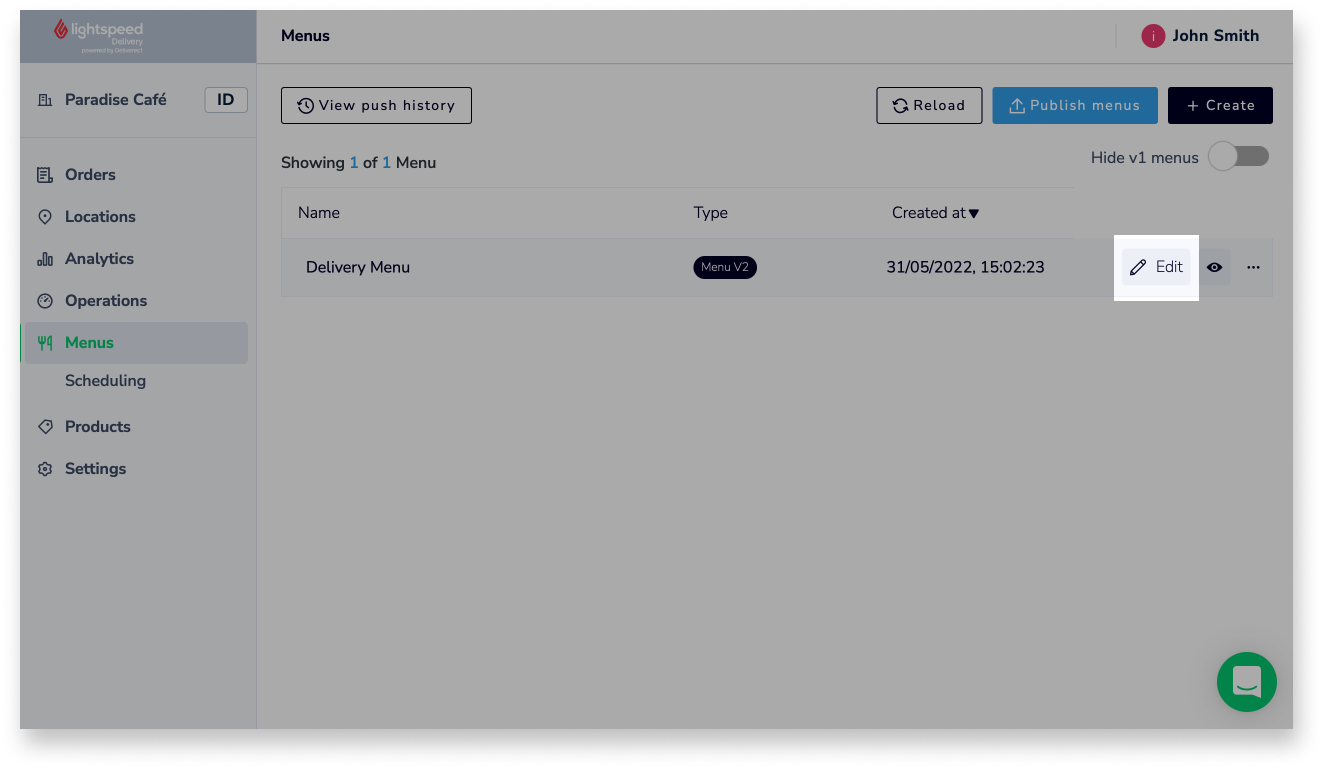
- From the navigation menu, click Menus.
- To create, edit, or delete a menu, click a button below to show the desired set of steps, then follow along.
Creating a new menu
- Click Create.
- Select Create menu from the pop-up message.
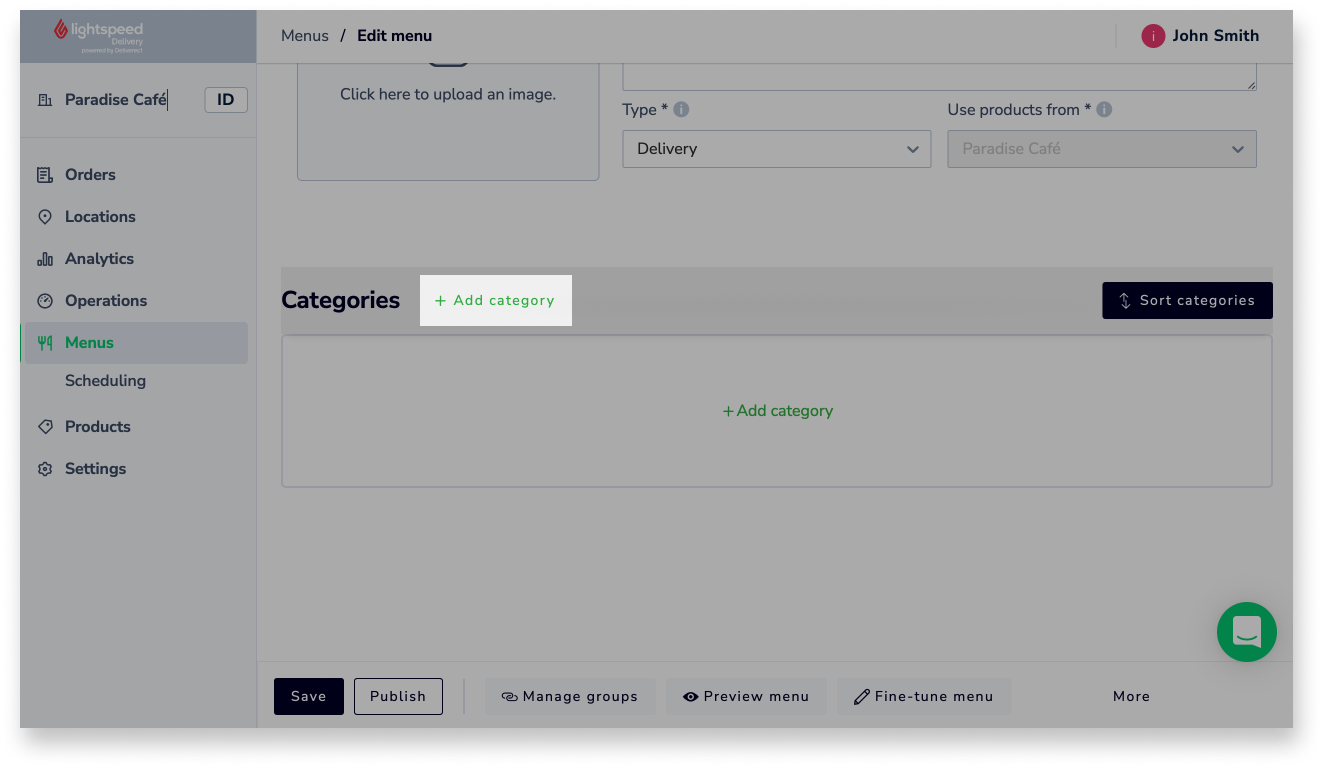
- Fill in the menu information fields. For a description of each field, see the Menu info fields table below.
- Click Save menu and create categories to create the menu.
- Follow the steps in the Managing menu categories and products section to add categories and products to the menu.
Editing an existing menu
- Click Edit next to an existing menu.
- Make changes to the menu information, or manage the menu categories and products by following the steps here.
- Click Save to save changes.
- Publish the menu to sync the changes to selected delivery channels. For detailed help, see Publishing menus.
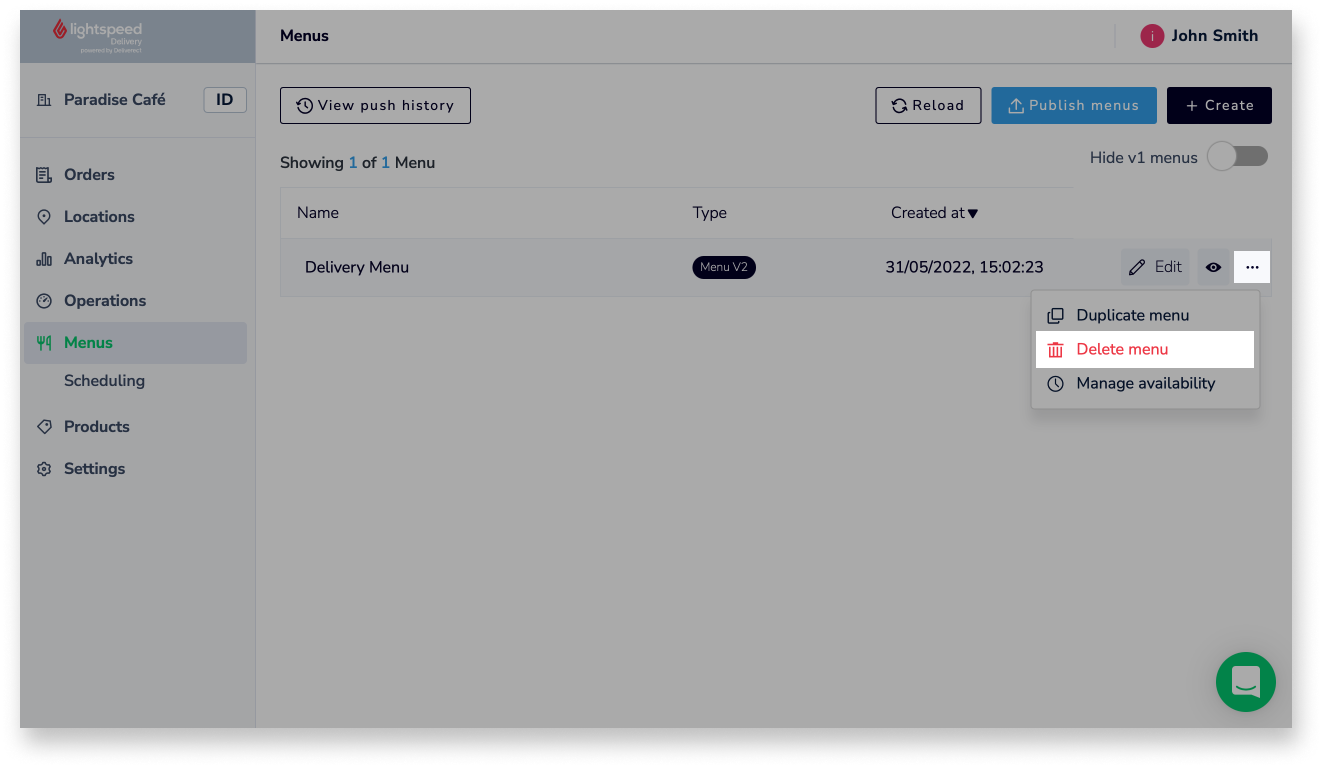
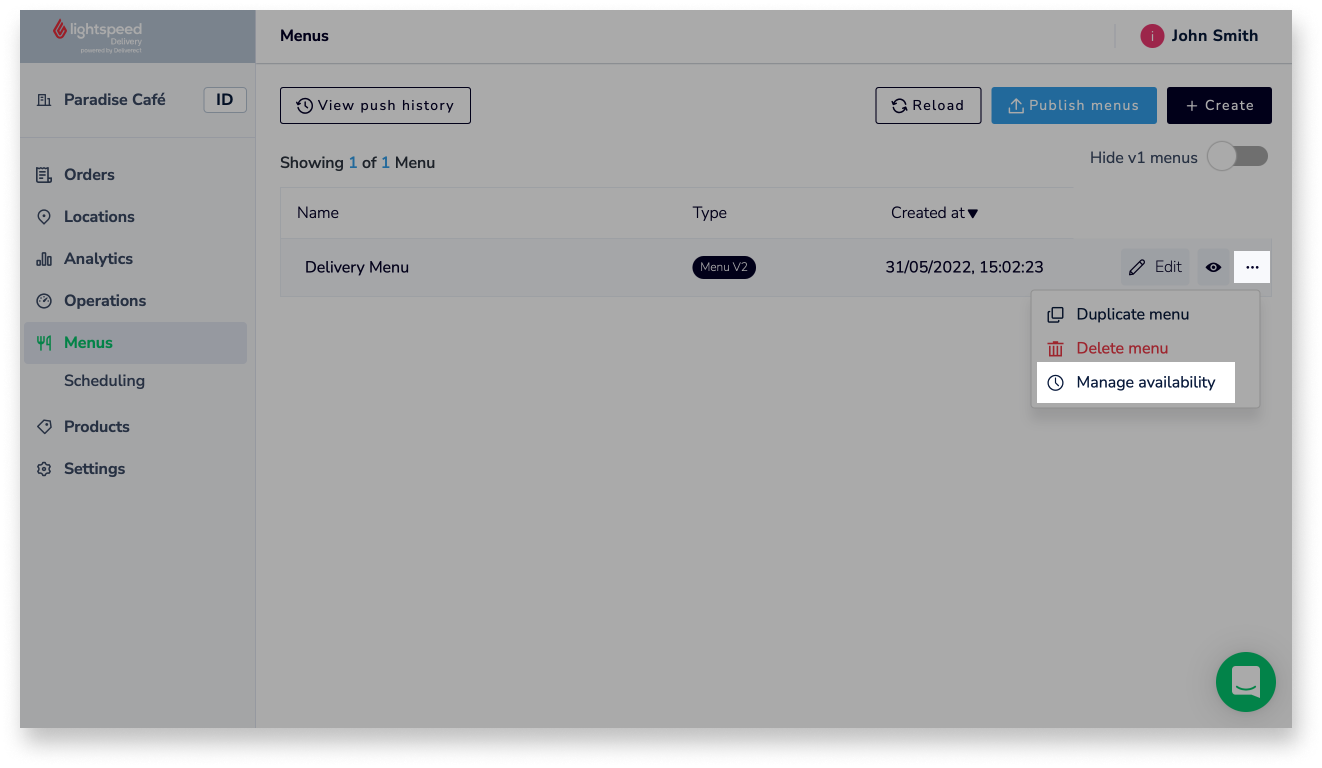
Deleting an existing menu
- Click the three-dot icon next to an existing menu.
- Select Delete menu.
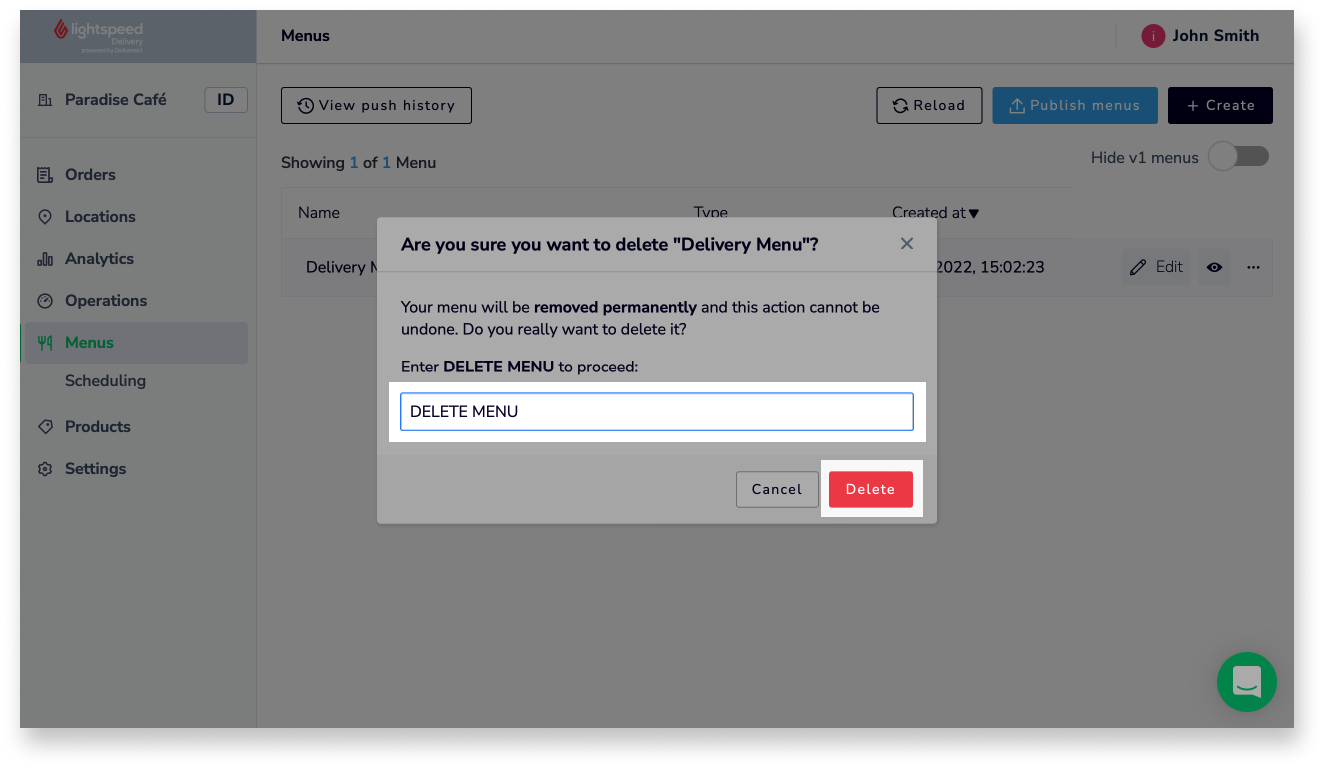
- Review the warning displayed in the pop-up message.
Important: This action cannot be undone. Deleted menus must be manually re-created if you want to use them again.
- Type DELETE MENU into the text field, then click Delete to confirm.
- Click Create.
Menu info fields
| Field | Description |
|
Menu image (optional) |
Click the box to upload an image that will appear on the menu in your delivery channels. Menu images should follow the guidelines listed on the Deliverect Help Center. |
|
Menu name (required) |
Name of the menu as it will appear in each delivery channel. |
|
Internal menu name (optional) |
Name of the menu as it will appear in Lightspeed Delivery. Leave blank to use the Menu name. |
|
Menu description (optional) |
Additional details about the menu that will appear in your delivery channels. |
|
Type (required) |
How the menu will be used: for Delivery, Pickup, Delivery and pickup, Curbside pickup, or Eat In. This categorizes the menu within Lightspeed Delivery and does not affect how it's displayed on delivery channels. |
|
Use products from (required) |
Select the location the menu will be used for. Only products from the chosen location can be added to the menu. |
Managing menu categories and products
Categories are groupings used to organize products on your Lightspeed Delivery menus, and products are the actual items customers order.
Add new categories to your menu, edit existing categories to change their name or other details, or delete categories to remove them from the menu. Add new products synced from Lightspeed Restaurant to make them available to customers, sort existing products to change the order they appear in, or remove products to delete them from the menu.
- Follow steps 1–3 in the Managing menus section to create or edit a menu.
- To add, edit, or delete a category, click a button below to show the desired set of steps, then follow along.
Adding a new category
- Click Add category.
- Enter a Name for the category. This is what the category will be called on each delivery channel.
- (Optional) Enter a description and upload an image for the category.
Both the Description and Category image will appear in your delivery channels.
- Click Add category to create the category.
- Follow step 4 to add products to the category.
Editing an existing category
- Click the
 edit icon next to the name of an existing category.
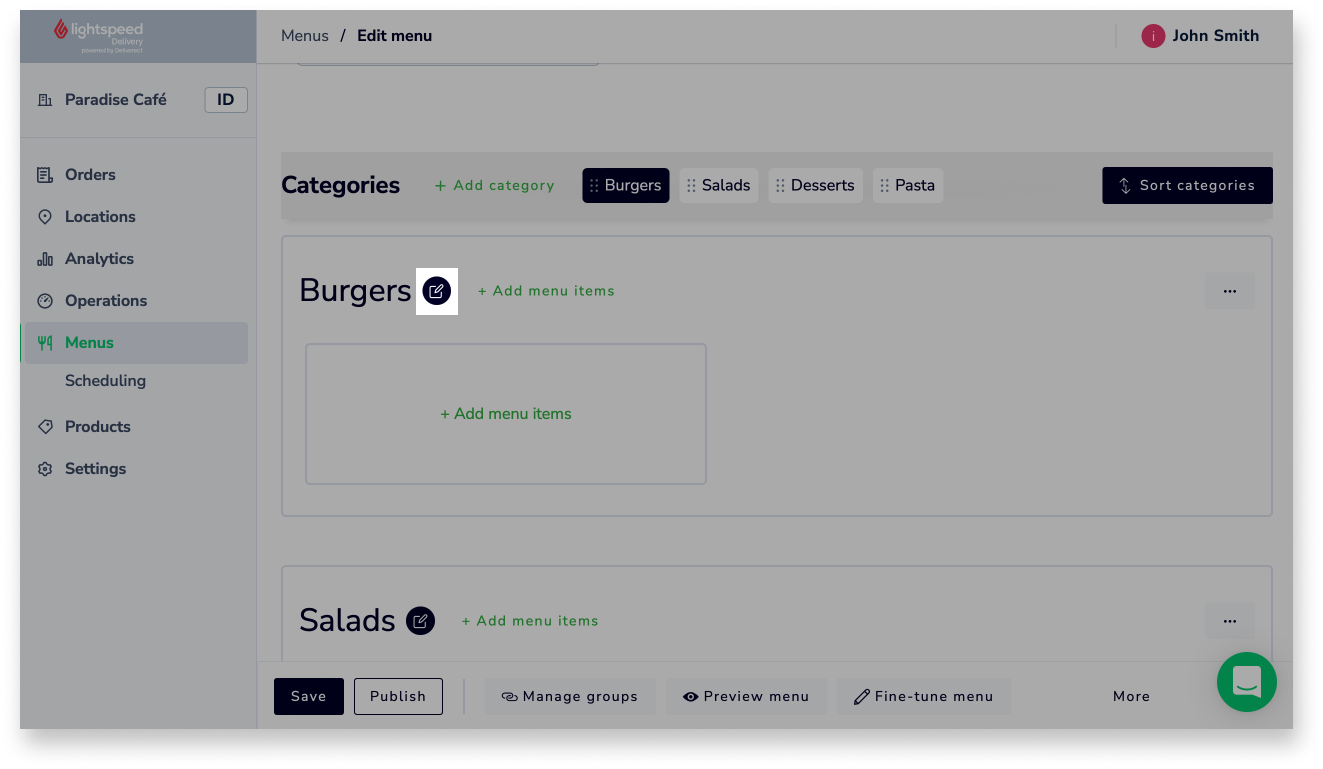
- Change the name, description, or image, and click Save edits to save.
Removing an existing category
- Click the three-dot icon next to an existing category.
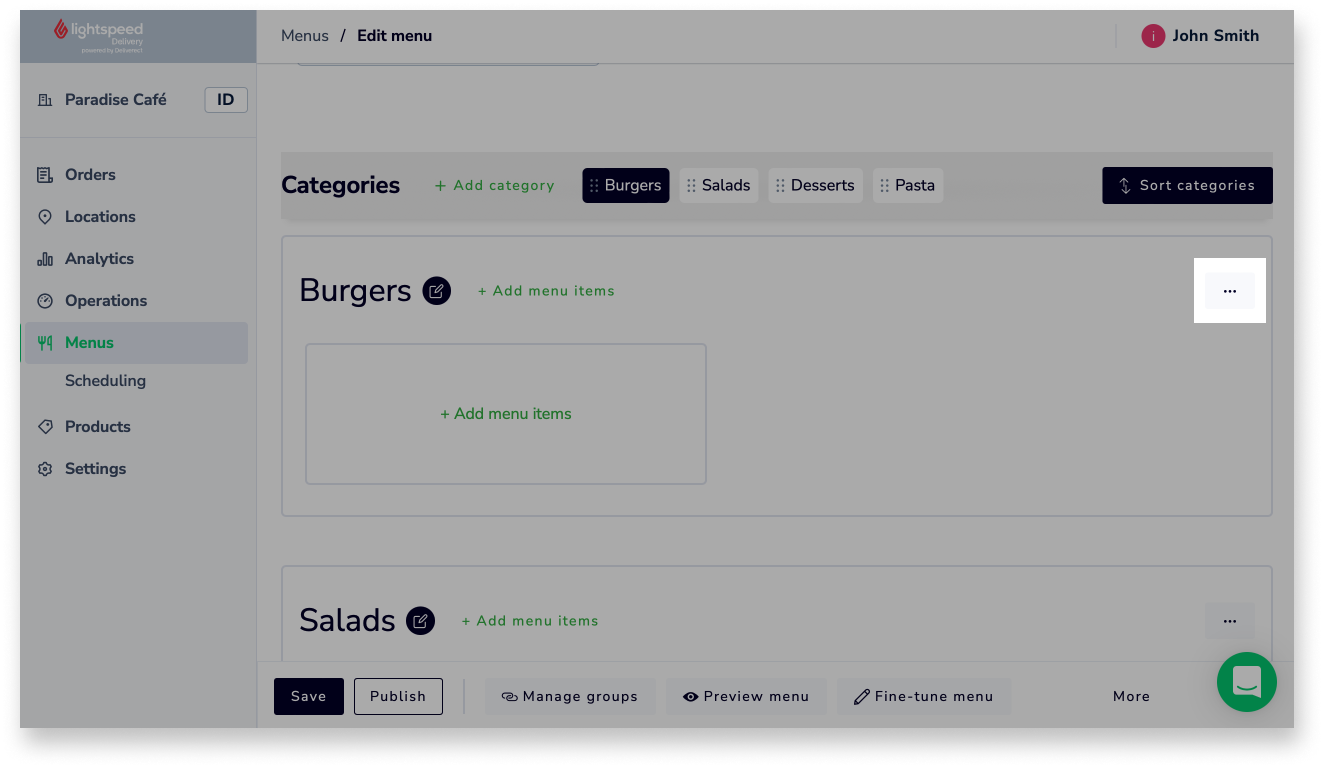
- Select Disable category or Remove category.
Important:
- Disabling a category will hide it from customers but keep it on the menu. To re-enable a disabled category, repeat step 2a and select Enable category.
- Removing a category will delete it and its items from the menu. This action cannot be undone. Removed categories must be manually re-created if you want them back on the menu.
- Click Disable or Remove to confirm.
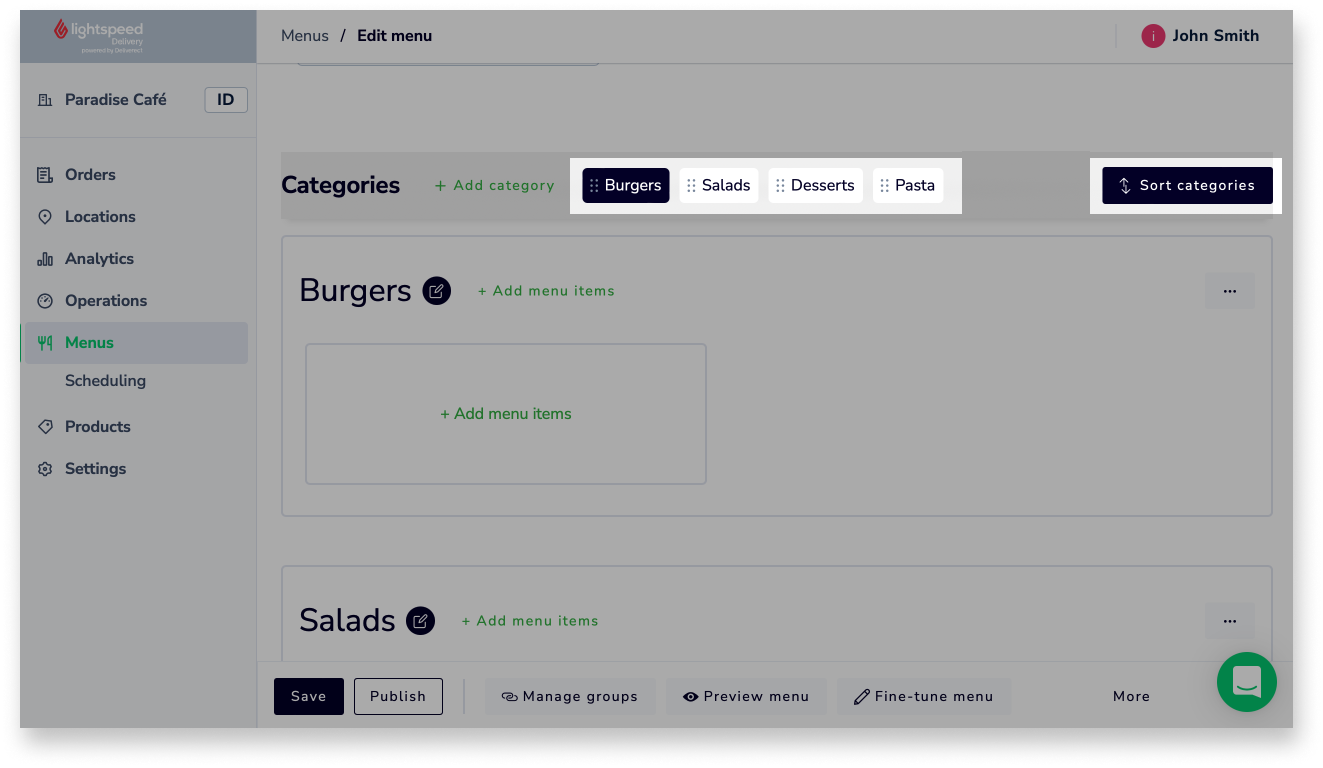
- Click Add category.
- To change the order categories appear in, click and drag the six-dot icon next to a category, or use the Sort categories button.
- To add, edit, or remove products in a category, click a button below to show the desired set of steps, then follow along.
Adding products to a category
- Click Add menu items next to the name of an existing category.
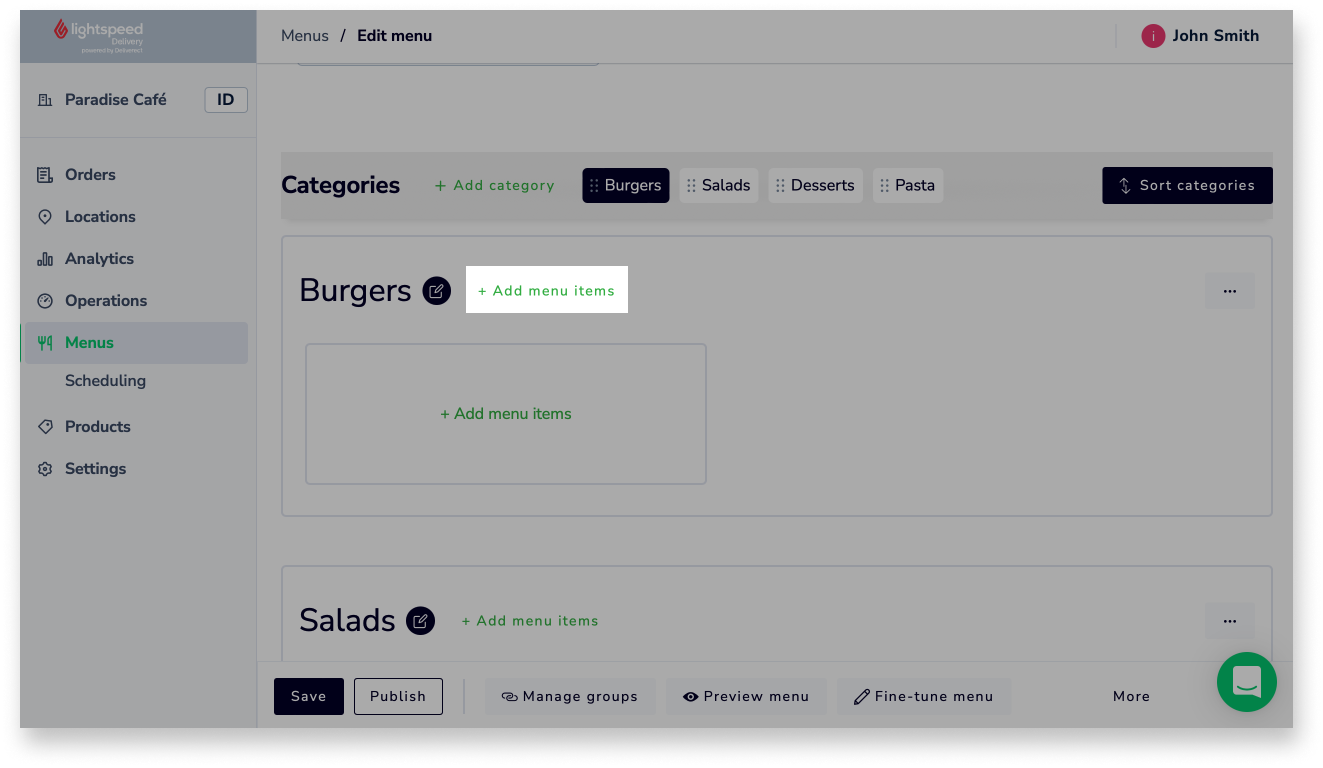
- (Optional) Select a POS category to browse items according to the category they are assigned to in Lightspeed Restaurant. You can also search for a product by name or PLU.
- Select each product to add to the category
- Click Add products to save changes.

Sorting products in a category
- Click and drag the six-dot icon next to a product, or use the Sort menu items button.
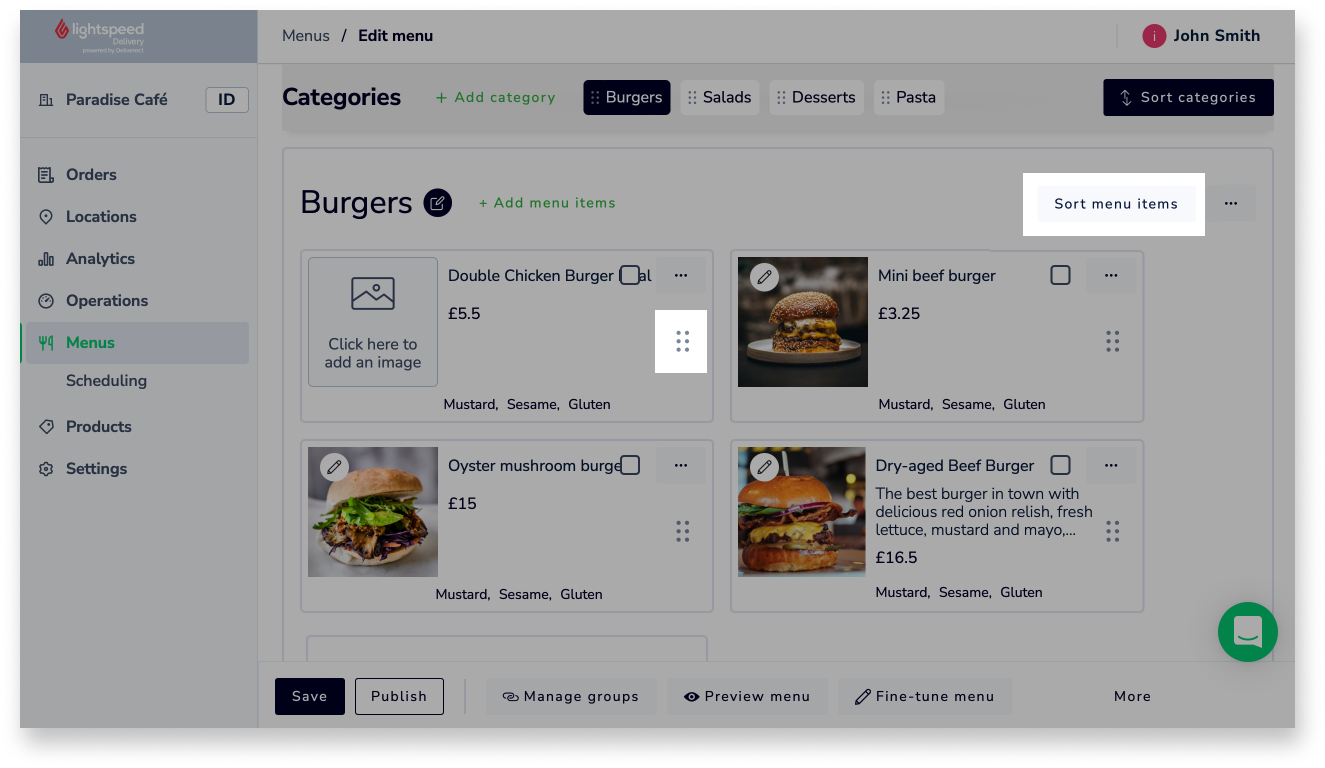
Removing products from a category
- Click the three-dot icon next to a product.
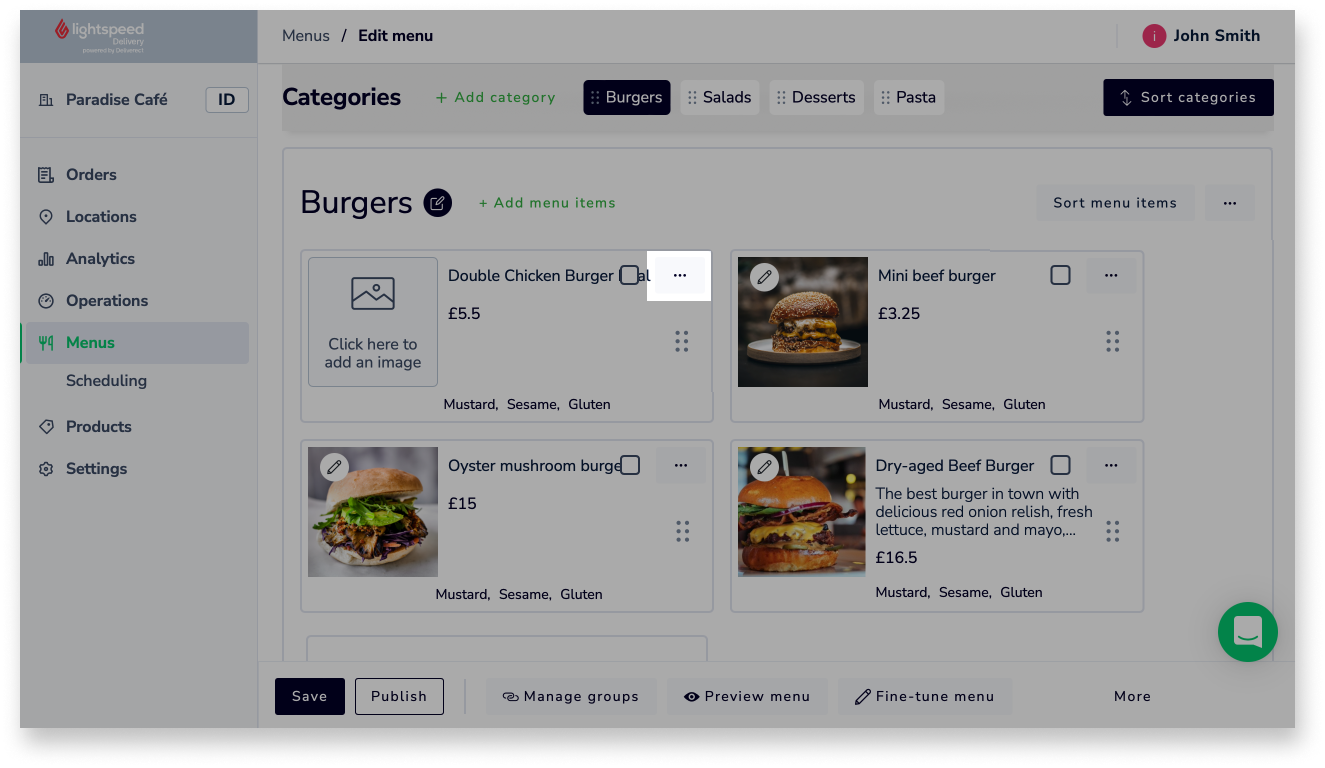
- Select Disable product or Remove product.
Important:
- Disabling a product will hide it from customers but keep it in the category. To re-enable a disabled product, repeat step 4a and select Enable product.
- Removing a product will delete it from the menu and cannot be undone. Removed products must be manually re-added (step 4) if you want them back in the category.
- Click Disable or Remove to confirm.
- Click Add menu items next to the name of an existing category.
- (Optional) Click Preview menu to see what the menu will look like to customers.
- Publish the menu to sync the changes made to selected delivery channels. For detailed help, see Publishing menus.
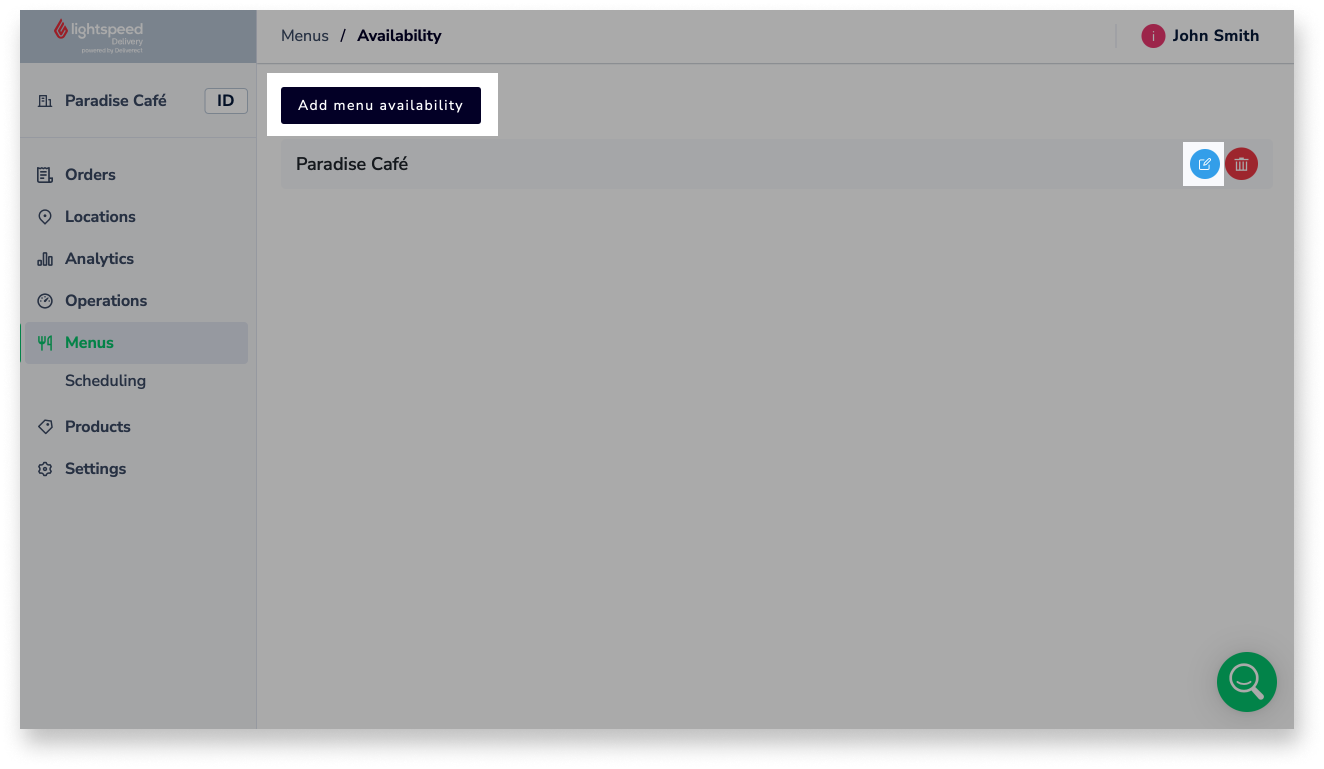
Setting menu availability
Set the date and time availability for each menu to control when customers can order from that specific menu.
- Follow steps 1–2 in the Managing menus section.
- Click the three-dot icon next to an existing menu.
- Select Manage availability.
- Click Add menu availability to set availability for a new location, or click the
 edit icon next to an existing location to modify the availability for that location.
- If adding availability for a new location, select the location from the drop-down menu.
- Set the menu availability for each day using the following actions:
- To add new time blocks to the schedule or adjust the timing of existing ones, click and drag vertically.
- To change the day for a time block, drag the time block horizontally.
- To delete a time block, click on it and select the trash can icon.
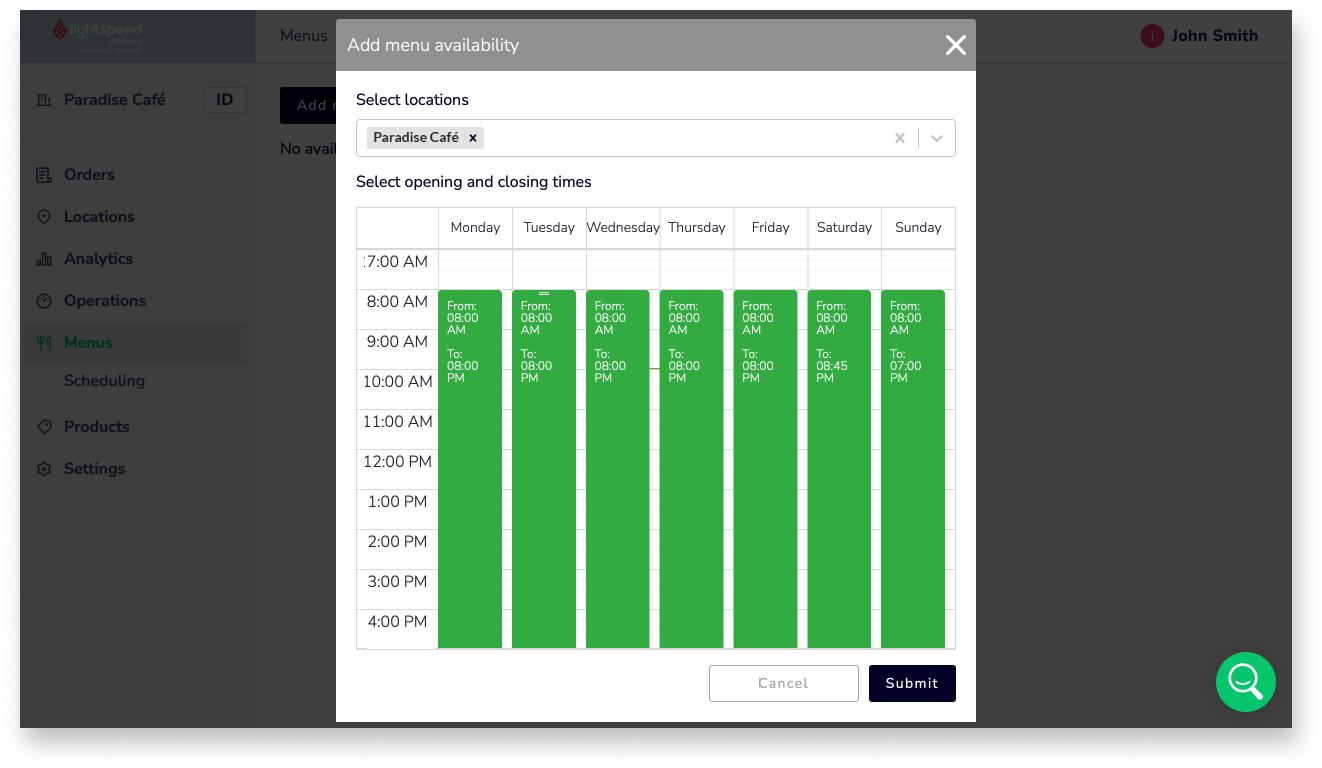
- Click Submit (if adding new availability) or the X (if editing existing availability) to save changes.
- Publish the menu to sync the changes made to selected delivery channels. For detailed help, see Publishing menus.
Publishing menus
After creating a new menu or editing an existing one, publish it to push it live to your delivery channels. New menus and updates to existing menus will not be available to customers until you publish them according to the steps in this section.
Important: Some delivery channels do not support publishing menus via Lightspeed Delivery or may require you to perform additional steps. Visit the Deliverect Help Center to determine if your delivery channels are affected.
- Log in to the Lightspeed Delivery Dashboard.
For help, visit our Logging in to the Lightspeed Delivery Dashboard article.
- From the navigation menu, click Menus.
- Click Publish menus.

- Choose one or more menus to publish from the drop-down menu.
- Select one or more delivery channels to publish the menu to.
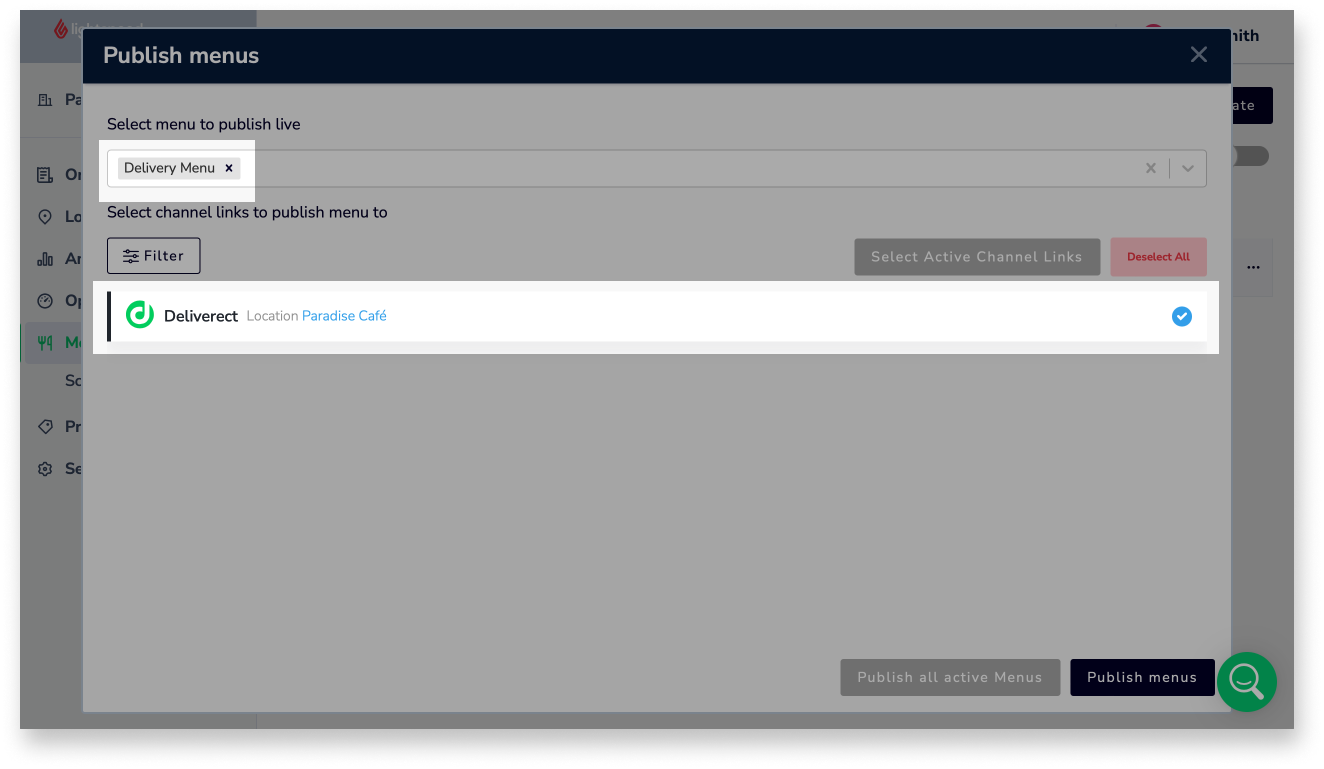
- Click Publish menus or Publish all active Menus to publish the menu(s).