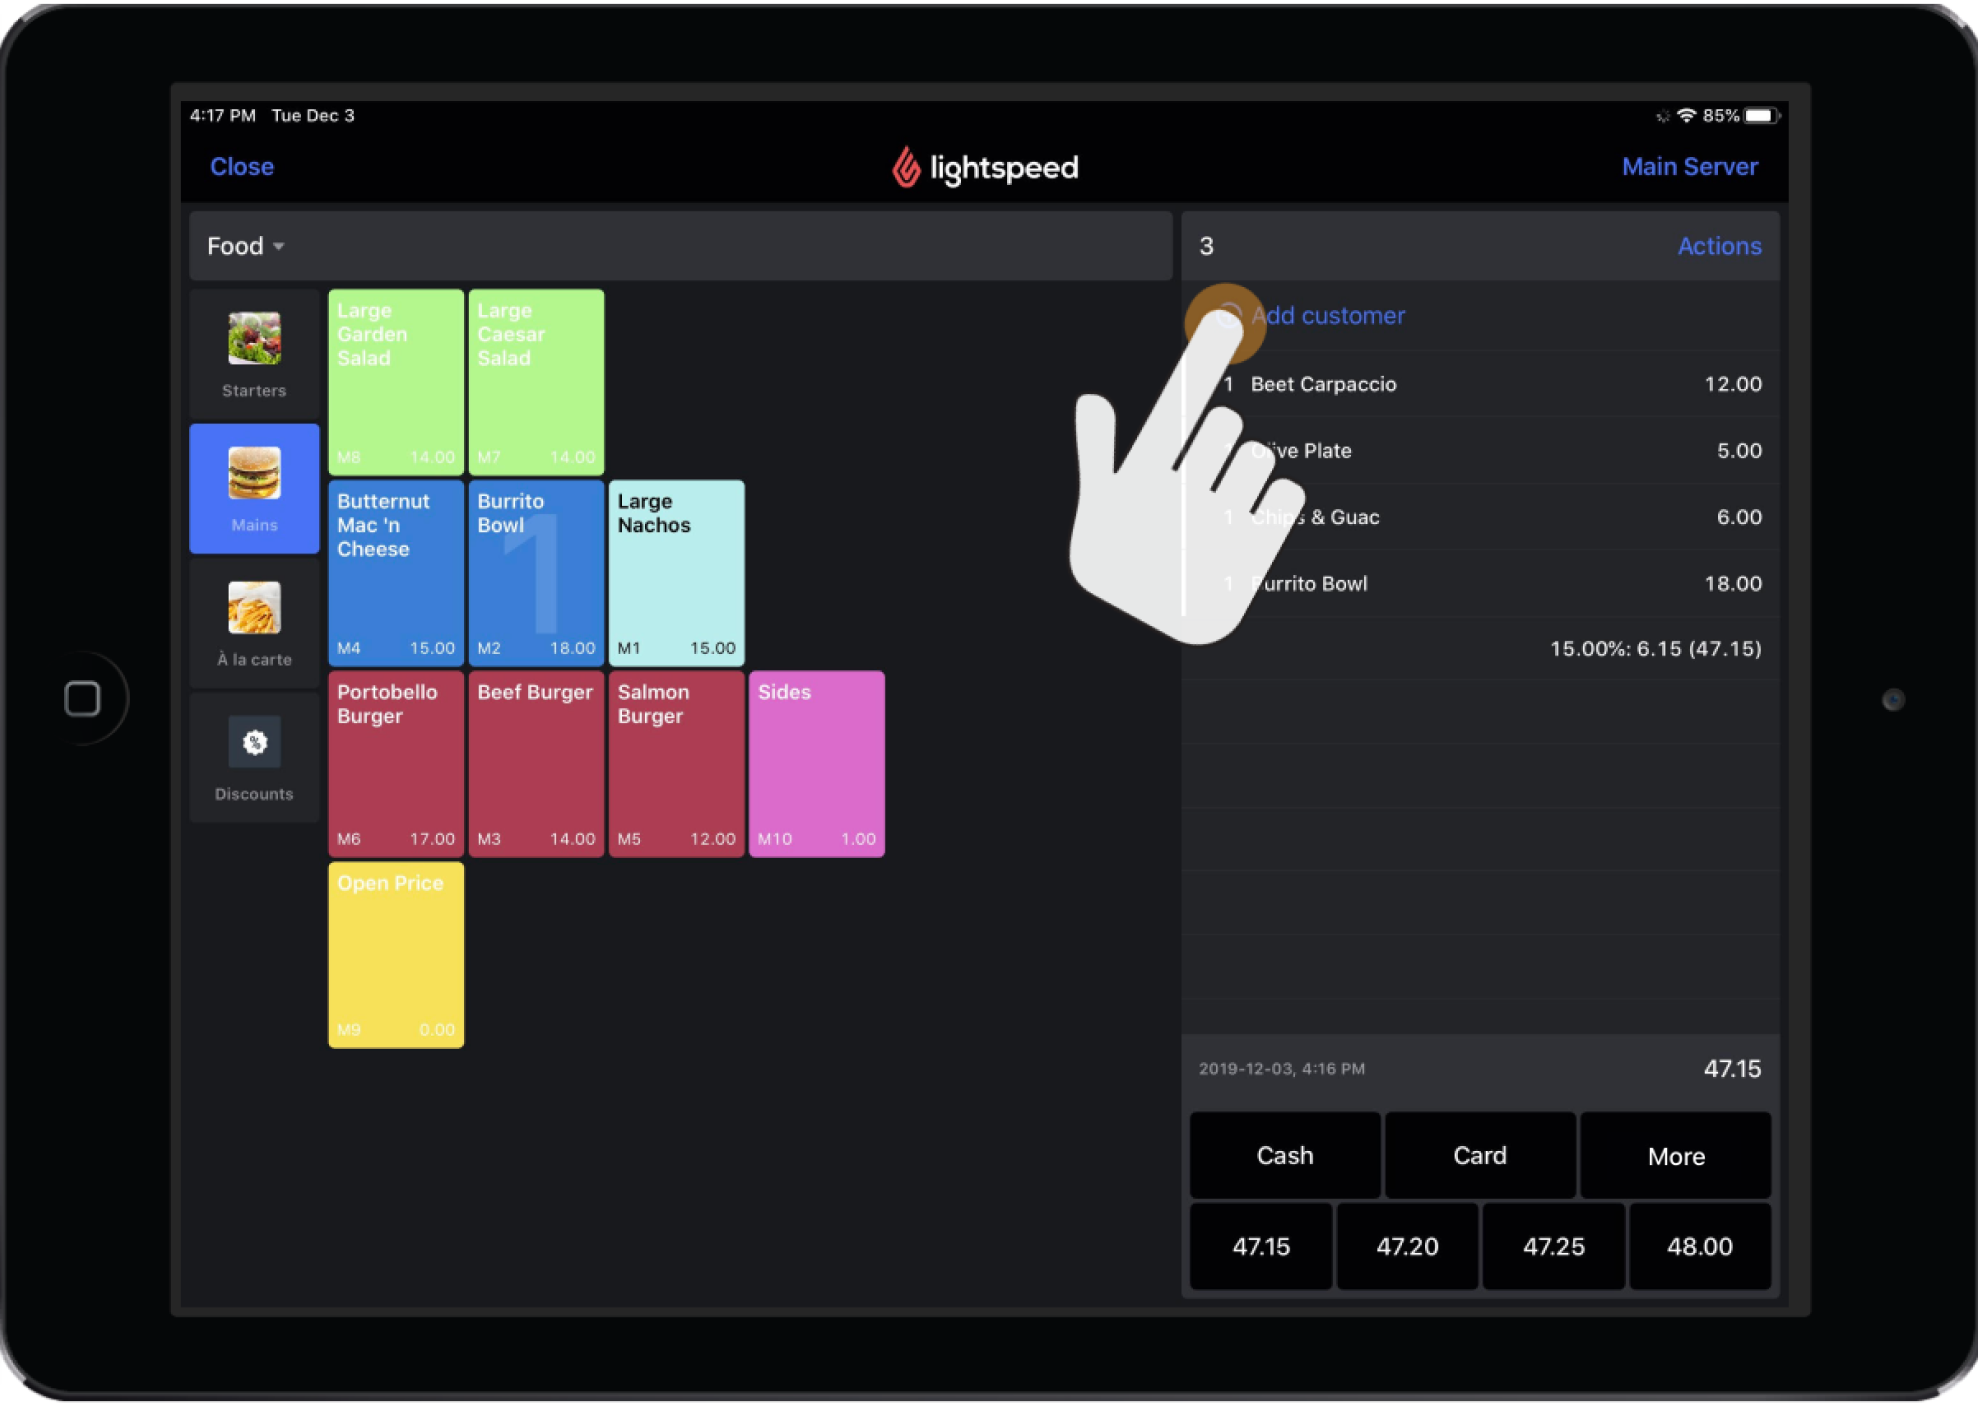
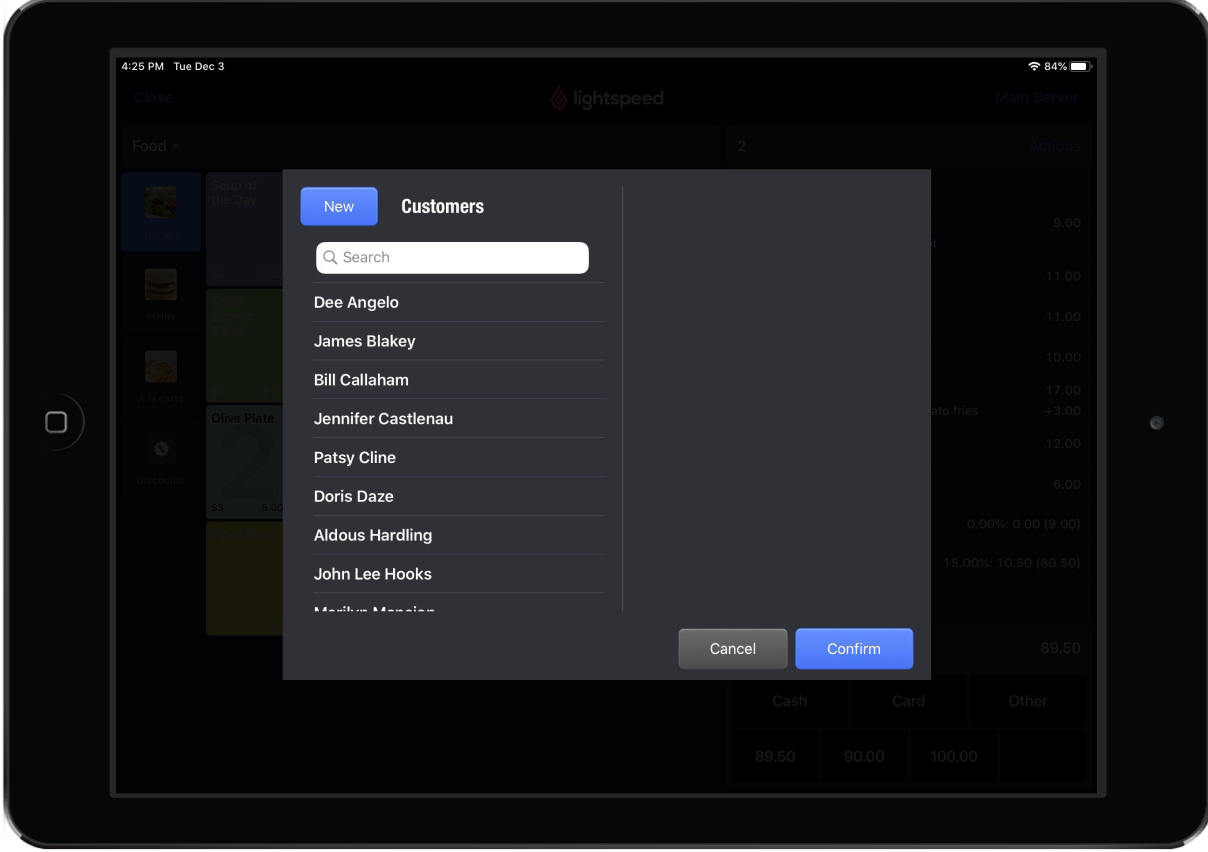
Adding customers to orders in Restaurant POS helps you identify and keep track of returning customers. Once a customer is in your system, you'll have quick access to information related to their favorite products, their visit history, and their credit or tab standing. Customer information can be viewed at any time via the Customer popup.


Assigning a customer on the Order screen
To add customers to orders from the Order screen:
- Tap the +Add Customer button at the top of the order list.
- Tap the customer profile to add them to the order. To create a new customer, see Creating Customers.
- Tap Confirm. The customer's name will now show at the top of the order list.
Assigning a customer to a receipt from the detailed Payments screen
A user may add order items to a bill before adding a customer and then navigate to the detailed Payments screen. Here is how to add a customer from the detailed Payments screen:
- In Restaurant POS, open the detailed Payments screen by selecting the Other button at the bottom of the order list on the Order Screen.
- Tap + Add Customer.
- Tap the customer to add them to the order. To create a new customer see Creating Customers.
- Tap Confirm. The customer's name will now show on the receipt.
Removing a customer from an order
- To remove a customer from an order, simply select the x button beside the customer name on the Order screen.
- A popup window will open asking the user to verify removing the customer. Tap either Remove to confirm removing the customer or Cancel to navigate to the Order screen without removing the customer.
For more information on using customer credit and tabs as payment methods, see Setting up customer accounts. Note that customer credit and tabs must first be configured as payment types in the Restaurant Manager to then be used in the Restaurant POS. See Adding a payment type for more information.
What's next?
- To navigate and understand payments in Quick Service mode, see Understanding payments
- To enter payment details on a receipt, see Processing payments
- To apply additional payment options on a receipt, see Using the detailed Payments screen
- To split a bill, see Splitting a bill
- To void a payment or finalized receipt, see Voiding a payment or finalized receipt.