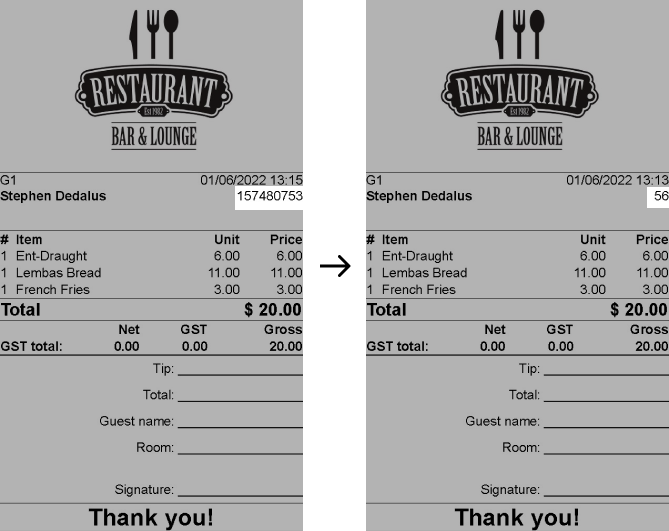
After adding printers in Restaurant Manager, assign a printer template to each printer. Printer templates control the layout and functionality of print actions. For example, if you have two receipt printers and two kitchen printers, you must have two receipt templates and two kitchen templates assigned to their respective printers. A printer in Restaurant Manager can also act as a virtual printer and be used for emailing receipts and invoices to customers. If you've created a printer with EmailCustomer and EmailUser as its type, create a template for each of these virtual printers.
Creating a printer template
There are two ways to add new templates: create a new template from scratch, or copy an existing template and modify it. To see a list of the settings you can edit, refer to the table for Template options included in this article.
Adding a new template
- In Restaurant Manager, select Printers > Printer Templates.
- Click Add Template to create a new template with default settings.
- Specify the settings and select Ok to finish.
Copying an existing template
- In Restaurant Manager, select Printers > Printer Templates.
- Select an existing template.
- Click Copy to create a template with identical settings.
- Select the new template, rename it, and edit the settings as needed.
- Click Ok to finish.
Template options
| Setting | Description |
| Name | Create a name for the template. |
| Type | The template Type defines the function or purpose of the template. For example, if the Type is set to Kitchen, assign the template to your Kitchen printer. See Template types for descriptions of the different types. |
| Printer | Sets the printer that will use this template. Optionally, you can set this as Save to Photos and have receipts appear in the Photos app on your device. See Adding printers for information on how to add more printers
Note: If the printer is not set to Save to Photos, but receipts are appearing in the Photos app regardless, check Printing > Printers to ensure that the assigned printer for this template is not set to Image type. |
| Logo URL | Upload the image (e.g., your business logo) that you want to be displayed at the top of the ticket. This is recommended for receipts. |
| Bottom Logo URL | Upload an image to be displayed at the bottom of the ticket. |
| Title Text | Title displayed on your ticket below the logo. We recommend putting your business name as the Title Text on receipts. |
| Greeting Text | Text displayed below the price (500 characters maximum). |
| Promotional Text | Text displayed below the Greeting Text (1000 characters maximum). |
| Show Customer | Enable this option to display the name, email, phone, address, notes, and other information entered for the customer assigned to an order. |
| Show Company | Enable this option to display your business information, including name, address, website, and VAT number. |
| Choose Layout | Assigns region-specific layout settings. These layouts are tailored to local norms and currencies. |
| Font | Set the font used for items on the ticket. |
| Font Size | Set the font size used for the items on the ticket. |
| Printed Copies | Number of copies to be printed. |
| Big font | Font used for the Total Price and Title Text. |
| Big Font Size | Font size used for the Total Price and Title Text. |
| Small font | Font used for product modifiers. Tip: Change the font type and size to accentuate modifiers on tickets. |
| Small Font Size | Font size used for product modifiers. |
| Item Number Width | Width of the column where the item codes are displayed. If you don't want to display the item number, set Item Number Width to -1. |
| Price Width | Width of the column where the item price is displayed. 6 is the recommended width. If set smaller, the full price of the item may not appear. |
| Show Total Price | When enabled, the total price of all items will be printed beneath the products. |
| Show Waiter Info | Enable this to show the waiter's name and the time that the table was opened on the ticket. |
| Signal Accessory | If your receipt printer has a buzzer attached, this option triggers that buzzer to signal whenever a receipt is printed. Note: If enabled on a receipt printer with a cash drawer attached, the cash drawer will open each time a receipt is printed. |
| Show Sequence No. |
When checked, the receipt ID is replaced with a chronological number that's helpful for order tracking. Sequence numbers only reset when they hit their limit (which can be adjusted in Misc. Settings).  |
| Show Free Products | If enabled, products with a price of 0 will still be printed on receipts. |
| Show Free Modifiers | If enabled, modifiers with a price of 0 will still be printed on receipts. |
| Show VAT | Enable this to show value-added tax (recommended for receipts). |
| Linked categories | For Bar and Kitchen templates, assign product orders to automatically print to certain restaurant stations according to the product category. See Assigning categories to printers to learn more. |
Template Types
The template Type defines the function of the printer, such as whether the printer should be used to print customer receipts or send production tickets to the bar or kitchen. The Type can be set to Receipt, Bar, Kitchen, Email Receipt, Invoice, and Fiscal (for users in Belgium). The configurable settings will change depending on the selected type. See the table below for descriptions of what each Type means.
| Types | Description |
| Receipt | This template is for receipts that you intend to give to customers. Note to Belgian FDM user: These templates function the same as the regular Bar, Kitchen, and Receipt templates, except that the following text appears at the bottom of the receipt: "This is not a valid BTW ticket (dit is geen geldig btw-kasticket)." The finalized BTW receipt requires the Fiscal printer template.
|
| Bar | Set the type to Bar for tickets that will print in the bar. By default, this template includes information relevant to the bar staff and omits unnecessary information such as item price. |
| Kitchen | Set the type to Kitchen for tickets that will print in the kitchen. By default, this template includes information relevant to the back-of-house staff and omits unnecessary information such as item price. |
| Email Receipt | Set the template Type to Email Receipt for receipts issued digitally and assign the template to a virtual printer defined as either EmailCustomer or EmailUser. For full instructions, see Setting up electronic receipts. |
| Invoice | Customer invoices show the unpaid receipts on a customer's account. To create a printer template that will email invoices to customers, set the template Type to Invoice, and assign the template to the virtual printer that's defined as Email Customer.
To create a printer template that will print invoices, set the template type to Invoice, and assign the template to the AirPrint printer. Full-page customer invoices can only be printed using an AirPrint-enabled printer. See Setting up Apple AirPrint. For instructions on how to print or email a customer invoice, see Creating customer invoices in Restaurant POS. |
| Fiscal (Belgian FDM users only) | This template is used for the official BTW receipt when a payment is finalized. This is a valid BTW receipt with the necessary FDM signature. To enable this type, first, configure your FDM hardware and settings. |
Linking a template to a device or floor
For restaurants with multiple floors, POS devices, and/or prep stations, printer templates can be assigned to select POS devices or floors.
Assigning templates to a device
- In Restaurant Manager, select Devices > Devices.
- Click Edit (the pencil icon
 ) next to your chosen device.
 - In the Templates section, assign specific templates to the Receipt, Kitchen, or Bar printers.

- Click Save to finish.
For more details and a video tutorial, visit Editing a device's settings.
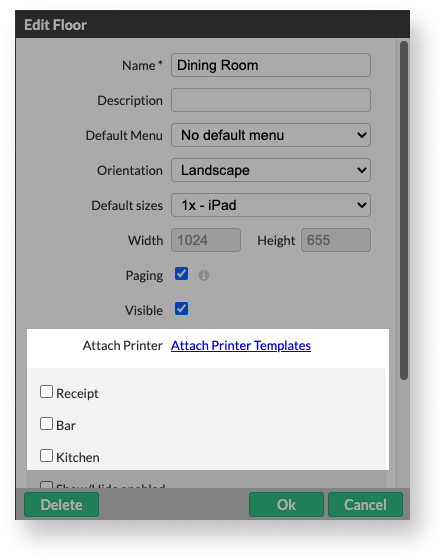
Assigning templates to a floor
- In Restaurant Manager, select Floor from the navigation menu.
- Choose the floor to which you will assign a template.
- Click the background of the floor plan to prompt the Edit Floor window.
- Click Attach Printer Templates and select the printer templates you want to assign to this floor.

- Click Ok to finish.
What's next?
Now that you understand basic printing templates, learn about advanced template settings in our Advanced printer template settings tutorial.