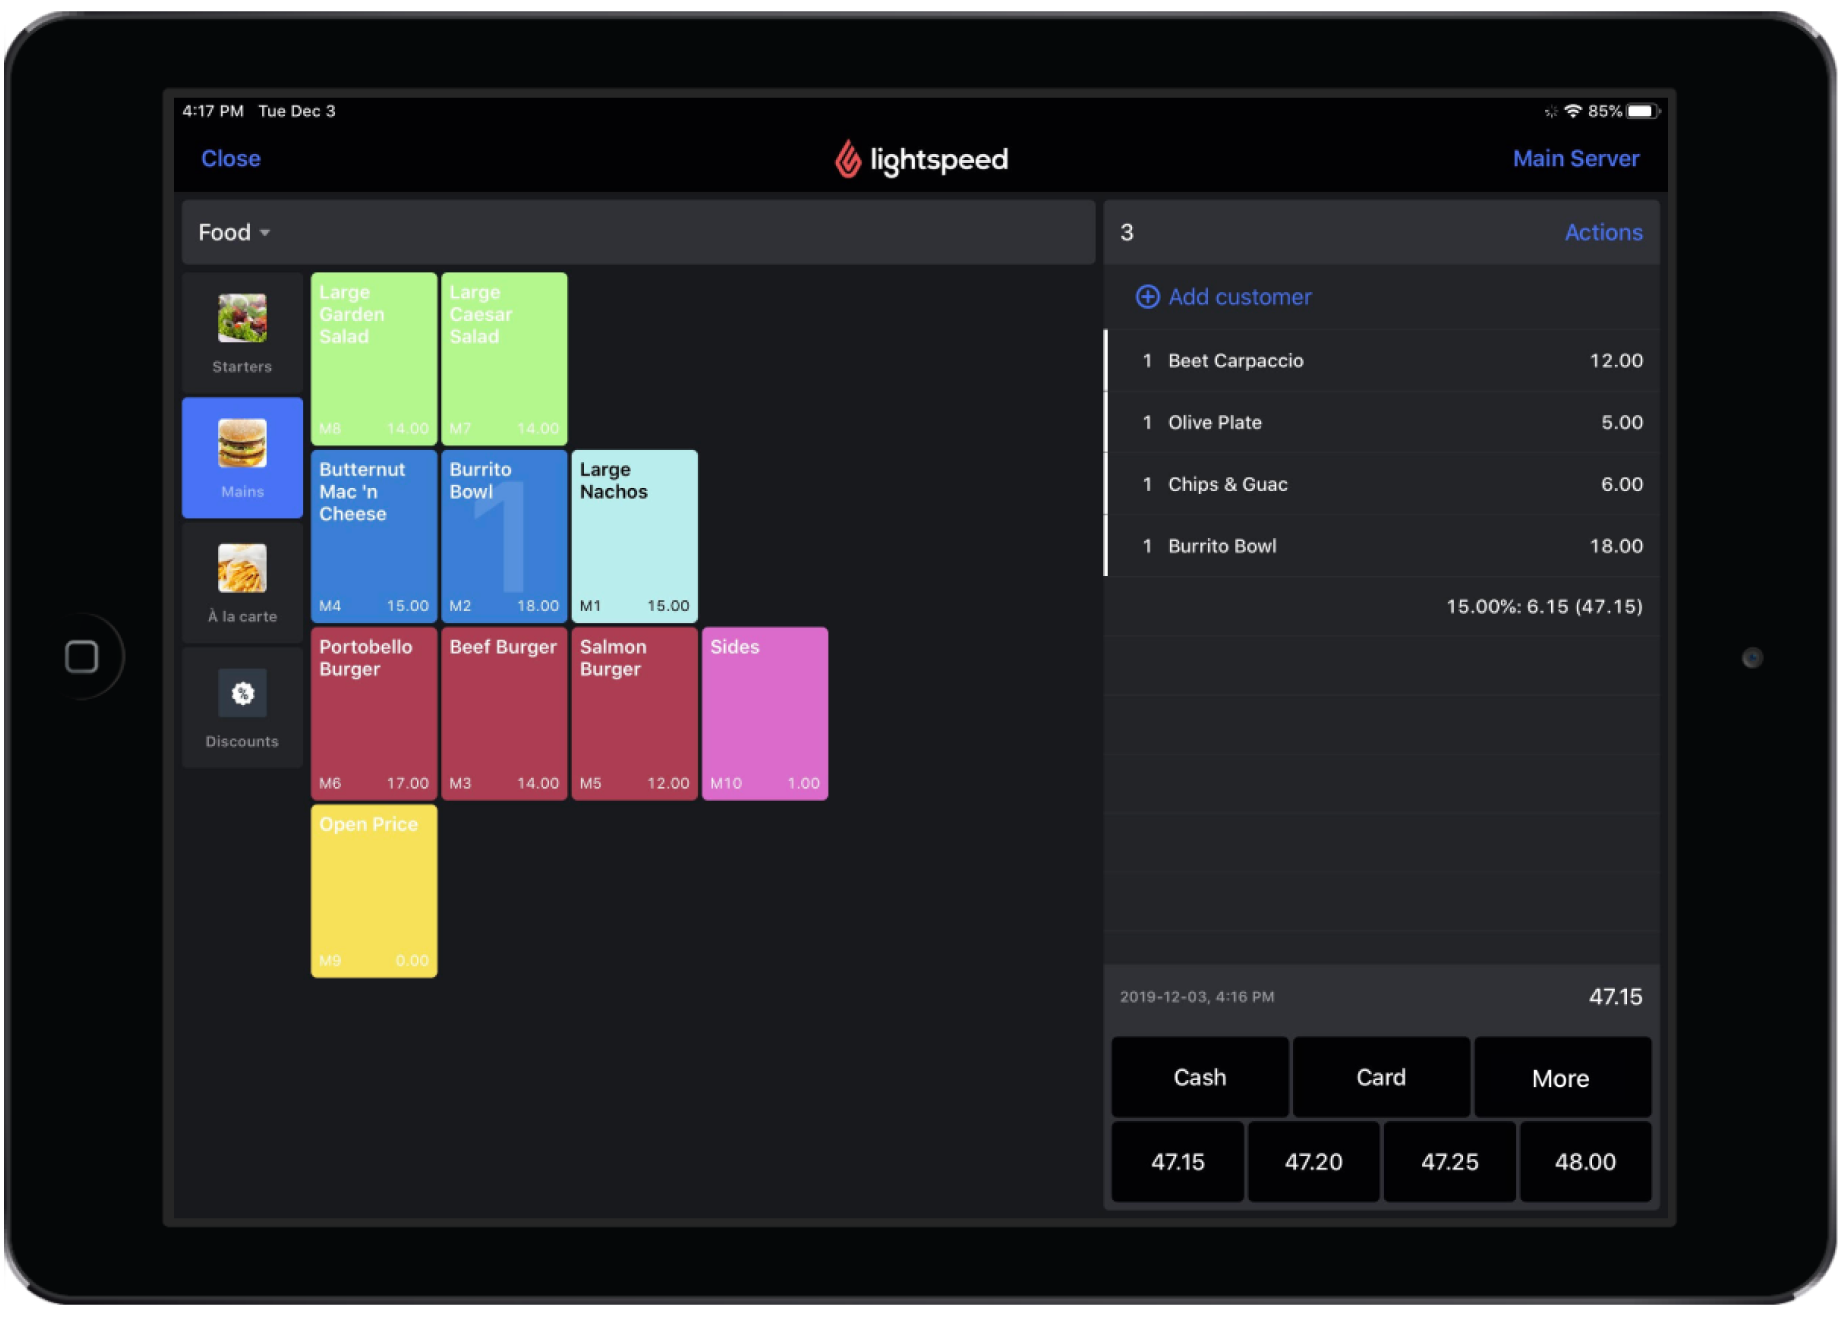
Les utilisateurs peuvent naviguer dans l’application Restaurant POS en mode service rapide ou service à table, selon le type de service fourni par le restaurant :
- Service à table est le mode par défaut du système de point de vente Lightspeed. Conçu pour les restaurants avec service aux tables, il propose des fonctions de gestion des places, des services et des commandes. Les tutoriels sur le mode par défaut Service à table se trouvent dans la catégorie Restaurant POS du Centre d’assistance.
- Service rapide est une configuration de point de vente qui convient aux bars, aux camions de cuisine de rue, aux cafés et aux installations à service rapide. Comme son nom l’indique, le mode service rapide est conçu pour les restaurants qui traitent les paiements au moment de la prise de commande. Le mode service rapide vous permet d’accélérer la prise de commande, le traitement du paiement et la finalisation de l’addition. Les tutoriels sur le mode service rapide se trouvent dans la section Restaurant POS > Mode service rapide (QSR) du Centre d’assistance.
Le mode service rapide convient aux installations de restauration rapide, et son interface compte moins de fonctions que celle du mode par défaut Service à table. À l’heure actuelle, le mode service rapide ne prend pas en charge les fonctions relatives à la gestion des places, aux services, à l’ajout d’éléments à l’aide d’un lecteur de code à barres et à l’ajout d’un client à une commande avec une carte RFID, aux codes PLU, à la recherche et aux réductions ouvertes. Le mode service rapide dispose d’un écran de commande simplifié qui accélère le traitement des paiements au moment de passer la commande.

Activation du mode service rapide (QSR)
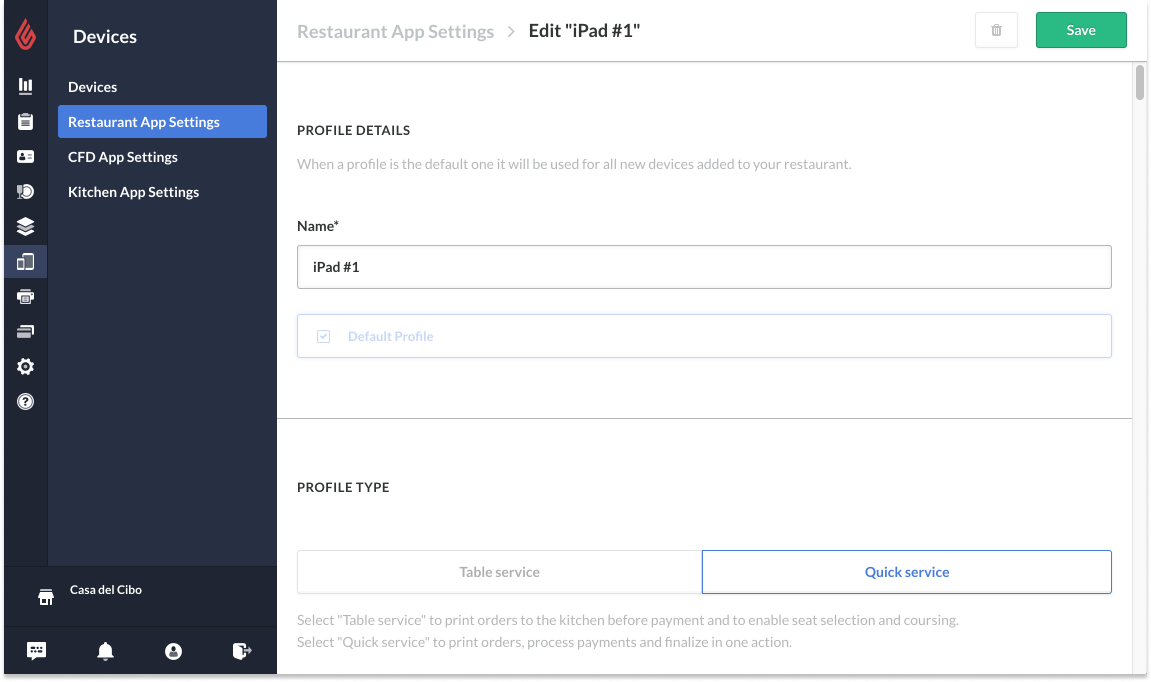
Pour utiliser le mode service rapide dans l’application Restaurant POS, vous devez commencer par l’activer dans Restaurant Manager :
- Connectez-vous à Restaurant Manager.
- Accédez à Appareils > Paramètres de l’application Restaurant.
- Sélectionnez le profil d’appareil à utiliser en mode service rapide. Vous serez redirigé vers la page des paramètres de l’application Restaurant pour l’appareil sélectionné. Pour en savoir davantage sur la création ou la modification de profils d’appareil, consultez l’article Profil d’appareil.
- Accédez au paramètre Type de profil sur la page Paramètres de l’application Restaurant.
- Sélectionnez Service rapide.
- Appuyez sur Sauvegarder.
Pour obtenir plus de détails sur la configuration des paramètres relatifs au profil d’appareil sélectionné, consultez l’article Profil d’appareil. Veuillez noter que le mode service à table est toujours le mode par défaut des profils d’appareil.

Prochaines étapes
Naviguez dans l’application Restaurant POS en mode service rapide.
- Pour créer une commande de base sur un iPad, consultez l’article Commande de base sur un iPad.
- Pour retirer ou modifier des éléments, consultez l’article Modification des commandes.
- Pour transférer des additions ou des éléments à une autre table, consultez l’article Utilisation du panneau d’actions.
- Pour associer un client à une commande, consultez l’article Attribution d’un client à une commande.
- Pour naviguer en mode service rapide et comprendre le traitement des paiements, consultez l’article À propos des paiements.
- Pour saisir des détails de paiement sur une addition, consultez l’article Traitement des paiements.
- Pour appliquer d’autres options de paiement à une addition, consultez l’article Utilisation de l’écran de paiement détaillé.
- Pour diviser une addition, consultez l’article Division d’une addition.
- Pour annuler un paiement ou une addition finalisée, consultez l’article Annulation d’un paiement ou d’une addition finalisée.