In this article
- What you need before setting up
- Adding your Merchant ID in Restaurant Manager
- Setting the language of the terminal
- Connecting your terminal to ethernet
- Setting the terminal to Restaurant Mode
- Connecting the terminal to Lightspeed
- Configuring table name settings
- Enabling tipping on the terminal
- Setting a default tip percentage
- What's next:
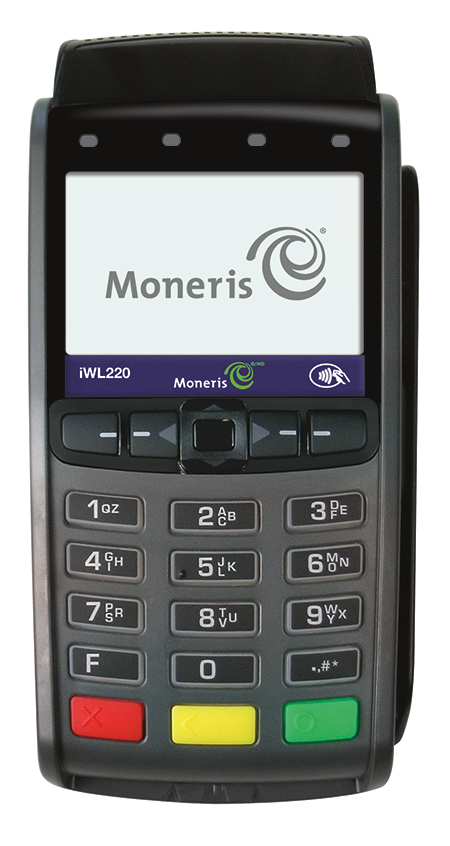
The Ingenico iWL220 is a wireless payment terminal available through Moneris that allows guests to complete payment at their table. Once the terminal is connected to Lightspeed Restaurant, servers can also view open tables and unpaid bills directly on the terminal.
Note: The iWL222 is the newer model of the iWL220, but the set-up process is the same.
What you need before setting up
- To obtain the iWL220/iWL222 terminal, contact Moneris. The terminal needs to be running software version 5.12 or higher
- This integration requires a LiteServer
- Ensure your staff have PIN codes to log in to Restaurant POS. They will use these same PIN codes to log in to the terminal. See Logging in to Restaurant POS for more information.
- Your admin card
- Merchant ID from Moneris
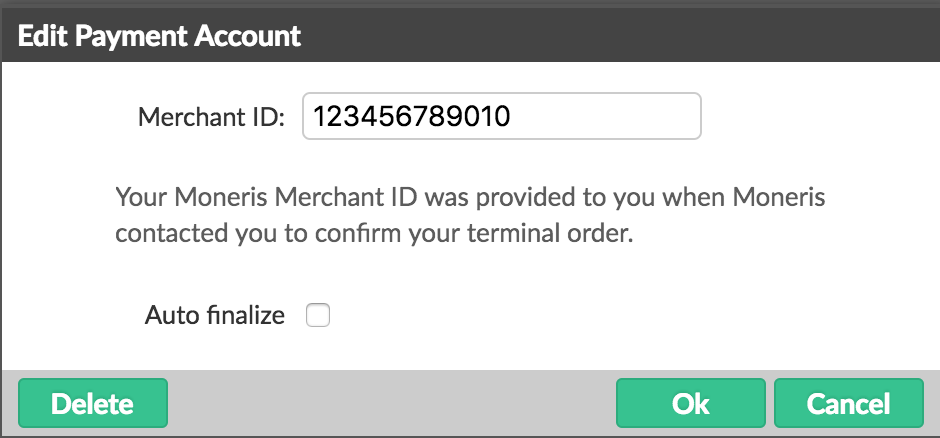
Adding your Merchant ID in Restaurant Manager
- In Restaurant Manager, click Payments > Payment Processors.
- Select Moneris.
- Enter the Merchant ID provided to you by Moneris and click Ok.

Setting the language of the terminal
To switch the language between French and English:
- Press the # button to go to the main menu.
- Use the arrow buttons to navigate to ADMIN, then press the green OK button.
- Select LANGUAGE and press OK.
- Select ENGLISH or FRENCH and press OK.
Connecting your terminal to ethernet
Note: If you are using an existing terminal, skip this step and proceed to Setting the terminal to Restaurant Mode.
- Press the # button.
- Use the arrow buttons to navigate to CONFIGURATION, then press the green OK button.
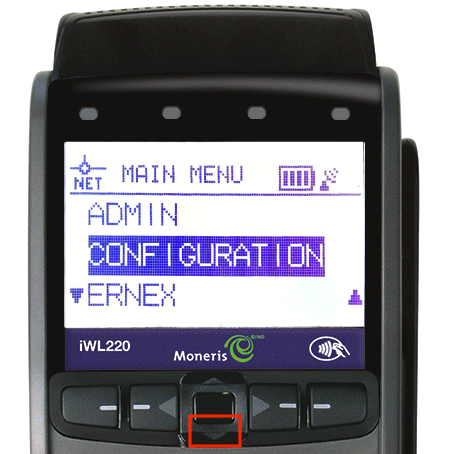
- Select GENERAL PARAMS, then press OK.
- Select COMMS TYPE, then press OK.
- Select ETHERNET.
- Press the red Cancel button twice to go back to the login screen.
Setting the terminal to Restaurant Mode
- Press the # button twice. The screen now shows ENTER ADMIN CODE.

- Enter 08, then press the green OK button.
- Use the arrow buttons to navigate to RESTAURANT, then press OK.
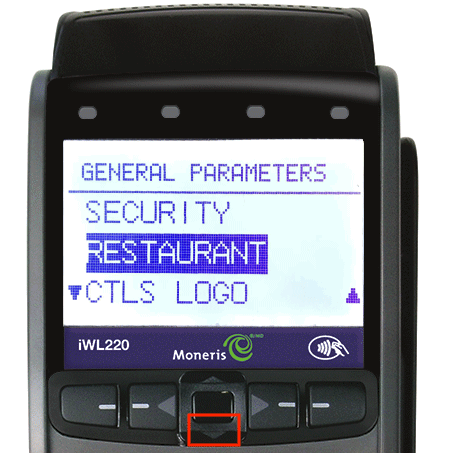
- Select TYPE 1, then press OK.
- Press the red Cancel button three times to go back to the main screen. The screen will show REINITIALIZATION REQUIRED.
- Press the # button twice. The screen will show ENTER ADMIN CODE.
- Enter 1, then press OK.
- Enter your Merchant ID.

Note: If you have already entered a Merchant ID, the terminal shows RETAIN ALL MERCHANT SETTINGS, select Yes. If you are shown a Merchant ID, press OK. - When you are prompted to enter a PHONE NUMBER, leave this field blank and press OK.
- Swipe your admin card when prompted.
- The screen will display SENDING, RECEIVING and PROCESSING while it re-initializes.
- Swipe your admin card to return to the login screen.


Connecting the terminal to Lightspeed
- Press the # button once.
- Use the arrow buttons to navigate to CONFIGURATION, then press the green OK button.
- Select RST COMM CFG and press OK.
- Select NAME OR ADDR and press OK.
- Select ADDRESS by pressing the right-most button below the screen.
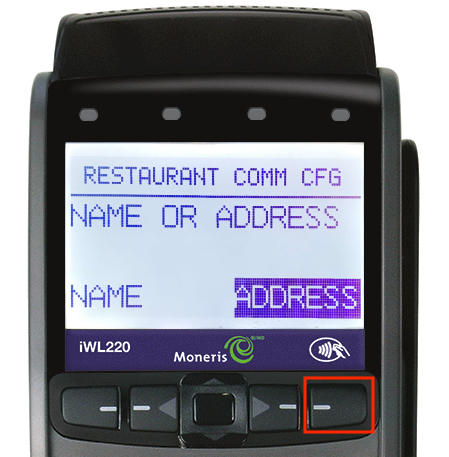
- Select PRIM HOST ADDR and press OK.
- Enter your LiteServer IP address. To type a period, press 0 and then the # button. Press OK when complete.
Note: You can find your LiteServer IP address by tapping the "i" icon on the User screen in the Restaurant POS app.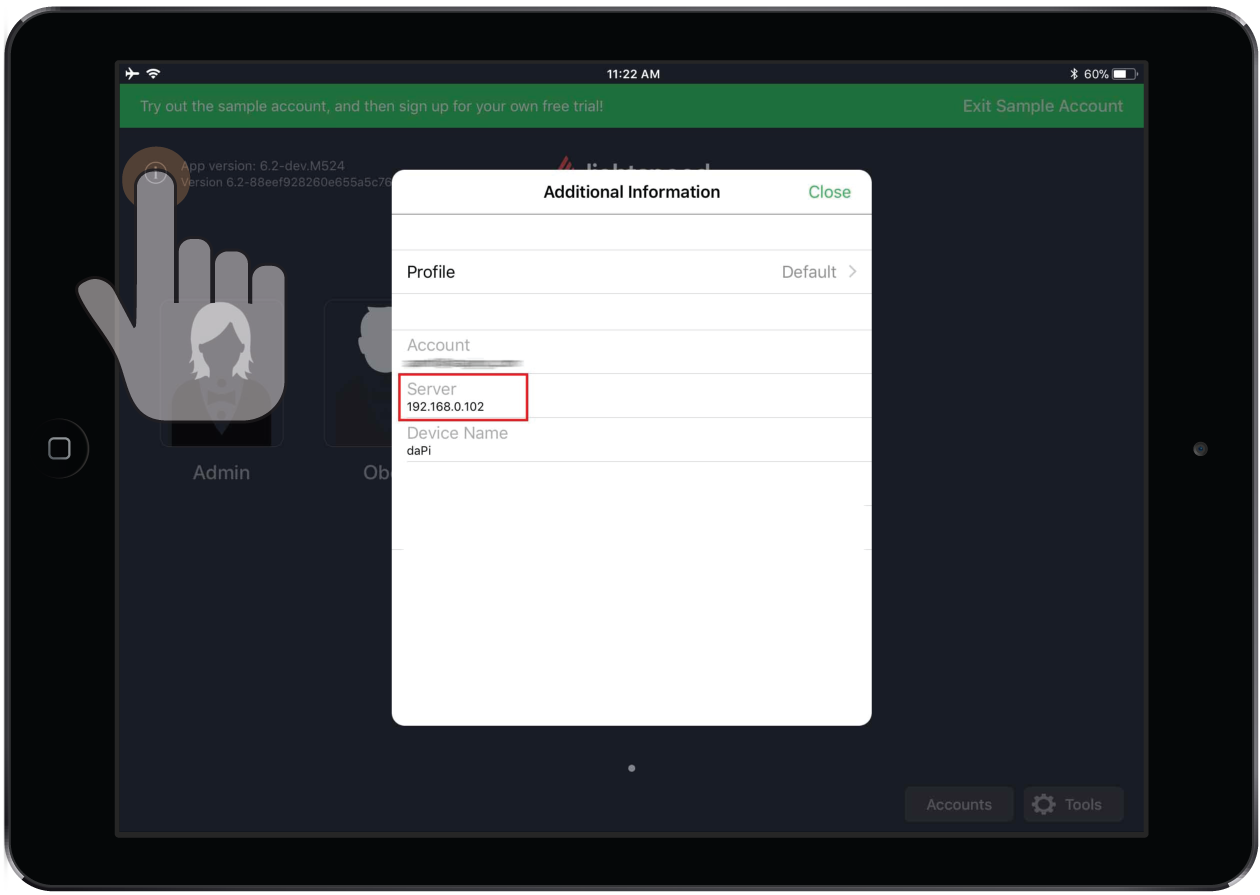
- Select PRIM PORT # and press OK.
- Enter 6666, then press OK.
- Press the red Cancel button to go back. The screen should now display the message below.
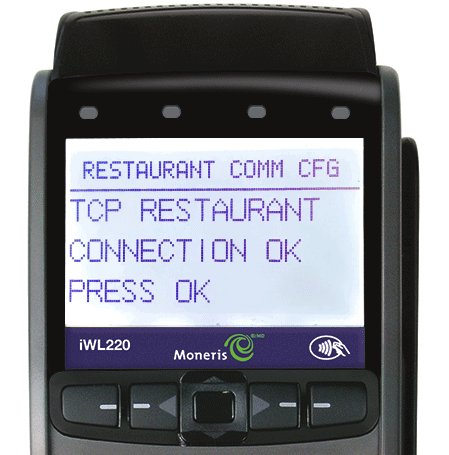
Note: If the screen displays REST COMMUNICATION FAILED, please return to Step 7 and 8 to confirm that the information entered is correct. - Press the green OK button. The payment terminal should return to the main screen that displays EMPLOYEE LOGIN - SWIPE/ENTER ID.


Configuring table name settings
In order to see a list of open tables and unpaid receipts on the terminal, the following settings need to be enabled:
- Press the # button once.
- Use the arrow buttons to navigate to CONFIGURATION, then press the green OK button.

- Select REST CONFIG and press OK.
- Use the arrow buttons to navigate to TABLE NAME and press OK.
- Select YES by pressing the left-most button below the screen.

- Press the red Cancel button three times to return to the login screen.

Enabling tipping on the terminal
- Press the # button once.
- Use the arrows under the screen to navigate to CONFIGURATION. Press OK.
- Select GENERAL PARAMS > TIP ENTRY. Select TIP ON and press OK.
- Select how customers can tip by choosing between TIP BY AMOUNT, TIP BY PERCENT and TIP BY $ AND %.
Setting a default tip percentage
You can set a default tip percentage that will appear on the terminal when a customer is prompted to tip. The customer can select the default percentage, enter their own, or choose not to tip.
- Press the # button once.
- Use the arrows under the screen to navigate to CONFIGURATION. Press OK.
- Select GENERAL PARAMS > TIP PERCENTAGE. Enter an amount and press OK.