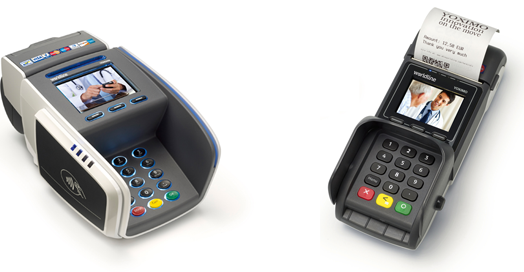
Set up a Yoximo (mobile) or Yomani (non-mobile) payment terminal via your WiFi network for use with Worldline payment processing in Lightspeed Restaurant.
Please note the following when using Worldline with Lightspeed Restaurant:
-
The Yomani/Yoximo payment terminals are currently only supported on iPadd using Restaurant POS.
- The payment terminal must be running app version 14.06.00 or later.
- For all issues related to the payment terminal itself, please contact Worldline Support directly.
1. Enable Yomani/Yoximo in iPad settings
- Open the iPad general Settings.

- Select Restaurant > Payment Settings.
- Under Worldline, enable Yoximo/Yomani.
- Restart the application for the changes to take effect.
2. Create Yomani/Yoximo payment type in Restaurant Manager
- Log on to the Restaurant Manager as an admin user.
- Tap Payments > Payment Types.
- Tap Add Payment.
- Assign a name for your new payment.
- Select Yomani/Yoximo from the Type drop down menu.
- Tap OK.
3. Connect the Worldline terminal to your WiFi network
Power on the Yoximo terminal by pressing the yellow Corr/ON button. To access the terminal menu, press Menu.
Power on the Yomani terminal by connecting the power supply. To access the terminal menu, press Stop > OK > Menu.
- From the terminal menu, press 3. Terminal Setup > 5. Wireless Settings.
- Enter the merchant password.The merchant password is typically the last four digits of the terminal ID.
- Press OK.
- Press 1. WLAN Settings > 2. Add WLAN > 2. Scan.
- A list of available wireless networks is shown. Select your WLAN. Enter a name for your network.
- Press OK.
- Enter your WLAN key.
- Enter a priority for the network. The terminal will select the network with the highest priority (0) at start up.
- Press OK. The terminal displays a confirmation that the wireless network has been added.
4. Include your device in the terminal ECR Settings
Prior to this step, ensure that the ECR Protocol is set to CTEP and the ECR Configuration is set to TCP/IP on the terminal. For assistance with these setup procedures, please contact a Worldline technician.
- Press Stop > OK > Menu to access the terminal menu.
- Press 3. Terminal Setup > 10. Next (0 on keypad).
- Press 3. Merchant Settings.
- Enter your merchant password.The Merchant password is typically the last four digits of the terminal ID.
- Press OK.
- Enter a label/name for the connection. Press OK.
- Press 10. Next (0 on keypad) > 1. ECR Settings > 2. Add an ECR device.For example: "Register 1"
- Enter the Hostname (IP address) of your mobile device. Between each separate number of the IP address, press OK.For example: 192 > OK > 168 > OK > 0 > OK > 123 > OK. To access your IP address on the iPad, tap Settings > Wi-Fi, then tap
 to display the network information. All IP addresses should be in static mode.
 - Press OK again.
- Enter the port number (9000). Press OK.
- Press 1. List ECR Devices.
- Select the device by name.
- Press Select to verify the IP address.
- Press Yes when prompted “Select this ECR device?”.
- Press Stop until you have returned to the home screen.
What's next?
You are now ready to process payments with your Worldline terminal! See Taking payments and tips.