You can quickly add or modify a floor or table directly in Restaurant POS.
When you add a table in Restaurant POS, the table type is defined as Restaurant by default. You can edit the table in Restaurant Manager to change the type.
NOTE: The user must have the Edit floors permission enabled in order to add/edit floors and tables. See Floors and tables in Restaurant Manager.
To edit tables and floors
- In Restaurant POS, select the floor you want to edit. See Switching floors.
- At the top of the Tables screen tap Edit. The settings panel appears.
- Tap the table or floor you want to edit or tap +floor or +table to add a new one.
- Make your edits in the settings panel on the left.
- Tap Save > Done.
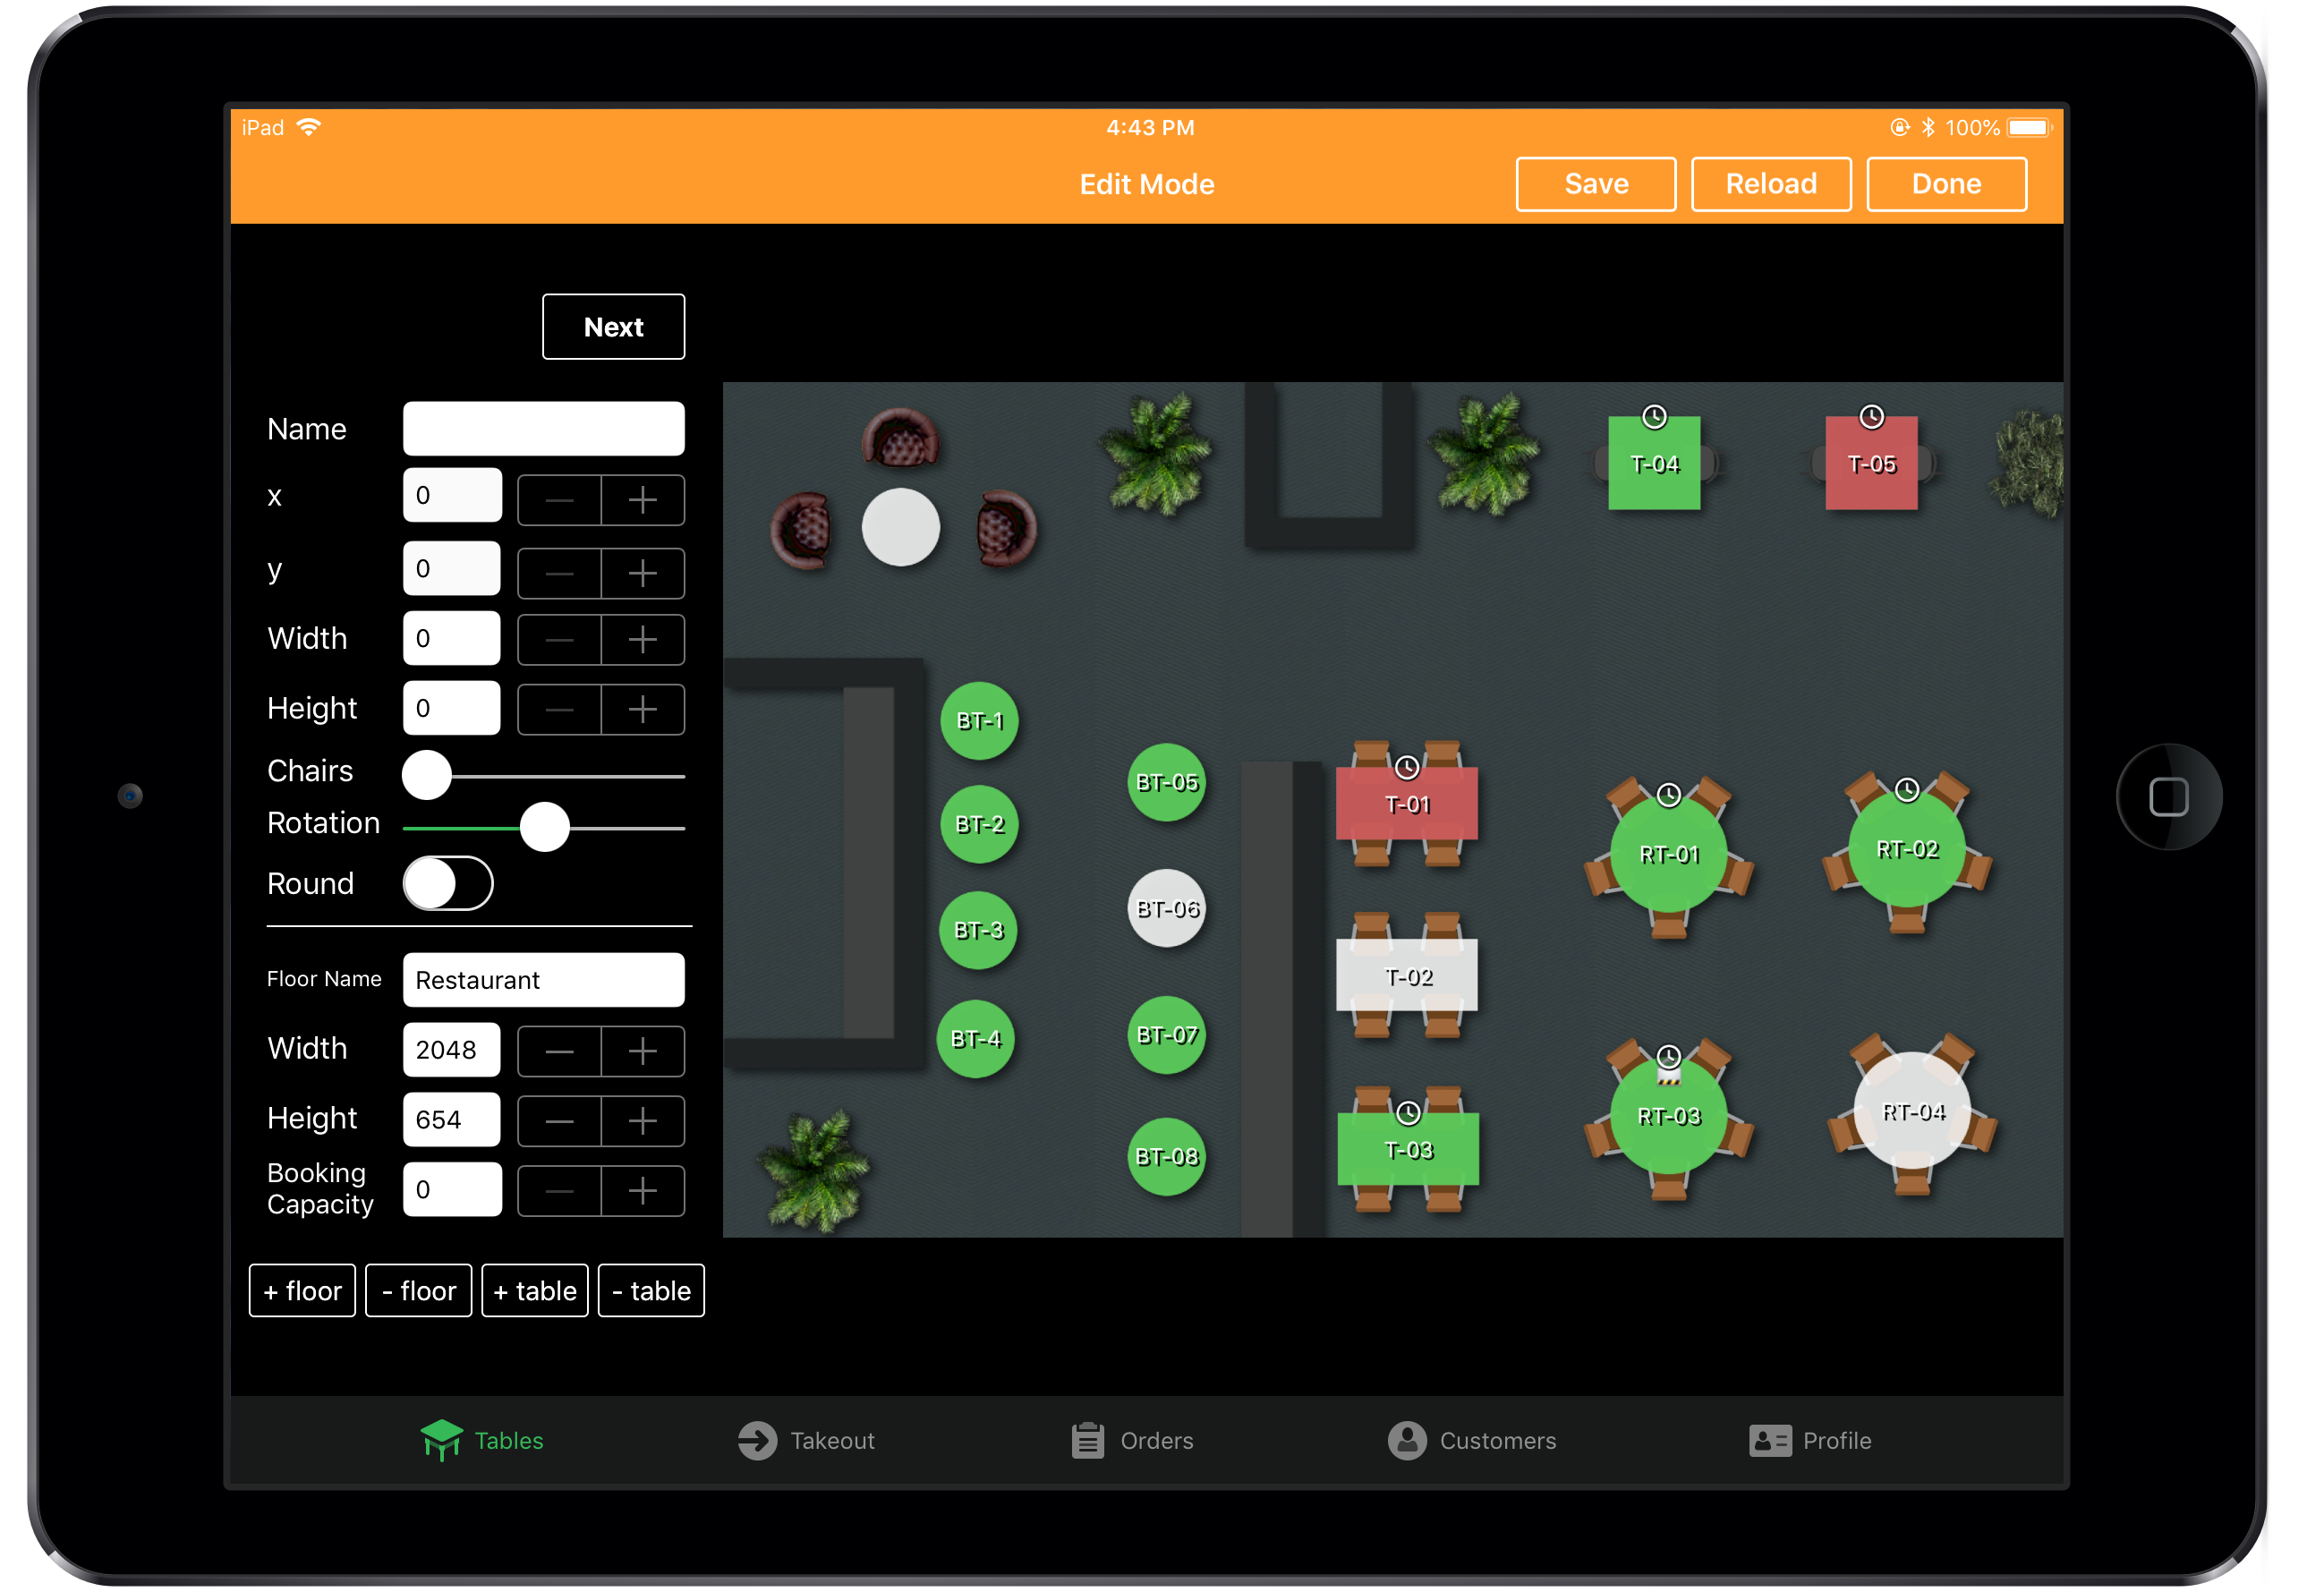
| TABLE SETTINGS | |
| Name | Designate or change the name of the table. |
| X and Y |
Horizontal and vertical positioning of the table. To move a table, tap-and-hold the table then drag it into place. |
| Width and Height |
The width and height of the table, measured in pixels. Tap on a table and use the resize icon to change a table's dimensions. You can also enter precise pixel measurements in the settings. |
| Chairs |
The number of chairs assigned to the table. Use the slider to increase or decrease the number of chairs. |
| Rotation | The rotation of the table. If the slider is in the center, the table's rotation is at 0 degrees. |
| Round |
If disabled, the table is rectangular by default. |
| FLOOR SETTINGS | |
| Floor | Designate or change the name of floor. |
| Width | Width of the floor in pixels. |
| Height | Height of the floor in pixels. |
| Booking Capacity | Booking capacity of the floor. |