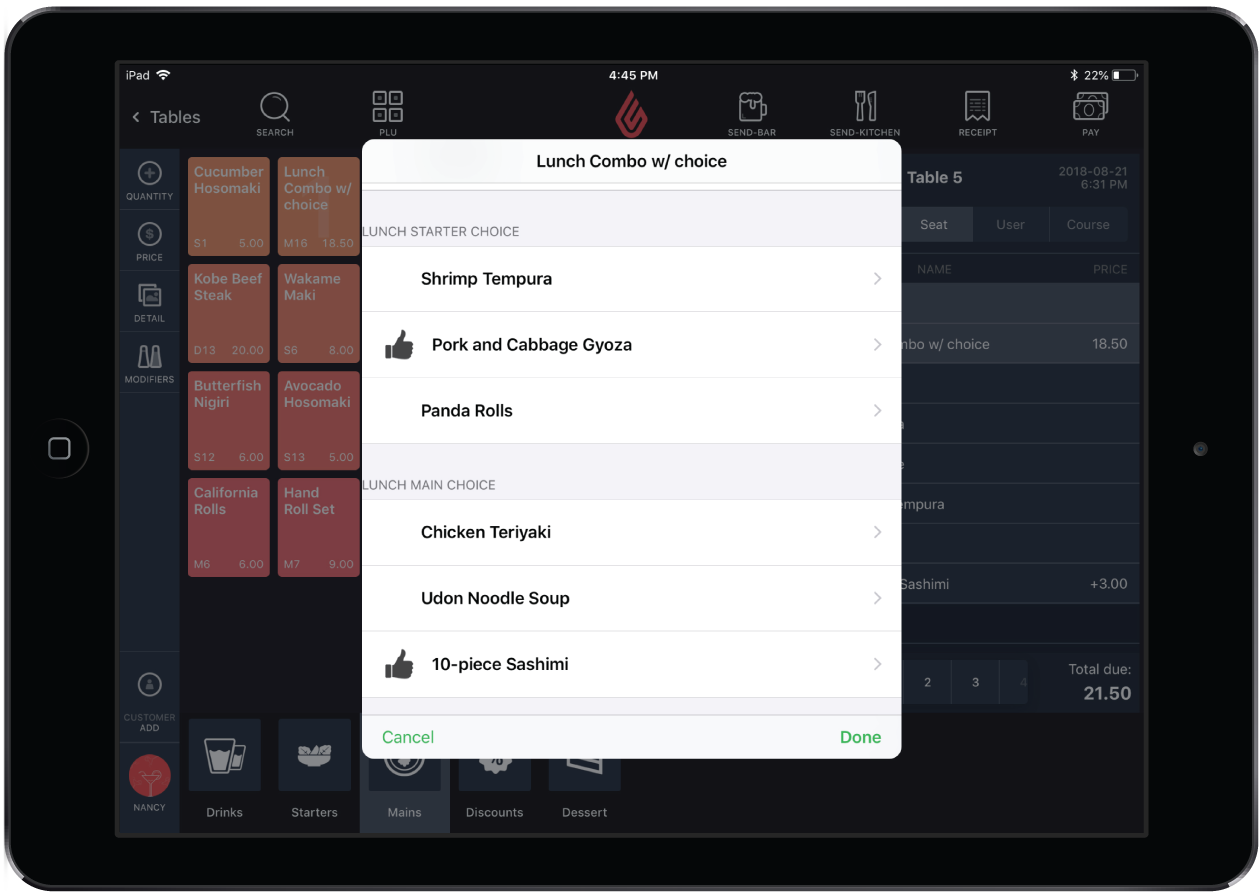
You can create a combo with choices in Restaurant Manager to offer customers a combo with multiple courses and a choice of items within each course. For example, a combo with choices might be:
- Drink: coke, water or coffee
- Side: fries, salad or coleslaw
- Main: burger, club sandwich or mac and cheese
To get started, first create choices as products. Then you can create a combo and add those choices as sub-products to the combo. NOTE: In order to prevent the choices from appearing as menu items in Restaurant POS, de-select the Visible checkbox in the Choice product popup.
When you add a combo with choices to an order in Restaurant POS, a popup will appear prompting you to select a choice for each course in the combo.

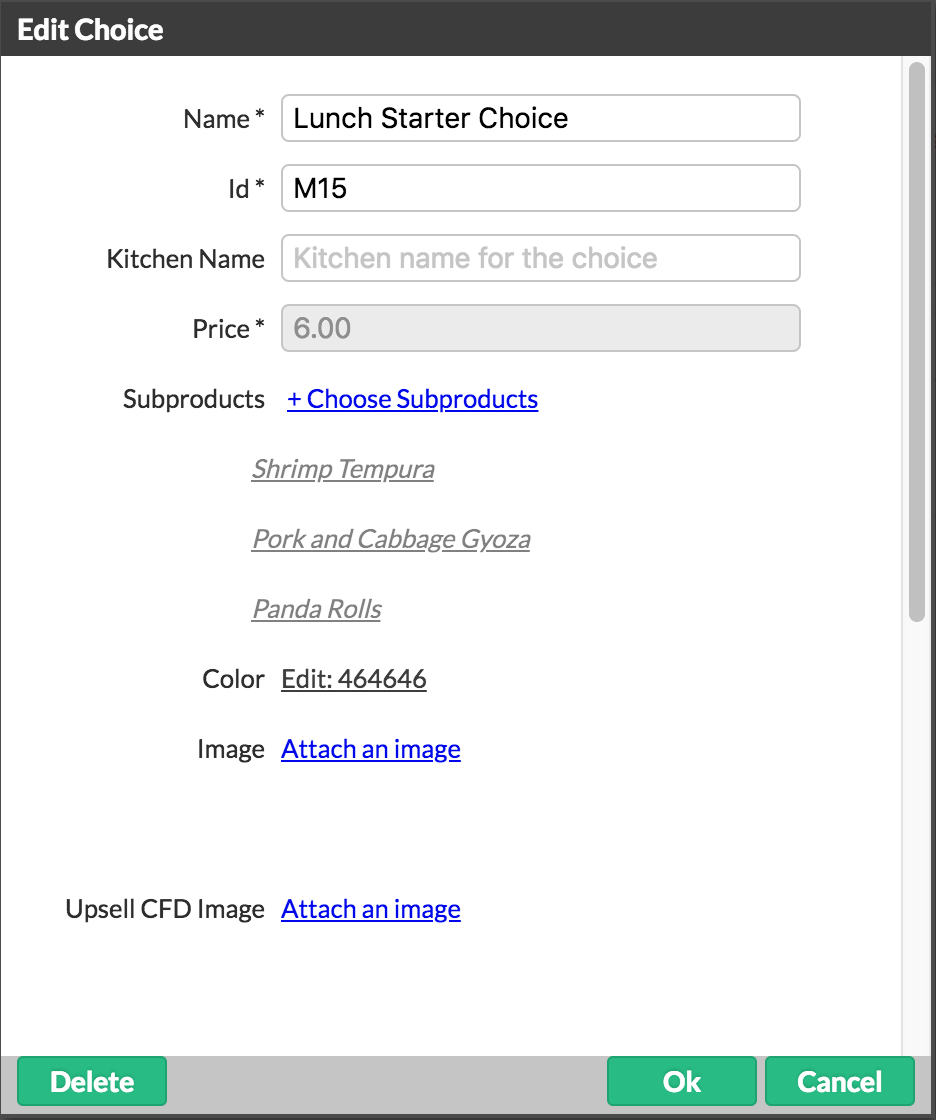
Creating a choice
- In Restaurant Manager, click Products > Product.
-
Click the category you want to create the choice within.
- Click Add Choice.
- Specify the settings and save your changes.

Settings
| NAME |
Name of the choice. |
| ID | ID of the choice. This will be automatically generated when you save. |
| KITCHEN NAME | Name that appears on tickets that are printed to the bar or kitchen. |
| PRICE | Price of the choice product. This is automatically set as the price of the least expensive item within the choice group. |
| SUBPRODUCTS |
Select the products in the choice group. |
| COLOR |
Color assigned to the menu button in the Order screen. |
| IMAGE |
Product image. It is not necessary to add an image for a choice. |
| VISIBLE |
De-select this setting to prevent the choice from showing as a regular menu item in Restaurant POS. |
Advanced Options
| DESCRIPTION |
Can be added to provide additional product information. |
| COST | Cost of the products within the choice group. |
| TIMED EVENTS |
can be used to assign a timed event to the choice. |
| STOCK | Stock amount for the choice group. |
| ENFORCE STOCK | Appears only when stock management is enabled (see Stock Settings). When this option is enabled, the choice group items cannot be ordered if the stock level quantity of any of the group items is zero (0) or less. |
| BARCODE | Menu barcode. |
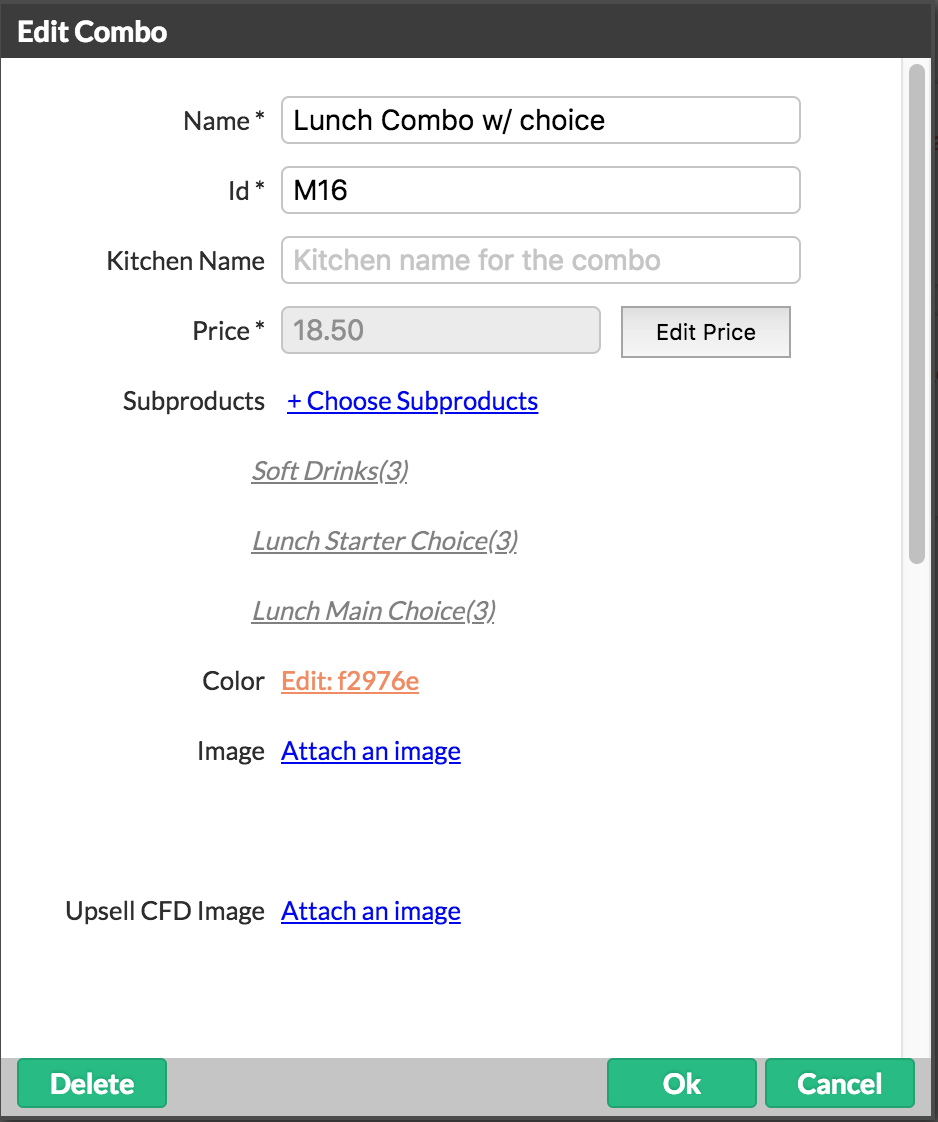
Creating a combo with choices
- In Restaurant Manager, click Products > Product .
- Click the category you want to add the combo within.
- Click Add Combo.
-
Specify the settings and save your changes.
Settings
| NAME |
Name of the combo. |
| ID | ID of the combo. This will be automatically generated when you save. |
| KITCHEN NAME |
Name that appears on tickets that are printed to the bar or kitchen. |
| PRICE | The base price for a combo with choices is automatically set as the total sum of the least expensive options in each choice group. However, when the combo is added to an order, if the customer has chosen a more expensive option, the price will be adjusted accordingly. You can edit prices after you save the menu. See Editing combo prices. |
| SUBPRODUCTS | Select the choices for the combo. |
| COLOR | Color assigned to the combo button on the Order screen. |
| IMAGE |
Combo image. |
| VISIBLE |
Sets whether the combo is available for selection in Restaurant POS. |
Advanced Options
| TAX RATE |
Tax rate for the menu. |
| DELIVERY TAX RATE | Delivery tax rate for the menu. |
| TAKEOUT TAX RATE | Takeout tax rate for the menu. |
| DESCRIPTION | Optional additional menu information. |
| COST | Cost of the products used within the combo. |
| TIMED EVENTS | Can be used to assign a timed event to the combo. |
| ENABLE STOCK MANAGEMENT |
Enable or disable stock management for each choice in the combo. When enabled, the stock of choices within the combo is tracked, and appears on reports and in Restaurant POS. When disabled, the choice's stock level is reset to zero, the stock level is not tracked, and does not appear on reports or in Restaurant POS. You can also disable Stock Management for all products at the same time (see Stock Settings). Disabling stock management resets the choice's stock level to zero (0). If you reset it, you can't restore the previous stock level. |
| STOCK | Stock amount for the combo. |
| BARCODE | Menu barcode. |
