The Ingenico Desk5000 is a countertop payment terminal from Moneris used to process transactions at your point-of-sale (POS) station. The Desk5000 is directly wired to your network through an ethernet connection and integrates with Lightspeed Restaurant. Since the Desk5000 communicates directly with Lightspeed Restaurant POS, there's no need to manually apply payments on the terminal – simply tap the associated payment button on the POS to prompt the terminal for payment. You then pass the terminal to the customer to apply their payment method and desired tip amount. When the customer is finished entering their payment information, they pass the terminal back as directed on screen.
Since the Moneris Desk5000 is a wired terminal, it's best for pay-at-order restaurant environments where a customer pays at the POS station. If your restaurant provides table service, you may be interested in the Moneris Move5000 terminal. The Move5000 is a mobile terminal connected to your network through a WiFi and Liteserver connection. The Move5000 is best suited for pay-at-table or mobile restaurant environments. For more information on the Moneris Move5000, please see our Move5000 setup guide.
This article explains how to set up your Moneris Desk5000 terminal, from hardware to software installation. Follow the steps below to set up your terminal:
- Unboxing
- Connect the hardware
- Adjust terminal settings
- Configure connection settings
- Add the terminal to Lightspeed Restaurant
- Process a payment
Unboxing
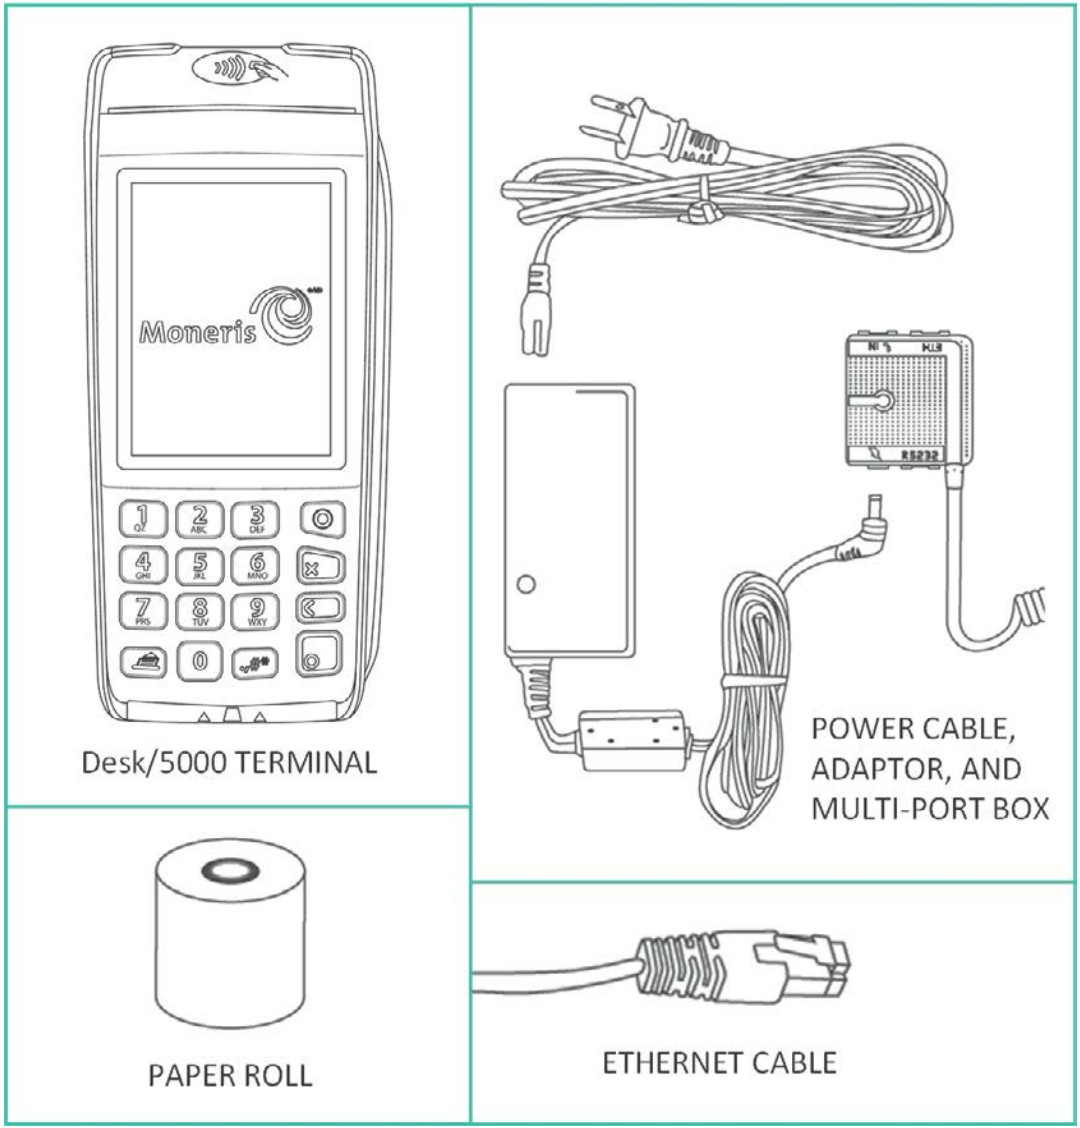
Before we get started, please make sure you have the proper hardware on hand. The following equipment is included in your hardware shipment when ordering through Lightspeed. To order additional paper rolls, please contact Moneris.
- Desk5000 terminal
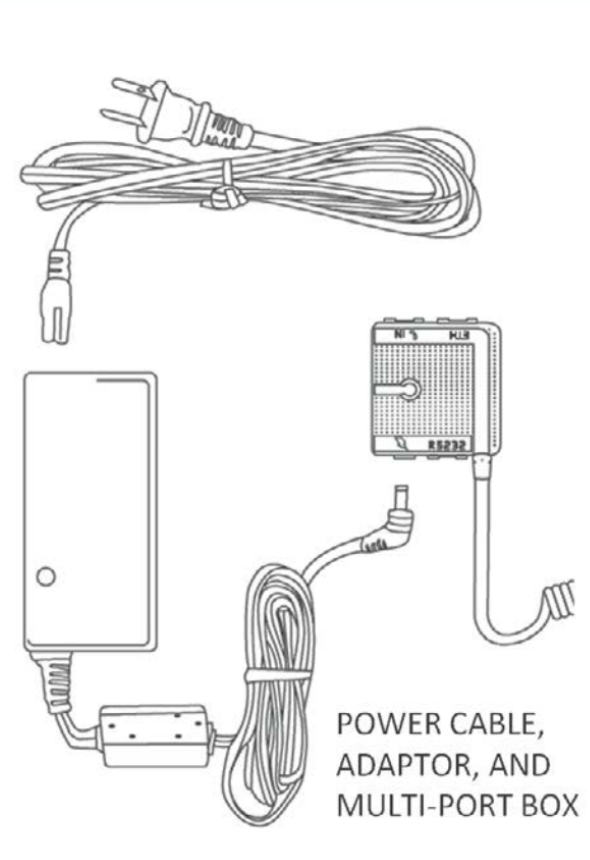
- Power cable, adaptor, and multi-port box (for power and ethernet)
- Paper roll (thermal 2.25"x1.64")
- Ethernet cable
Connect the hardware
First things first! Connect your terminal to power and ethernet. Then, install a paper roll. Once your hardware is connected, you'll set up terminal settings and add the terminal to Restaurant Manager. But for now, let's focus on connecting your hardware:
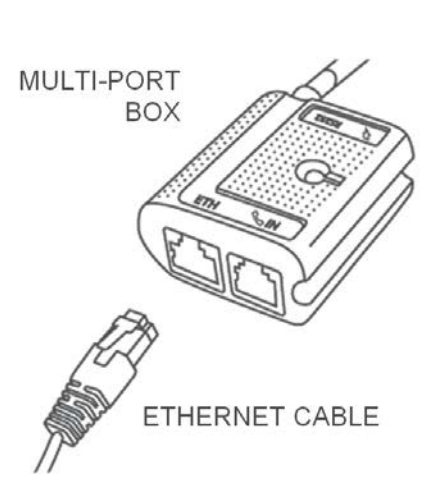
- Plug one end of the ethernet cable into the multi-port box labelled ETH.
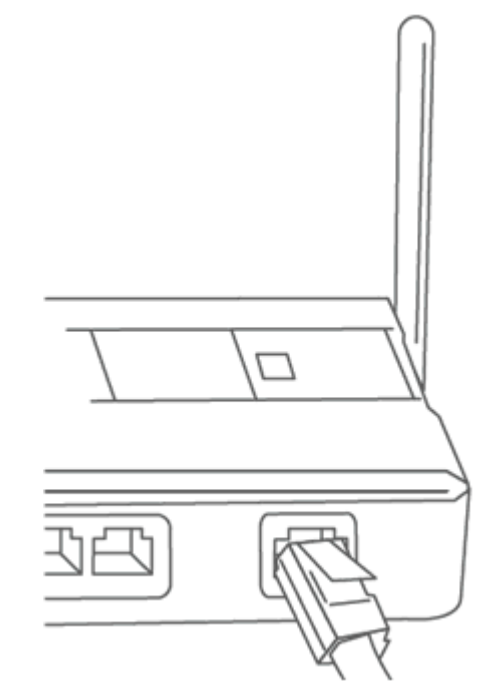
- Plug the other end of the ethernet cable into your router or switch to establish a wired LAN connection.
- Insert the plug connector end of the power cable into the adaptor box.
- Take the adaptor box and insert its power cable's barrel connector into the circular port of the multi-port box.
- Plug the other end of the power cable into a power source. The terminal will power on.
1. 2.
2.  3.
3.
Now that your terminal is connected to power and LAN, let's install a paper roll:
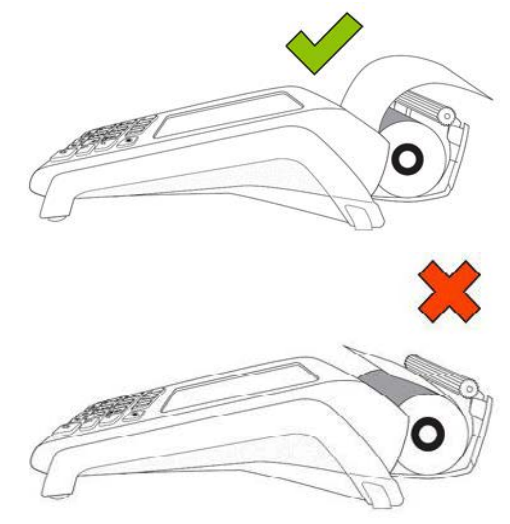
- Lift the printer latch up, and then pull back to open the lid and expose the paper well.
- Insert a paper roll into the well with the paper pulling under and out towards the terminal. While doing so, make sure the paper roll stays taut and doesn't unravel.
- Close the lid, and press down to snap it back into place so that the extended paper is pressed securely against the closed lid and the faceplate. The paper should unroll over the back of the terminal, not over the faceplate.
Adjust terminal settings
Now that your terminal is connected to power and a paper roll has been installed, let's adjust some basic settings on your terminal. When your terminal is powered on for the first time, you will be prompted to sync the terminal with Moneris and create a user ID and password.
Connect the terminal to Moneris
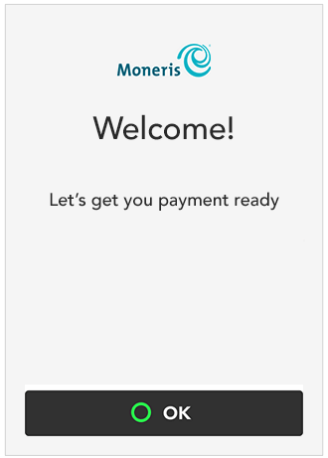
- When the terminal first powers on, you will see a welcome message on the terminal screen. Tap OK.
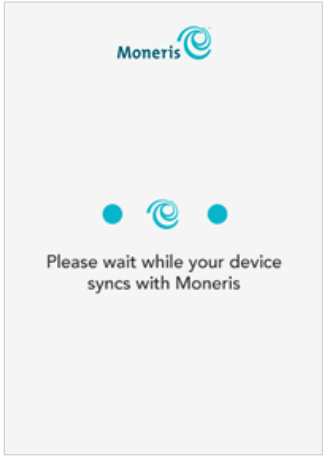
- The terminal will then display a message saying it is connecting to Moneris. The terminal syncs to Moneris via an ethernet connection. If your terminal is not properly connected to the Internet, the terminal will say it is unable to connect. In this instance, please ensure your terminal is properly connected to your router via ethernet and that your router is connected to the Internet.
-
-
- For networking issues, we advise that you reach out to your network administrator. For more information on troubleshooting a Desk5000 connection, we advise accessing the Desk5000 setup guide.
-
-
Create a user ID and passcode
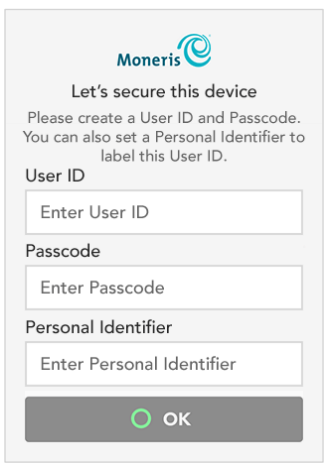
A high security user ID and passcode are required to protect the terminal. The user ID and passcode are used to perform administrative functions and set up user pins. Once you have applied a user ID and passcode, the only way to reset the user ID and passcode are by contacting Moneris. Be sure to store your user ID and passcode information somewhere secure.
- After the terminal has successfully connected to Moneris, a message will appear on screen prompting you to secure the device. Tap the User ID field and enter a user ID consisting of 1 to 4 digits, then tap OK.
- Tap the Passcode field and enter a passcode consisting of 4 to 10 digits, then tap OK. Note that you cannot use three or more consecutive numbers or three or more repeating numbers.
- Select the Personal Identifier field, enter a name and tap OK. Note that this field is optional.
- Tap OK at the bottom of the screen to confirm the above information. The terminal will confirm it is ready to process payments. Please note that there are still a few more setup steps to process integrated payments with Lightspeed Restaurant.
Editing settings
The Quick Setup menu appears after you tap Edit your Settings or you press 1 on the keypad. From the Quick Setup menu, you can select the following options according to your business needs:
- Tip: Use this screen enable tipping. Once tipping is enabled, you can specify which options your customers will see when leaving a tip (eg. percentage amounts).
- Multi-terminal: Use this screen to enable multi-terminal settings.
- Clerks: Use this screen to enable clerk IDs (user pins) for the terminal.
- Receipts: Use this receipt settings screen to specify how a customer receives their receipt (email, text, no receipt, printed receipt), along with some other receipt formatting options.
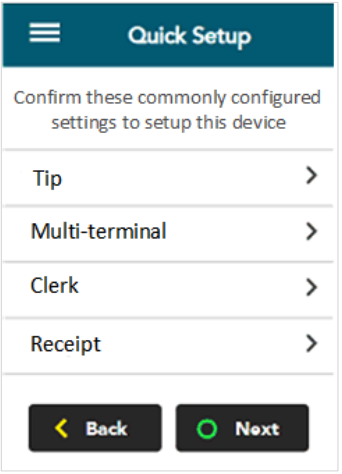
Once you're completed configuring settings, tap OK. For more information on editing terminal settings, access Moneris' Desk5000 setup guide.
Configure connection settings
Almost there! Before adding the terminal to Lightspeed Restaurant, you'll need to set the terminal to Semi-Integrated mode and confirm its IP address.
|
💡 What is Semi-Integrated mode? Semi-Integrated mode is the setting required for the Desk5000 terminal to communicate and integrate with Lightspeed Restaurant. This settings allows Lightspeed Restaurant to send a payment to the terminal, where the terminal then prompts your customers to: (1) enter their payment card information by tapping, inserting or swiping their card and (2) enter a tip. |
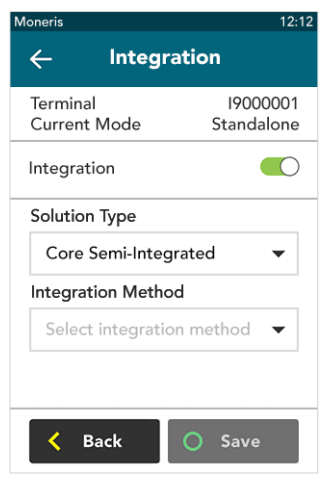
Enable Core Semi-Integrated mode
-
- On the terminal, tap Settings > Application > Integration to get to integration settings.
- Tap the Integration toggle to enable. You'll know it's enabled when the toggle turns green and the Solutions Type field appears.
- In the Solution Type field, select Core Semi-Integrated.
- Beside the Integration Method field, select Ethernet.
- In the Listening Port field, enter 8013.
- Once you've applied the above settings, tap Save. You'll return to the Applications Settings Menu.
- Press the Menu key on the keypad to return to the terminal's Main Menu.
Confirm IP address
Knowing the terminal's IP address is required to connect the terminal to Lightspeed Restaurant.
-
- From the Main Menu, navigate to Reports > Settings Reports > Communication.
- The terminal will display the Communication report on screen.
- The terminal's IP address is listed on screen beside Ethernet Settings.
- Write the IP address down or tap Print for a paper copy.
Add the terminal to Lightspeed Restaurant
Now that your terminal hardware and settings are configured, you can add the terminal to Lightspeed Restaurant. Adding the terminal to Lightspeed Restaurant is important so that the terminal is integrated with the Restaurant POS app. After confirming payment processor and terminal details, you'll create a payment button for the terminal that appears on the POS.
Confirm Moneris as a payment processor
- Log in to Restaurant Manager.
- Navigate to Payments > Payment Processors.
- Select the Moneris button on the Payment Processors screen.
- On the pop-up window, apply your Merchant ID. Your Merchant ID would have been sent to you when signing up for Moneris payments.
Add terminal details
- From Restaurant Manager, navigate to Payments > Payment Terminals.
- Select Add Terminal.
- Confirm your terminal connection details on the pop-up window:
- Beside Name, enter Desk5000 (or your preferred terminal name).
- Beside IP, enter the terminal IP address retrieved from the Desk5000 terminal.
- Beside Port, enter 8013 (as configured on the terminal).
- In the Type field, select Moneris Core-Semi.
Add a payment type button
-
- From Restaurant Manager, navigate to Payments > Payment Types.
- Select Add Payment Type.
-
On the pop-up window, apply settings for the payment type. Keep in mind that this is creating a payment button which appears on the POS. This will be the button POS users select when processing a payment with the Moneris terminal.
- Beside Name, enter a name for the payment button. This will be the payment button name on the POS (eg. Card, Desk5000 or Credit/Debit).
- If you have more than one Moneris terminal at your establishment, we recommend giving the payment button a precise name. If you ever need to process a refund, the refund must be made for the terminal which processed the original payment, which can be identified through payment type.
- Beside Description, enter a description for the terminal (eg. Moneris payment terminal).
- Beside Type, select CSI Payment terminal (for (Core Semi-Integrated) from the drop-down list.
- Beside Color, select a color for how you want this button to appear on the POS.
- Select Auto-finalize if you want payments to be auto-finalized when processed with the Desk5000.
- Select the box beside Visibility if you want this payment button to be visible on the POS.
- Beside Name, enter a name for the payment button. This will be the payment button name on the POS (eg. Card, Desk5000 or Credit/Debit).
What's next?
Congrats! You're now ready to process a payment. See Using the Desk5000 for more information on processing payments.