To send electronic receipts to your customers, there are a few configuration steps to complete on Restaurant Manager. Follow the steps below to enable email receipts from the POS.
Create an email receipt printer template
- From Restaurant Manager, select Printers > Printer Templates.
- Select the button Add Template to open a template popup.
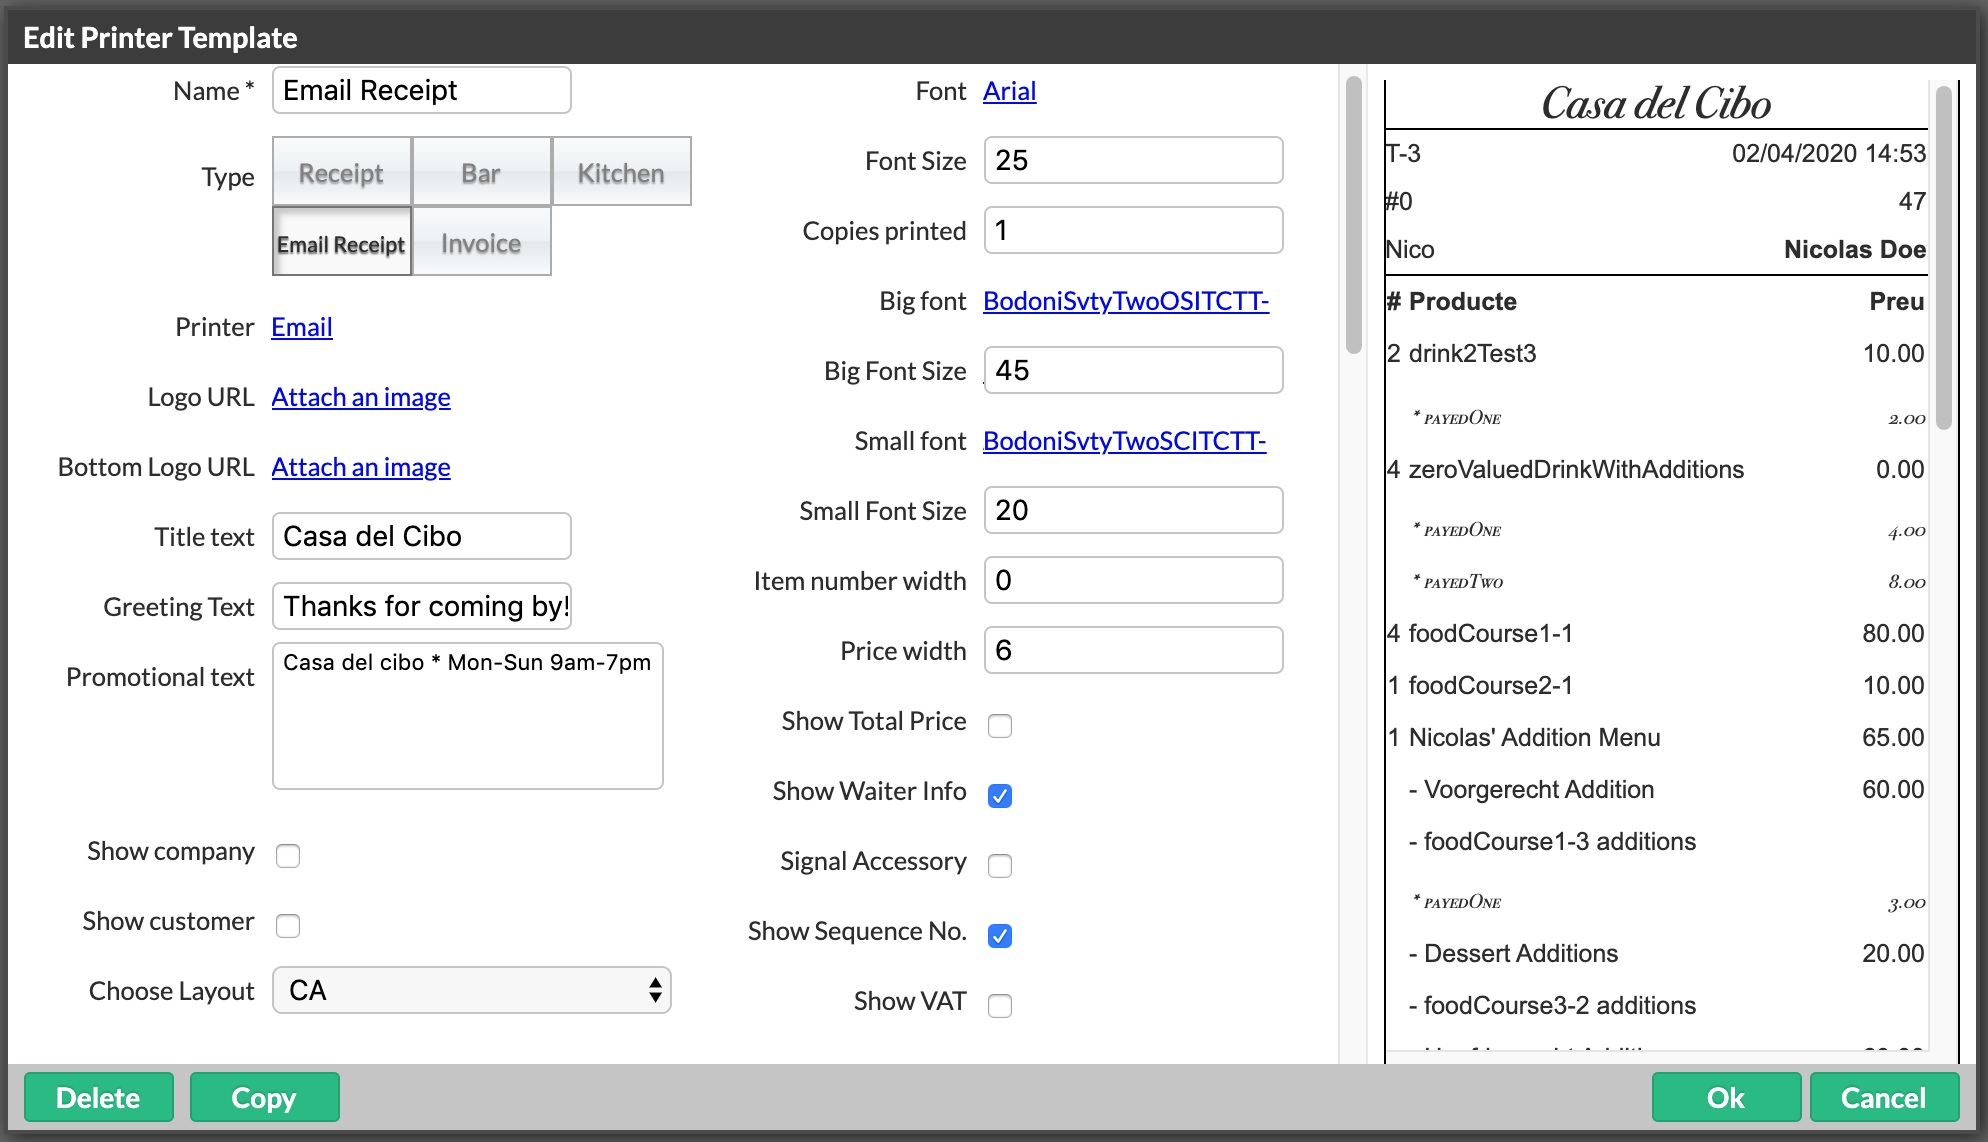
- Enter a name for the email receipt template, such as e-Receipts.
- Specify Email receipt as the printer template type.
- Specify Email as the printer type.
- Specify your locale from the Choose Layout drop-down list setting.
- Configure other settings you wish to include in your Email receipt template. See Creating printer templates for more information on template settings.
- Select Ok once done editing settings to save your email receipt template.
Create an email receipt POS button
After creating an email receipt template, you'll need to create a button on the POS to enable sending an e-receipt. When a user presses this button, they are commanding the POS to email a copy of the receipt to a customer's email address. This POS button is called a Payment Type button because it appears on the Payments screen - however, please note that applying this button on the POS will not submit payment information on the order. For more information on setting up payment type buttons, see Adding a payment type.
- From Restaurant Manager, select Payments > Payment Types.
- Select the button Add payment to open a popup.
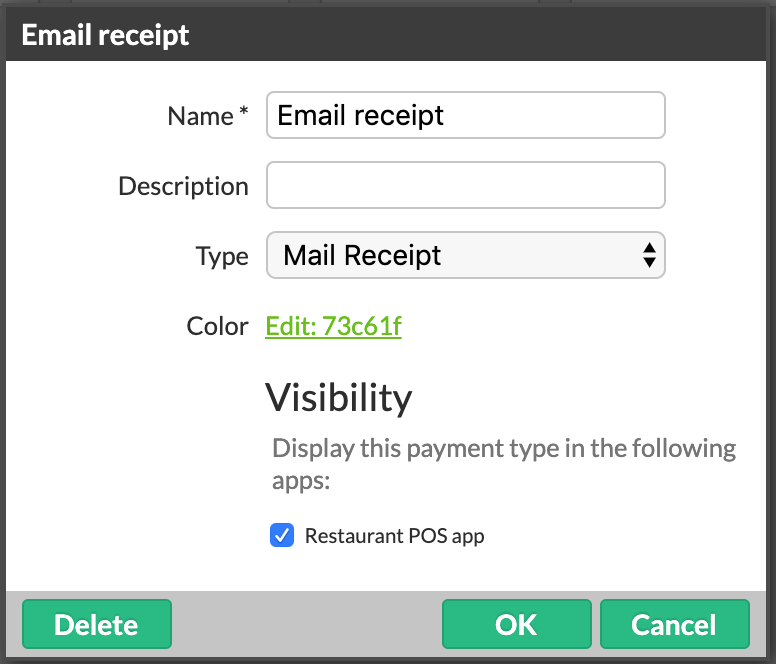
- Give the button a name such as Email Receipt to signify it mails the customer's receipt. This button's name is what appears on the POS.
- From the Type drop down list, select Mail Receipt.
- If you want this to be a visible button on the POS (so users can email customers their receipts), make sure to check the box enabling Visibility.
Disable the Print to images setting on your iOS device
You probably already have this setting disabled, but it's a good idea to verify it's not on. This setting should be set to "off" so receipts are sent to a printer and not auto-saved as images on your iOS device.
- From the iOS device(s) hosting the Lightspeed Restaurant app, go to Settings.
- Scroll down to and tap the Restaurant app icon.
- From the Restaurant page, select Developer under Developer Settings.
- From the Developer Settings page, ensure the setting Print to image is disabled.
What's next?
Now that electronic receipts are configured on Restaurant Manager, you can send electronic copies of receipts to your customers. See Sending electronic receipts for more information.